
The BEST Classic Cinnamon Rolls
Stop searching because you have found the Best Cinnamon Rolls recipe right here with a soft, pillowy dough, gooey cinnamon filling and vanilla cream cheese icing. These are perfect classic homemade cinnamon rolls and I promise it is the only cinnamon roll recipe you'll ever need. I have developed this recipe in partner with my husband who is also a Food Scientist that specializes in bread, so you can be assured that this is a recipe that works and they are so much better than Cinnabon. There are no fancy tricks, just good technique and I break down all the science for you in this article so you can make cinnamon buns from scratch at home any time and enjoy the pleasure of eating them fresh and warm from the oven. If you love cinnamon baked goods, check out my Cinnamon Apple Fritter Cake, Cinnamon Streusel Coffee Cake, Cinnamon Swirl Pumpkin Scones and Chewy Brown Butter Snickerdoodles.

WHY THIS RECIPE WORKS
- Easy to make - this is a very simple recipe with thoughtful proportions. You combine all of the dough ingredients and knead until it becomes very smooth and gluten is well developed. This dough rises only once (single bulk fermentation) and then a short rise in the pan after they are formed.
- Simple ingredients - you just need basic pantry ingredients to make great cinnamon rolls. Flour, yeast, egg, butter, milk, oil and salt are the main ingredients.
- Soft and fluffy texture - you will love how soft and fluffy these rolls are! They are not dense, gummy and pasty like I find some cinnamon rolls can be if the dough is too weak and not strong enough to hold the air.
- Big puffy rolls - this recipe makes 12 nice puffy rolls from a modest amount of dough and that's because it is designed with the right baker's proportions and kneaded thoroughly to have proper structure to hold in lots of air bubbles.
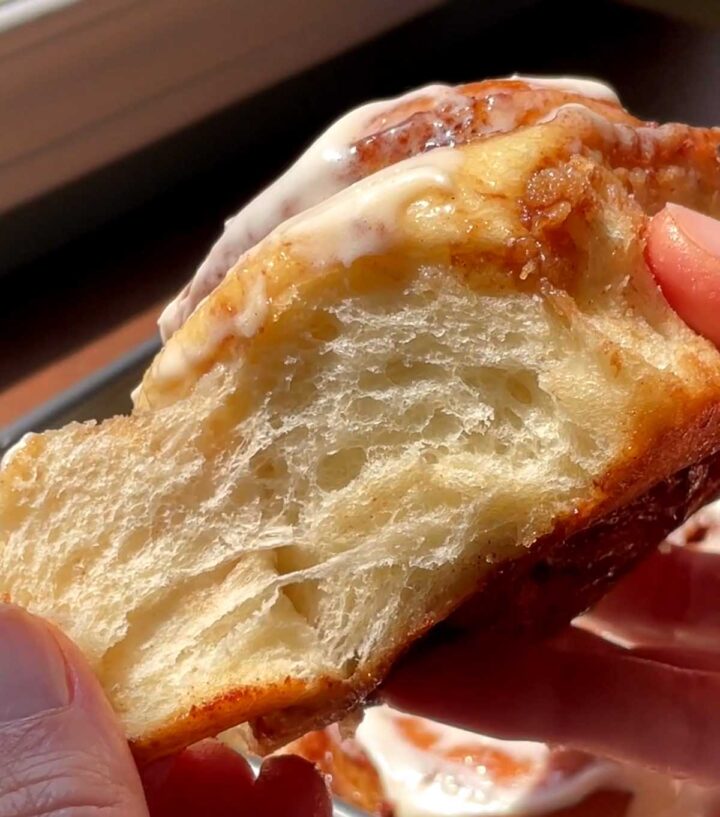
- Feathery dough - you'll see how the soft, fluffy buns just peel away so delicately which is a testament to their softness and structure. In the baking industry, this effect is called "feathering".
- Gooey cinnamon swirl - the cinnamon filling does not ooze out! I make a unique wet paste that you can easily spread onto the dough without tearing. It keeps the dough moist and also bakes into the dough rather than leaking out through the bottom.
- No cream bath - a lot of viral cinnamon roll recipes bathe the dough in cream by pouring cream over the raw rolls in the pan before baking. This is not necessary to make good cinnamon rolls and I think it is a way to cheat so you don't over-bake them, but it can lead to dense gummy rolls.

INGREDIENTS FOR THE BEST CINNAMON ROLLS
- Bread flour - I love to use bread flour for this recipe. Bread flour contains a higher protein content and also higher protein quality which means that has a greater ability to build strength in the dough to hold in air. Bread proteins, glutenin and gliadin, provide elasticity and extensibility to dough so it can expand and then hold in the gas bubbles created by yeast to make a fluffy and tender dough. All-purpose flour also works in this recipe, and the rolls will have slightly less volume. NOTE: all flour brands and types/sources behave differently, so you may need to adjust the liquid additions in the recipe to achieve the desired dough consistency.
- Butter - this sweet dough has a total of about 10% fat between the butter and oil. The flavor of butter is delicious in cinnamon rolls, both in the dough and for the filling, however its harder fat composition is not ideal for optimum softness in a classic cinnamon roll recipe. Much more than 10% fat has a negative effect on typical dough volume as it dilutes the gluten content, compromises the structure and prevents the dough from holding in gas.
- Oil - liquid oil helps lubricate gluten proteins so that they can expand and trap air for fluffier dough. Butter tastes great, however it will lend a firmer texture to the final rolls once cooled, and since there is plenty of butter in the filling, you won't miss the flavor.
- Granulated sugar - This recipe has 11% sugar on a baker's percentage. (A baker's percentage means it is based on the flour being 100% and not the total amount of dough with the water included). This amount suits this recipe because it is high enough to provide the right amount of sweetness and tenderness, but not so high that it will slow the yeast fermentation process. Too much sugar can hinder yeast.
- Eggs - you just need one large egg to add nice structure and spongy texture. These are classic cinnamon rolls and not brioche, so more egg isn't necessary to make these great.
- Pure vanilla extract - vanilla adds delicious flavor to the cream cheese frosting. I like this Madagascar Bourbon Vanilla extract.
- Milk - I recommend using whole milk or 2% milk for this recipe. It is the main source of moisture to hydrate the dough. In combination with egg, this dough has about 62% hydration. Most recipes suggest heating milk to 105 degrees F to help activate the yeast, however the friction of your stand mixer is usually enough to warm up the dough. If you are making these in the winter in a cold climate, then warming the milk may be beneficial.
- Yeast - I use instant yeast which is so convenient because you do not need to proof it. You can add instant yeast directly to the dry ingredients as long as it is not in direct contact with the salt. Direct content with salt will inactivate the yeast. Red Star instant quick-rise yeast is great, and I also like Fleischmann's rapid rise yeast.
- Salt - this recipe has 1.5% salt and it is an important ingredient! Salt is not just for flavor in bread. Salt creates a more stable gluten network to hold more gas and provides greater volume. Typical breads have 2% salt, but I use slightly less for rich sweet breads like cinnamon rolls and brioche.
- Cinnamon filling - my filling is unique because it is a wet paste with a bit of flour and water. Water helps make a smoother paste that is easier to spread so it doesn't tear the soft dough while flour helps hold the filling in place as it bakes so it doesn't leak out through the bottom.


ACTIVE DRY YEAST VS. INSTANT YEAST
Active dry yeast looks like little spheres and is larger than instant yeast which has smaller granules the size of white granulated sugar meant to dissolve easily. It requires rehydration or "blooming" because of the way it is processed, there is more dead yeast on the surface. Hydrating penetrates this layer so the active yeast, which is only about 30%, can thrive. Instant yeast does not require rehydration and you can add it directly to the dry ingredients when making breads. Since it is smaller, there is more surface area so it dissolves readily. Instant yeast is processed in a way that makes it more viable.

WHAT IS THE ROLE OF SALT IN BREAD
Salt provides flavor and strength to bread dough. In low concentrations (typically 2% on flour), salt helps to improve the volume of breads. Salt is composed of sodium and chloride minerals. The negatively charged chloride ions shield the polar charges of the gluten molecules so that there is less electrostatic repulsion and therefore they are more attracted to each other. This helps gluten molecules come together or associate and build a stronger network.

IT DOESN'T MATTER HOW MUCH YEAST YOU ADD
It's true… to a reasonable extent. You can add less or more yeast and it will just take longer or faster for the dough to rise. Adding more yeast will make the dough rise faster if you're in a rush, but it will also have an impact on flavor. Bakers will tell you that using less yeast with a longer fermentation time makes the best bread and that is because yeast have more time to thrive and produce delicious flavor compounds. Fast fermentation typically causes yeast to produce undesirable flavors. Of course if you use so little yeast then it will not be effective as it will take way too long for the dough to ferment.


WHY DOES DOUGH TEMPERATURE MATTER?
The dough temperature controls how yeast behaves in dough. If you're making bread at room temperature around 23 degrees C using a mixer, then you can use cool water/milk around 16 degrees C or 60 degrees F. Surprised? Many recipes on the internet might instruct you to use warm water or heat your water/milk to 44 degrees C or 112 degrees F. That may be necessary to activate dry yeast, however if the liquid is still that warm when you make the dough, then you might end up with a very sticky dough that requires more flour to handle easily. More flour creates a drier dough and drier rolls. The mixer and your hands create enough friction/heat to warm up the dough without having to use hot water.

HOW TO MAKE THE BEST CINNAMON ROLLS
- STEP 1). Make the dough. Combine dry ingredients. Place flour in the bowl of a stand mixer. Add in sugar, yeast and salt in little piles in separate places over the flour in the bowl so that they are not touching. See my video above the recipe card. The point is that you do not want the salt in direct contact with the yeast for a prolonged period of time without mixing or it can inhibit its activity.
- STEP 2). Add wet ingredients. Add in the egg, oil, milk and soft butter.
- STEP 3). Mix the dough. Attach the dough hook and mix on medium-low for 10-15 minutes. Stop after a 2 minutes to scrape down the sides of the bowl and ensure all of the flour is incorporated and the dough is a uniform mixture. It will still be wet and rather loose at this point. Continue mixing for another 2-3 minutes. The dough should start to climb up the dough hook and will still be webbing around the bottom of the bowl. (Note: if the dough seems rather dry and stiff at this point, add water at 10ml increments until you reach a softer consistency as described). Stop the mixer and scrape around the inside of the bowl to release the dough. Continue mixing for another 3 minutes. Stop again, pull the dough off of the hook and scrape around the inside of the bowl to release the dough again. Continue mixing for another 3-5 minutes. At this point the dough should start forming a mass and come away from the bowl as it is mixing. You can check the temperature of the dough now if you have a digital thermometer - it should be between 24-26 degrees C (75-80 degrees F) for optimal activity.
- STEP 4). Knead the dough. Transfer the dough to a lightly floured work surface. Now you will stretch and fold the dough to help develop the gluten structure so the rolls will be soft and fluffy. Using both hands, grab both sides of the dough, pull it outwards (this is the "stretch"), then fold it inwards over itself. Rotate the dough and continue to stretch and fold until the dough feels very smooth. Watch my video for a full tutorial. Shape the dough into a ball by tucking the sides underneath and rolling it around the counter The surface of the dough ball should pull smoothly without tearing.
- STEP 5). Bulk Fermentation (first rise). Place the ball into a bowl and then rub a little bit of oil lightly over the surface with your hands to prevent it from drying out. Cover the bowl with plastic and then cover with a kitchen towel. Set it aside in a warm dark place and let it rise for 1-2 hours until nearly tripled in size. Note that the amount of time required will depend on the temperature of your kitchen. After it has risen, place it in the fridge for 15 minutes to let it firm up slightly so it is easier to roll. Note, if you are making these in a very cool climate, then this step isn't necessary.


- STEP 6). Make the filling. Combine brown sugar, cinnamon and flour in a small bowl and mix well so it is evenly blended. Add melted butter and water and stir until it forms a smooth sludge like wet sand.
- STEP 7). Roll out the dough. Lightly flour a work surface to cover a large area. Carefully invert the bowl and tip the dough out onto the surface. Let the dough gently release from the bowl and plop onto the counter. Do not knead it any more at this point. Gently pull on the dough and stretch it out into a rectangle shape, then use a rolling pin to roll it out to a 17x14 inch rectangle. Gently apply the filling, spreading it out evenly right to the edges using a large offset spatula. Now you can either roll it up into a log and slice the log into 12 portions, or slice the rolled dough into 12 long strips and then roll up each individual strip into a scroll.
- STEP 8). Second rise. Place each roll spiral-side-up into the prepared pan so they fit nicely next to each other. Cover the pan loosely with plastic and proof for 30 minutes to 1 hour. Note: this highly depends on the temperature of your dough and temperature of your room. The rolls are ready for baking when you press the side of one scroll gently with your finger tip and it slowly springs back.
- STEP 9). Bake for 20-25 minutes until evenly golden and the center roll is cooked through. The internal temperature should be between 90 and 94 degrees C (194-201 degrees F). Transfer pan to a wire rack and let rolls cool for at least 20 minutes.
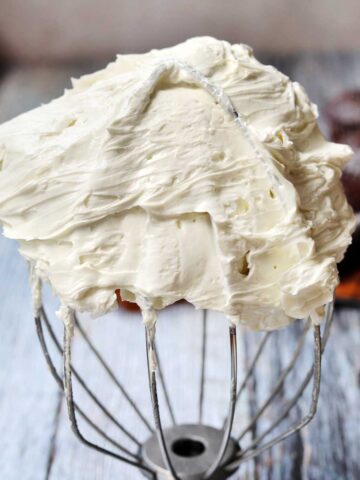
- STEP 10). Make the icing. Combine cream cheese, soft butter, powdered sugar and vanilla in a medium bowl and mix well with a wooden spoon, whisk, spatula or electric hand mixer until very smooth. Spread a big dollop of icing over each roll and dig in!
STEP BY STEP INSTRUCTIONS (watch the recipe video at the bottom of the page for a full tutorial)

Combine all cinnamon roll dough ingredients in a stand mixer bowl.

Mix with dough hook until ingredients are blended and dough forms.

Scrape around the bottom of the bowl to pull the dough away from the sides.

Continue mixing until dough is smooth, pulls away from the sides and stops "webbing" around the bottom of the bowl.

Knead the dough by hand. Stretch it out by pulling the sides outwards.

Knead the dough by hand. Fold the stretched dough back onto itself.

Roll the dough into a smooth ball.

Place the dough into a bowl to rise in a warm place. Lightly oil the surface and cover it.

Invert the risen dough onto a lightly floured work surface

Invert the risen dough onto a lightly floured work surface

Roll the dough out into a rectangle.

Spread on the cinnamon filling.

Slice the dough into strips.

Roll up the strips into spirals.

Arrange cinnamon scrolls in greased baking pan.

Spread cream cheese icing over baked cinnamon rolls.
EXPERT BAKING TIPS FOR THE BEST CINNAMON ROLLS
- Use fresh oil. Oil that is old can become rancid so be sure to use fresh oil that has a clean taste. Store oil in a cool, dark place away from the stove.
- Oil vs. butter: although butter tastes great, oil is a great ingredient for breads because it helps keep the crumb soft and it helps lubricate the gluten so that the dough has more volume during baking. This makes fluffier rolls.
- Have a well hydrated dough. This dough has 62% hydration which is a well hydrated dough for an enriched sweet dough such as cinnamon rolls. You may be tempted to add more flour as you may feel it is a bit tacky, but this is correct. Conversely, different flours can absorb different amounts of water, so depending on the quality of your flour, you may need to increase hydration. A well developed hydrated dough will feel tacky, not sticky and it is the best way to ensure you have moist cinnamon rolls.
- Don't over-heat the dough. Yeast thrives at 24-26 degrees C (75-79 degrees F). The friction of the mixer often heats the dough alone, so I often even use cool to room temperature water and don't even need warm water to make cinnamon roll dough in my stand mixer. If the temperature is too high, the dough will be sticky and it will proof too fast. A controlled temperature creates controlled fermentation for optimum flavor.
- Knead thoroughly. The dough should be smooth like a baby's bottom and will not tare when it is ready. A dough that is well developed will hold in the gas bubbles produced by yeast to yield fluffy rolls. This usually takes at least 10 minutes in a stand mixer on medium-low speed.
- Make sure you use all of the cinnamon sugar filling. It's the perfect amount. Too much will just ooze out of the dough and be lost to the pan, while not enough will not give you the right flavor.
- Cut the dough into even strips. Try to make them even the best you can and use a ruler to guide you as you slice them. If the strips are of varying sizes, then the scrolls will have various heights in the pan and the taller ones (the larger rolls) will overtake the smaller ones as they bake. This can mean that some rolls will take longer to bake, so you'll have to sacrifice the smaller ones that will be a bit over-baked. They will also not look as uniform, but that won't affect the taste.
- Tuck the scrolls into the pan so that they are side by side and not overlapping. If you find that your rolls are a little wide in your pan, try to tuck them in so they are shoulder to shoulder. If any of the rolls are overlapping, then they may coil up during baking.
- Do not over-bake. Over baking will dry out any type of bread so watch the baking time after the 20 minute mark.
- Do not under-bake. Raw bread is not good. As important as it is to avoid over-baking, it is equally important to avoid under-baking as this will cause your rolls to collapse and sink in the middle. The dough will also be dense and pasty if it is under-cooked.
- Cover the top of the rolls with foil if it browns too quickly. You can place a sheet of foil loosely over the rolls (like a tent) after the first 20 minutes of baking if they are getting too dark on top. This all depends on your oven since some ovens can be quite top heavy.

RECIPE FAQ
Any neutral tasting oil will work. I prefer sunflower oil for it's clean flavor profile.
You can use all butter in the dough in place of the oil, but note that the rolls will have slightly less volume. A bit of oil really makes a difference here and it is commonly used in the bakery industry to achieve better dough volume for fluffier bread.
Cinnamon rolls store well at room temperature for up to 3 days as long as they do not have icing. If you apply the cream cheese icing, then keep them refrigerated in an airtight container for up to 3 days and let them come to room temperature before eating. Or, better yet, warm them up just slightly.
No, I do not recommend pouring cream over the unbaked cinnamon rolls. In fact, I think it is a waste of money. This has become trendy, but it is an unnecessary step that can make the rolls mushy and also slow their baking rate.
I always prefer metal pans for baking as they conduct heat faster and cook food more evenly. If you use a glass baking dish or a ceramic dish, then the rolls will need 5-10 minutes longer.
It is possible to leave the dough to "bulk" ferment slowly over night in the fridge. In this case, place the dough in a large bowl and cover it tightly with plastic. The next day, roll and shape it as directed.
Yes, you can perform an "overnight" process. Make the dough, roll it out, fill it and shape it as directed below in Steps 1-7 below in the late afternoon or evening. Place the rolls into the pan, cover tightly with plastic so they don't dry out and refrigerate. The next morning, bring them out and let them come to room temperature. If they have not fully risen, let them proof as required before baking as directed in the recipe card below. *Additional tip: if you live in a warm climate, work quickly to get the shaped rolls into the fridge because if they proof a lot during forming, they could end up over-proofing in the fridge overnight. In contrast, if the rolled dough pieces are really cold going into a cold fridge, they might not rise much overnight and will require further proofing time in the morning.
Yes you can, but you will need to proof or "bloom" the yeast before adding to the dough. You can do this by adding the active yeast to a portion of the milk that is warmed with a pinch of sugar. When it is frothy, then add it to the remaining ingredients in the bowl just before mixing.
The final proof when the dough is in the pan and already rolled up is important. To know that they are proofed sufficiently, press on the dough gently with your fingertip. If it leave and indent that fills back out slowly, then they are ready. If the indent springs back right away then they are not ready and still need more time. If the indent holds and doesn't spring back, then the dough is over-proofed.
TROUBLESHOOTING CINNAMON ROLLS
If your rolls collapsed when you took them out then it is likely that the dough was over-proofed or under-baked.
Most likely the rolls would be dry if they are over-baked, not enough moisture in the dough (low hydration) or you have used too much flour for rolling and shaping.
If your dough is not rising, you may have used active yeast instead of instant active yeast, the yeast was too old, or the dough and/or surrounding environment is too cold. Yeast that is too old will lose the ability to leaven the dough and can even cause the dough to become more sticky. Its activity is highly dependent on temperature, so it is important to have a final dough temperature between 24-26 degrees (75-79 degrees F). If the dough is too cold, or kept in a very cool place, the yeast will ferment very slowly and proof times may be very long.
If your cinnamon rolls popped up in the middle, it is likely that the dough was under-proofed or that the rolls were too wide and there was not enough space between the rolls to grow as they bake. Dough that is under-proofed will be very tot and strong with a lot of tension so it will expand more rapidly. You'll know that dough is proofed enough when you press your finger into it gently and it springs back slowly. If it springs back right away, it is not relaxed enough. Also, if the strips are too long and the rolls are too wide, then they will not have enough room to expand in the pan, and they will rise up instead of out.
To fix this, you can push them down with a wooden spoon or spatula while they are in the oven once they turn golden after about 15 minutes. Just reach into the oven and push them down on the tops. As long as they are browning on top, they shouldn't smoosh the dough because they are already set on top.
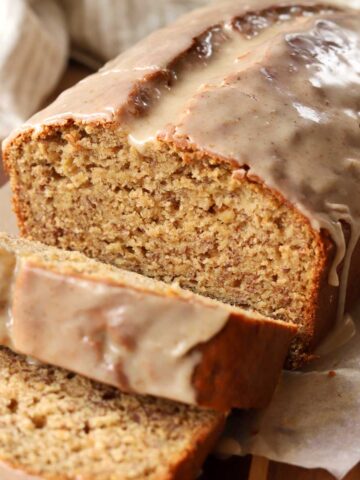
If you love making loaf cakes, check out these recipes!
Walnut Chocolate Chip Zucchini Bread Brown Butter Chocolate Chip Pumpkin Bread Best Chocolate Chip Banana Bread Copycat Starbucks Lemon Loaf Apple Cinnamon Bread with Maple Crumble Double Chocolate Loaf Cake DOUBLE CHOCOLATE ZUCCHINI BREAD CLASSIC BANANA BREAD RECIPE MAPLE PECAN BANANA BREAD WITH DARK CHOCOLATE DOUBLE CHOCOLATE BANANA BREADLoaf recipes...
Here are some of my favorite loaf/bread recipes:
Video
The BEST Cinnamon Rolls

Ingredients
NOTE: To make ahead, you can prepare the dough the night before you plan to bake them. See the FAQ section in the article above for instructions.
Cinnamon Roll Dough:
- 4 cups (568g) unbleached bread flour, plus more as needed for rolling and shaping
- ⅓ cup (65g) granulated sugar
- 3 teaspoon (11g) instant quick-rise dry yeast
- 1 ¼ teaspoon (10g) fine table salt*
- 1 large egg, at room temperature
- 2 tablespoon (24g) liquid oil such as vegetable, canola, sunflower or olive oil
- 1 ¼ cups (300ml) milk (whole milk or 2% preferred)
- 2 tablespoon (28g) salted butter, softened
Cinnamon Filling:
- 1 cup (200g) packed dark brown sugar
- 4 teaspoon (10g) ground cinnamon
- 1 tablespoon (8g) all-purpose flour
- 4 tablespoons (57g) salted butter, melted
- 1 tablespoon (15ml) water
Cream Cheese Icing:
- 3 oz (85g) cream cheese, softened
- 2 tablespoon (28g) salted butter, softened
- ¾ cup (90g) powdered sugar
- ½ teaspoon pure vanilla extract
*you can also use Kosher salt, but then be sure to measure 10g by weight as it is lighter (has a lower density) than table salt. You will need around 2 teaspoons of Kosher salt.
Instructions
- Make the dough. Place flour in the bowl of a stand mixer. Add in sugar, yeast and salt in little piles in separate places over the flour in the bowl so that they are not touching. See my video above the recipe card. The point is that you do not want the salt in direct contact with the yeast for a prolonged period of time without mixing or it can inhibit its activity.
- Add in the egg, oil, milk and soft butter. Attach the dough hook and mix on medium-low for 10-15 minutes. Stop after a 2 minutes to scrape down the sides of the bowl and ensure all of the flour is incorporated and the dough is a uniform mixture. It will still be wet and rather loose at this point. Continue mixing for another 2-3 minutes. The dough should start to climb up the dough hook and will still be webbing around the bottom of the bowl. (Note: if the dough seems rather dry and stiff at this point, add water at 10ml increments until you reach a softer consistency as described). Stop the mixer and scrape around the inside of the bowl to release the dough. Continue mixing for another 3 minutes. Stop again, pull the dough off of the hook and scrape around the inside of the bowl to release the dough again. Continue mixing for another 3-5 minutes. At this point the dough should start forming a mass and come away from the bowl as it is mixing. You can check the temperature of the dough now if you have a digital thermometer - it should be between 24-26 degrees (75-79 degrees F) for optimal activity.
- Transfer the dough to a lightly floured work surface. Now you will stretch and fold the dough to help develop the gluten structure so the rolls will be soft and fluffy. Using both hands, grab both sides of the dough, pull it outwards (this is the "stretch"), then fold it inwards over itself. Rotate the dough and continue to stretch and fold until the dough feels very smooth. Watch my video for a full tutorial. Shape the dough into a ball by tucking the sides underneath and rolling it around the counter The surface of the dough ball should pull smoothly without tearing.
- Place the ball into a bowl and then rub a little bit of oil lightly over the surface with your hands to prevent it from drying out. Cover the bowl with plastic and then cover with a kitchen towel. Set it aside in a warm dark place and let it rise for 1-2 hours until nearly tripled in size. Note that the amount of time required will depend on the temperature of your kitchen. After it has risen, place it in the fridge for 15 minutes to let it firm up slightly so it is easier to roll. Note, if you are making these in a very cool climate, then this step isn't necessary.
- While the dough is rising, prepare the pan and make the filling. Lightly grease a 13x9-inch metal baking pan with cooking spray or soft butter.
- Make the filling. Combine brown sugar, cinnamon and flour in a small bowl and mix well so it is evenly blended. Add melted butter and water and stir until it forms a smooth sludge like wet sand.
- Lightly flour a work surface to cover a large area. Carefully invert the bowl and tip the dough out onto the surface. Let the dough gently release from the bowl and plop onto the counter. Do not knead it any more at this point. Gently pull on the dough and stretch it out into a rectangle shape, then use a rolling pin to roll it out to a 17x14 inch rectangle. Gently apply the filling, spreading it out evenly right to the edges using a large offset spatula.
- Now you can either roll it up into a log and slice the log into 12 portions, or slice the rolled dough into 12 long strips (just over 1 ¼ inches thick) and then roll up each individual strip into a scroll. I like to roll up the strips (watch my video above for reference) since this is a soft dough and it tends to get squished when slicing with a knife. To do this, slice the dough into 12 even strips along the width so that you are slicing it into 14-inch long strips that are about 1 ¼ inches wide. Then, roll up each strip into a spiral from one long end to another. They will fill out and be full and beautiful!
- Place each roll spiral-side-up into the prepared pan so they fit nicely next to each other. Cover the pan loosely with plastic and proof for 30 minutes to 1 hour. Note: this proof time highly depends on the temperature of your dough and temperature of your room. The rolls are ready for baking when you press on the side gently with your finger tip and it slowly springs back, leaving just the slightest imprint. If your fingerprint remains and leaves a deep imprint, then the dough is over-proofed.
- While the rolls are rising, preheat the oven to 350°F.
- Bake for 20-25 minutes until evenly golden and the center roll is cooked through. The internal temperature should be between 92 and 94°C (198-201 degrees F).
- Transfer pan to a wire rack and let rolls cool for at least 20 minutes.
- Meanwhile make the icing. Combine cream cheese, soft butter, powdered sugar and vanilla in a medium bowl and mix well with a wooden spoon, whisk, spatula or electric hand mixer until very smooth. Spoon a dollop of icing over each roll, spread it out to cover them in a thin layer and dig in!

This recipe is perfect 👌 I did the second proof in the fridge overnight and the cinnamon sugar mixture did liquify a little bit it didn’t negatively impact the final product. It has given me such trust in your recipes that now I want to try everything on your website!
Thank you for the feedback Nicolette! I'm so glad you enjoyed the recipe. Happy baking 🙂
We loved these cinnamon rolls. I made them Saturday for Sunday morning family breakfast. Our family of four all loves them. We zapped them in the microwave for 30 seconds for that just out of the oven soft and warm goodness. The instructions were very easy to follow and worked great.
Thank you Erin! I'm so glad you and your family enjoyed the cinnamon rolls 🙂
Wow! Amazing! I made cinnamon rolls that were Delicious. Thanks as always for sharing your talent. Any chance you’d consider a dinner roll recipe?
You are welcome Judy! Thank you for taking the time to share your feedback! Yes, more bread recipes will come soon.
Any way to reduce the amount of sugar, in which part and by how much? Thanks!
Hi Ivan, you can reduce the sugar but it will affect texture and obviously the flavour. If you reduce in the dough, it won't be as soft and moist. If you reduce in the filling, it won't be as gooey or flavorful. You can just omit frosting if you want to reduce your overall sugar consumption.
Lovely recipe! I live in a tropical country and this is suitable for my climate! This is a 100% must try!
Thank you Azura! Glad you enjoyed the recipe. I wish I had some of your weather right now 🙂
Ive made many cinnamon rolls recipes and this one is by far the best! The oil and a bit more yeast made the dough fluffy and a dream to shape and work with. i do add 2 tablespoons of cocoa powder to the cinnamon mixture which to me cuts a bit the sweetness. I will dedicate keep making it. ❤️
Thank you Christie! I'm glad you like the recipe. Nice idea adding the cocoa powder 🙂
Wow! Amazing recipe! The fluffiest buns and not crazy sweet! I added diced apple too😉Thanks for a keeper!
You are welcome Chris! Thanks for the feedback! Sound delicious with added diced apple 🙂
The absolute best. I’ve baked many different recipes and this one surpasses all of them. There’s no comparison. Fluffy and flavourful. They store well and taste fresh out of the oven when microwaved days later. I’m sharing this with all my buddy bakers. Thanks for the recipe!
You are welcome Anna Maria! Thank you for the feedback. I'm so glad you enjoyed the recipe 🙂
My husband is on an ultra low sodium diet. How much could I reduce the salt in this recipe without affecting the final result too much? Thank you!
Hi Darra, you can probably reduce the salt by a 1/4 tsp. However, you may loose a little bit of volume and find that it will proof faster. The gluten network will not be as strong with less salt so be careful not to overproof them or knock the pan once proofed.
Thank you so much!
This recipe was easy to follow and the rolls are so soft and moist. I'm so happy to have a trusted recipe to hold on to.
Thank you Jess! Glad you enjoyed the recipe 🙂
Do you have any instructions to make them the night before and then bake them in the morning?
Hi Kristi! Yes, please see Recipe FAQ section for information on an overnight process.
These were fantastic! I did an overnight bulk ferment, and then rolled/filled in the morning. Quick question- if I wanted to switch up the filling (I’m thinking orange/cardamom) would white sugar work? Or would it need some liquid sugar to replace the lost molasses?
Thank you Shane! Yes you can use white sugar with that combination. Sounds delicious!
Can you leave the dough in the fridge overnight after the first rise? I'd like to bake these in the AM for a breakfast and don't want to be waking at an insane hour to make dough 😀
Hi Jennifer! Yes, make the dough and shape in the late afternoon or evening, cover (so they don't dry out) and place in the refrigerator overnight. In the morning let them come to room temp. If needed, proof a little longer before baking.
My new favorite cinnamon roll recipe! I tried this recipe because my usual cinnamon roll recipe (the dough specifically) always left me wanting something more. This dough is awesome and I’ll be using this recipe moving forward! Very proud to say I achieved the feathery texture in the dough! I do like an ooey gooey roll so I doubled the butter in the filling, but I did have a lot of filling leakage so I feel inclined to try the recipe exactly as is just to see how it turns out. I also appreciate that you didn’t make us make 6 cups of frosting for no reason at all - why do so many people want you make so much frosting? Thanks again - love the science breakdown!
You are welcome Mariah! Thanks for the feedback on the recipe. Glad you enjoyed them 🙂
Do you think this recipe would work ok to sub a gluten free flour blend 1:1? And then would I knead less?
Hi Kim! I have not tested it, but your best bet would be to use a gluten free flour that is specifically designed for use in bread recipes.
I was inspired to make cinnamon rolls after seeing your post and how easy it looked and I'm so glad I finally did! They are so easy to make and they turned out soft, fluffy and golden. My family is already asking when I'm going to make them again.
Thank you Mary! I'm so glad you and your family enjoyed the cinnamon rolls!
Best cinnamon roll I've ever made, thank you for the recipe!
Also i skipped the hand mixer and kneaded by hand for like 12 minutes and it came out perfect
Nice!
Good to know as I do not have a stand mixer!
You are welcome Jo! Thank you for the feedback!
Excellent, fluffy and easy to make cinnamon rolls. They don’t need much butter and oil, and STILL, they are super moist. 5⭐️
PS: I didn’t have bread flour ( I uaes AP) and they still turned out wonderfully!
Thank you for the feedback Lucia! Glad you enjoyed the recipe 🙂
Can we omit the egg?
Thx
Hi Orliande, you can but it will affect the texture and volume. You will also need to add back about 50g of water.
Have you experimented without using a stand mixer? i.e. by hand or a food processor/thermomix? Do you have tips if we don't have access to a stand mixer?
Also for active yeast, is there an order you'd recommend when combining with the sugar and salt, since you mentioned salt can inhibit the yeast's activity.
Hi N! You can knead by hand, it will just take about twice as long (depending on technique and speed - 15-20min). I would not use a food processor. For active yeast (not to be confused with instant active yeast), you should bloom it in a portion of the milk that is warmed with a pinch of sugar. When it is frothy, then add it to the remaining ingredients in the bowl before mixing. When you add the salt is not important, just don't pour the salt directly on top of the yeast and let it sit for a while without mixing.
Great recipe! Thank you Christina for always making it so easy to follow along!!
You are welcome Miss Paris! Thanks for the feedback 🙂
Excited to try this. I have a lot of active dry yeast. Any recs to swap?
Hi Tina! Yes, you can use active dry yeast. You will need to bloom the yeast in a portion of the milk that is warmed with a pinch of sugar before using in the dough. Proof times will likely be a little bit longer as well.