
Perfect Homemade Sandwich Bread
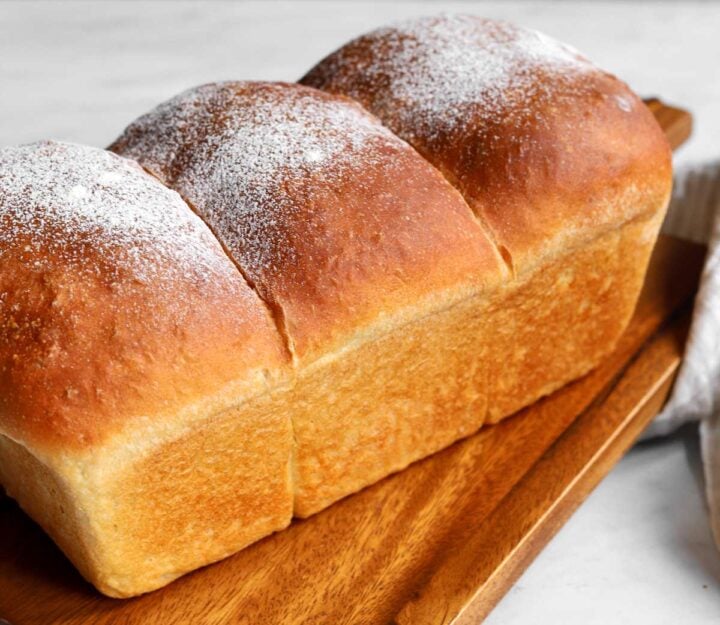
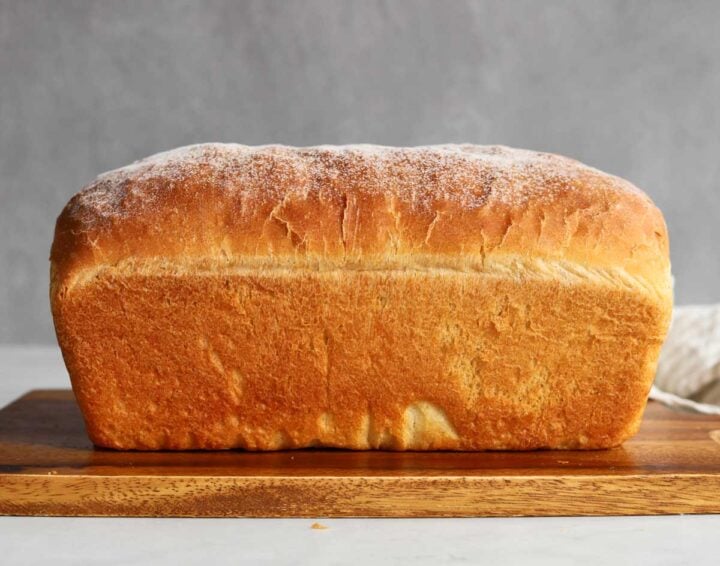
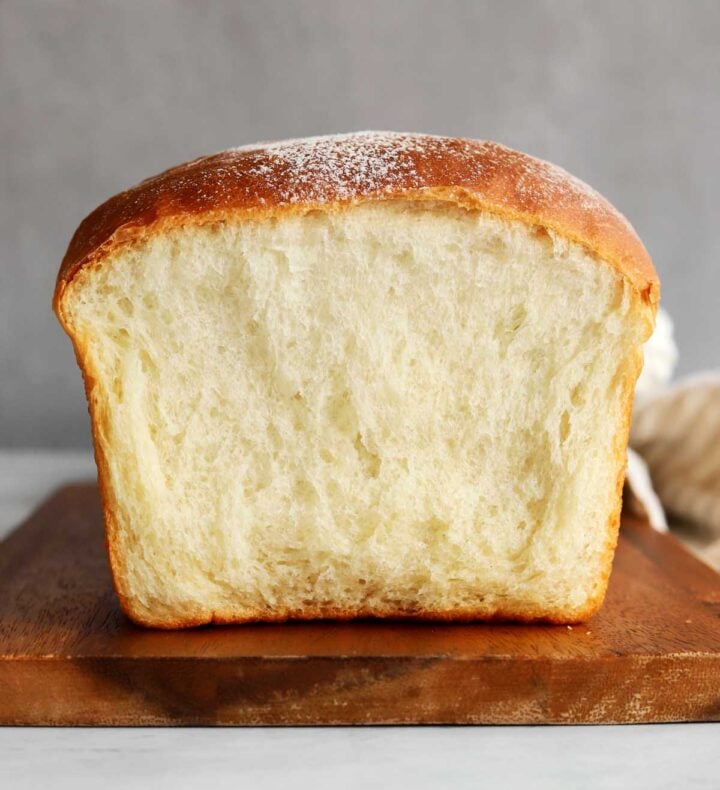
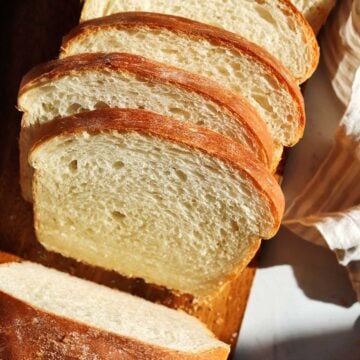
Learn how to make delicious fresh bread at home without preservatives using this Homemade Sandwich Bread recipe. This classic homestyle loaf recipe is so soft and fluffy while still being sturdy and passes the spread test. It's perfect for breakfast, lunch, tea sandwiches and dipping into soups. Enjoy it for morning toast or a late night grilled cheese snack and pack it up for school lunches. I love making my own bread as I know exactly what's in it, plus it is easy to master with my step-by-step instructions and full video tutorial. You don't need any special ingredients; you just need good technique. I break down all of the science for you in this article so you can make sandwich bread from scratch at home any time and enjoy the pleasure of eating it fresh and warm from the oven. If you love making bread at home, try my Best Cinnamon Rolls recipe and my Homemade Pizza Dough.
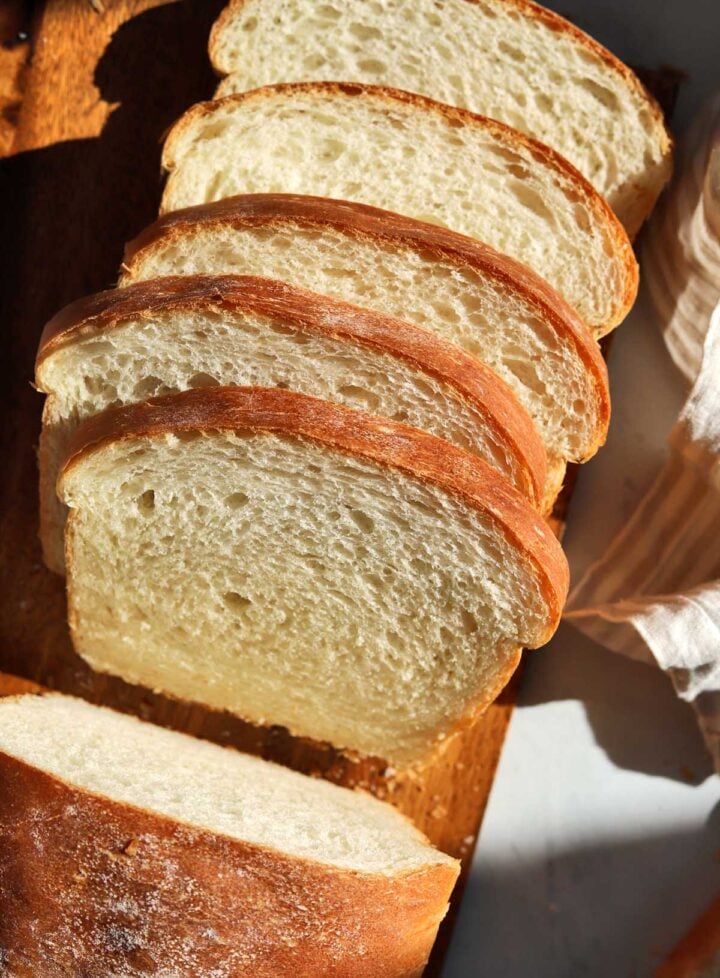
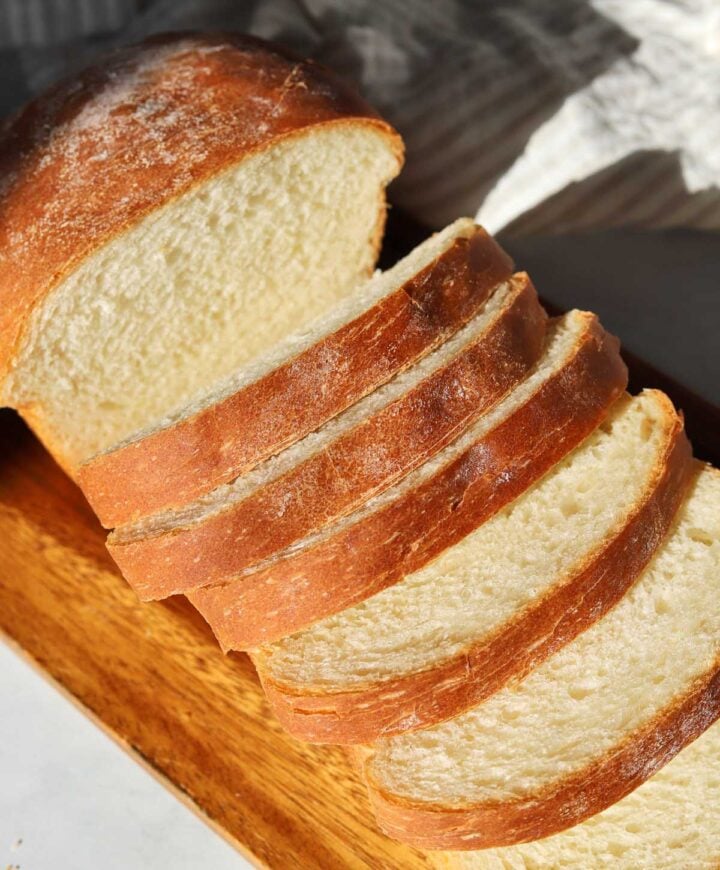
WHY THIS RECIPE WORKS
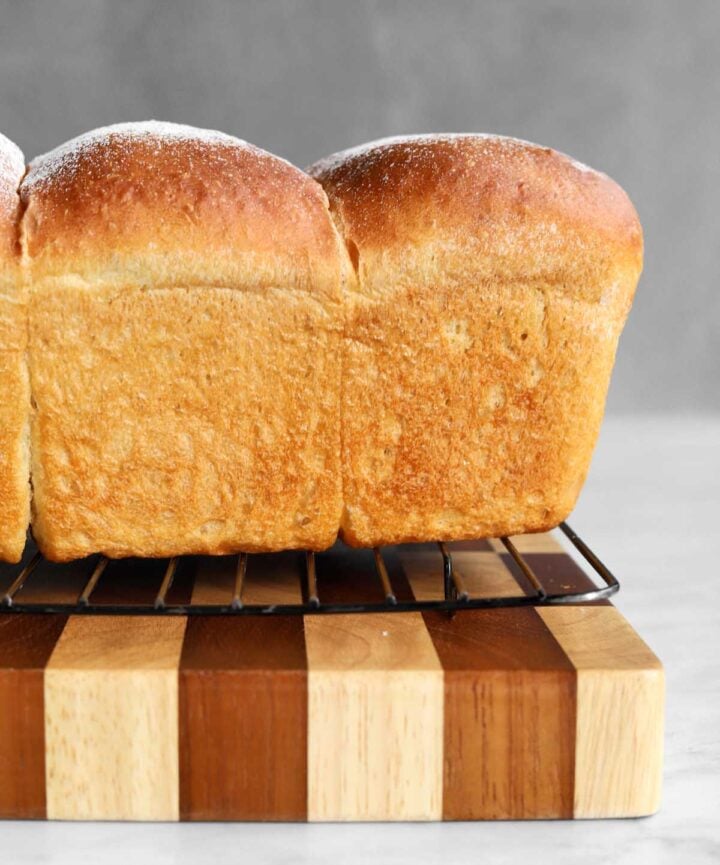
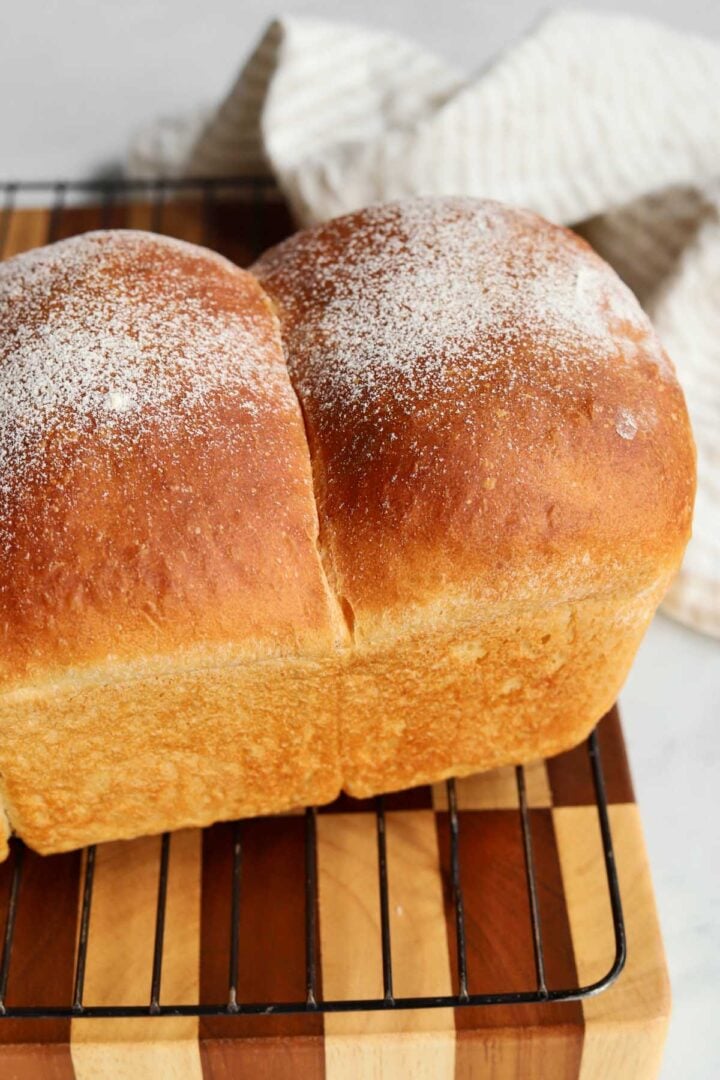
- Easy to make - this is a very simple recipe with thoughtful proportions. You combine all of the dough ingredients and knead until it becomes very smooth and gluten is well developed. This dough requires a single bulk fermentation and then you can shape them as a standard one-piece log or even easier, as a three balls joined together or three-piece loaf.
- Simple ingredients - you just need basic pantry ingredients to make great sandwich loaves. Flour, sugar, yeast, oil and salt are the main ingredients. There are no preservatives or artificial ingredients found in many store-bought breads.
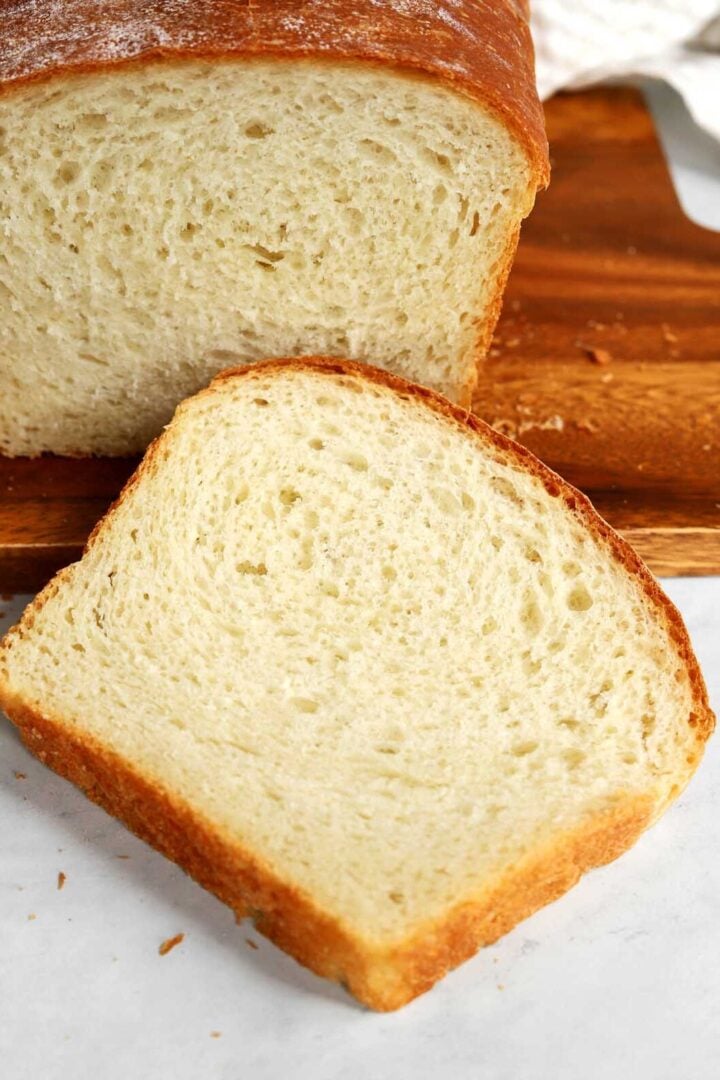
- Soft and fluffy texture - you will love how soft these loaves are! They have an even crumb that is both cohesive and resilient thanks to a well developed gluten network, meaning they hold up well to your favorite spreads, like peanut butter and jam.
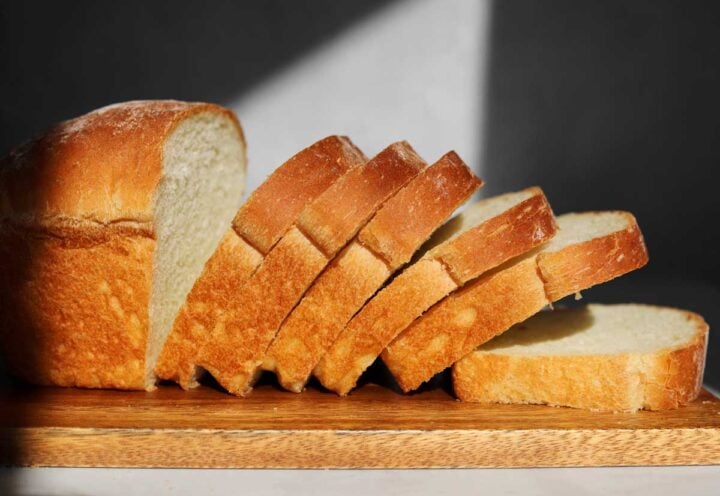
- Big loaves - this recipe makes 2 large sandwich loaves it is designed with the right baker's proportions and kneaded thoroughly to have proper structure to hold in lots of gas bubbles.
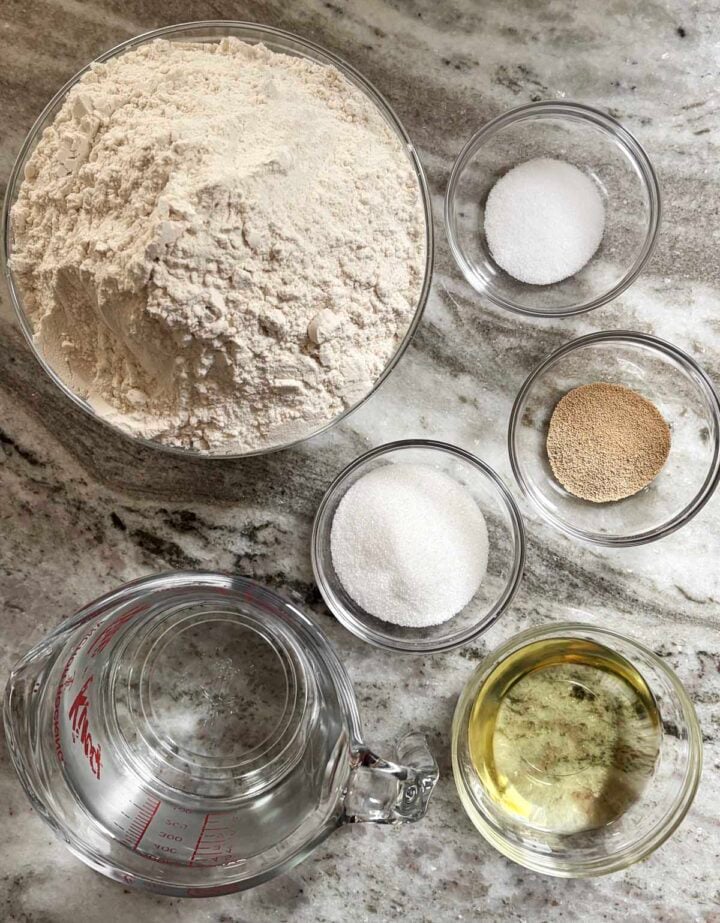
INGREDIENTS FOR SANDWICH BREAD
- Bread flour - I love to use bread flour for this recipe. Bread flour contains a higher protein content and also higher protein quality which means that has a greater ability to build strength in the dough to hold in air. Bread proteins, glutenin and gliadin, provide elasticity and extensibility to dough so it can expand and then hold in the gas bubbles created by yeast to make a fluffy and tender dough. All-purpose flour can also work in this recipe, however you may get less height and volume.
- Oil - liquid oil helps lubricate gluten proteins so that they can expand and trap air for fluffier dough. It also helps provide the bread with a softer texture.
- Granulated sugar - This recipe has about 6% sugar on a baker's percentage. (A baker's percentage means it is based on the flour being 100% and not the total amount of dough with the water included). This amount provides a bit of sweetness as well as softness and moistness, since it is a humectant and binds water. It also provides the yeast with food to speed up fermentation and helps promote browning in the oven.
- Yeast - I use instant yeast which is so convenient because you do not need to proof it. You can add instant yeast directly to the dry ingredients as long as it is not in direct contact with the salt. Direct content with salt will inactivate the yeast. Lesaffre instant yeast is great, and I also like Fleischmann's rapid rise yeast.
- Salt - this recipe has a typical 2% salt and it is an important ingredient! Salt is not just for flavor in bread. Salt creates a more stable gluten network to hold more gas and provide greater volume.
ACTIVE DRY YEAST VS. INSTANT YEAST
Active dry yeast looks like little spheres and is larger than instant yeast which has smaller granules the size of white granulated sugar meant to dissolve easily. It requires rehydration or "blooming" because of the way it is processed, there is more dead yeast on the surface. Hydrating penetrates this layer so the active yeast, which is only about 30%, can thrive. Instant yeast does not require rehydration and you can add it directly to the dry ingredients when making breads. Since it is smaller, there is more surface area so it dissolves readily. Instant yeast is processed in a way that makes it more viable.
WHAT IS THE ROLE OF SALT IN BREAD
Salt provides flavor and strength to bread dough. In low concentrations (typically 2% on flour), salt helps to improve the volume of breads. Salt is composed of sodium and chloride minerals. The negatively charged chloride ions shield the polar charges of the gluten molecules so that there is less electrostatic repulsion and therefore they are more attracted to each other. This helps gluten molecules come together or associate and build a stronger network.
IT DOESN'T MATTER HOW MUCH YEAST YOU ADD
It's true… to a reasonable extent. You can add less or more yeast and it will just take longer or faster for the dough to rise. Adding more yeast will make the dough rise faster if you're in a rush, but it will also have an impact on flavor. Bakers will tell you that using less yeast with a longer fermentation time makes the best bread and that is because yeast have more time to thrive and produce delicious flavor compounds. Fast fermentation typically causes yeast to produce undesirable flavors. Of course if you use so little yeast then it will not be effective as it will take way too long for the dough to ferment.
WHY DOES DOUGH TEMPERATURE MATTER?
The dough temperature controls how yeast behaves in dough. If you're making bread at room temperature around 23 degrees C using a mixer, then you can use cool water/milk around 16 degrees C or 60 degrees F. Surprised? Many recipes on the internet might instruct you to use warm water or heat your water/milk to 44 degrees C or 112 degrees F. That may be necessary to activate dry yeast, however if the liquid is still that warm when you make the dough, then you might end up with a very sticky dough that requires more flour to handle easily. More flour creates a drier dough and drier rolls. The mixer and your hands create enough friction/heat to warm up the dough without having to use hot water.
HOW TO MAKE SANDWICH BREAD
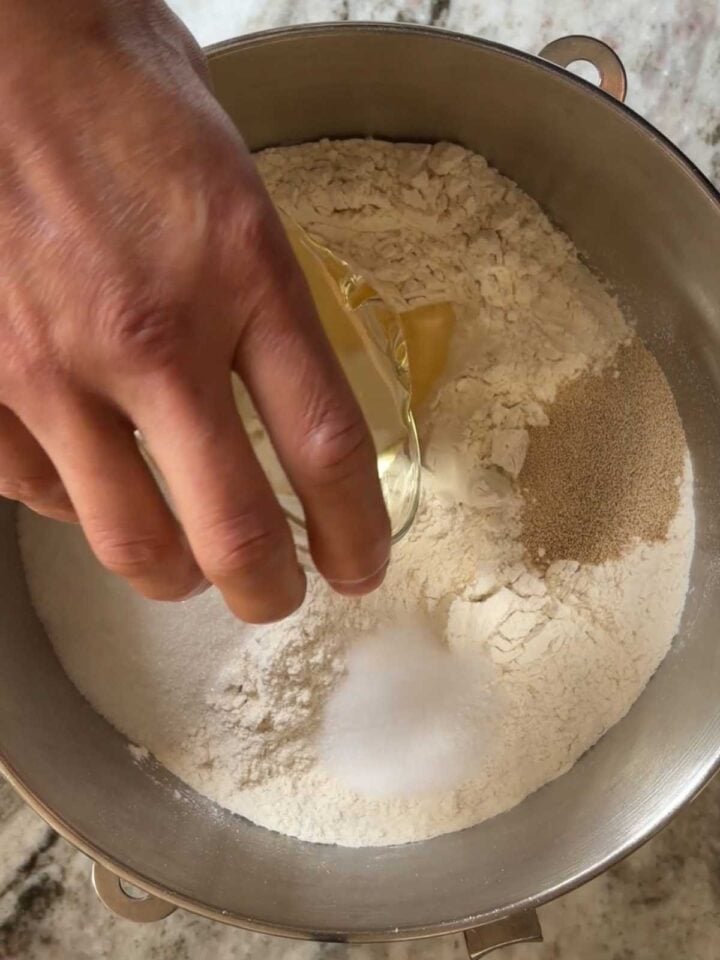
- STEP 1). Make the dough. Combine dry ingredients. Place flour in the bowl of a stand mixer. Add in yeast, sugar and salt in little piles in separate places over the flour in the bowl so that they are not touching. You do not want the salt in direct contact with the yeast for a prolonged period of time without mixing or it can inhibit its activity.
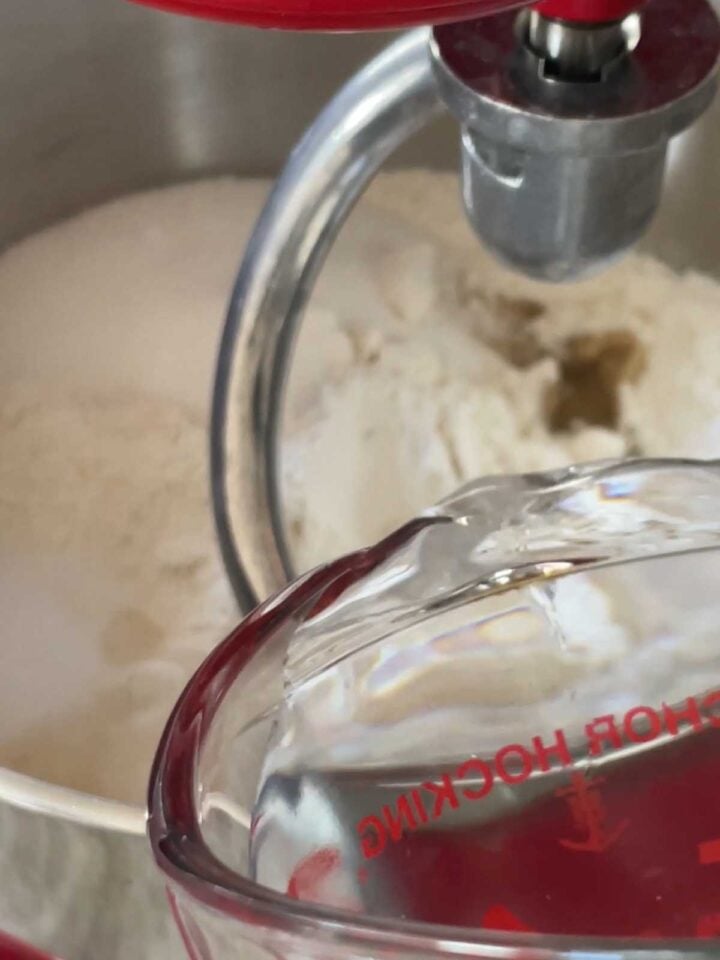
- STEP 2). Add wet ingredients. Add in the oil and water. (Note: if using a stand mixer at standard room temperature, use cool water around 16 degrees C (60 degrees F)).
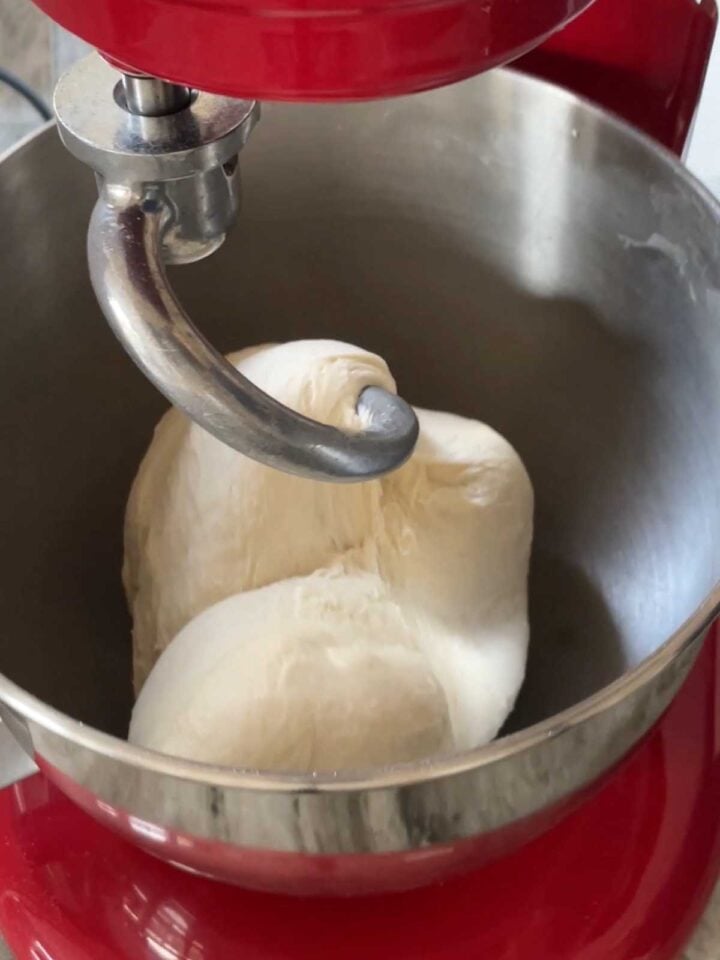
- STEP 3). Mix the dough. Attach the dough hook and mix on medium-low for 10-15 minutes until it the surface looks smooth. Stop after a 2 minutes to scrape down the sides of the bowl and ensure all of the flour is incorporated and the dough is a uniform mixture. It will still be wet and rather loose at this point. Continue mixing for another 2-3 minutes. The dough should start to climb up the dough hook and will still be webbing around the bottom of the bowl. (Note: if the dough seems rather dry and stiff at this point, add water at 20ml increments until you reach a softer consistency as described). Stop the mixer and scrape around the inside of the bowl to release the dough. Continue mixing for another 3 minutes. Stop again, pull the dough off of the hook and scrape around the inside of the bowl to release the dough again. Continue mixing for another 3-5 minutes. At this point the dough should start forming a mass and come away from the bowl as it is mixing. You can check the temperature of the dough now if you have a digital thermometer - it should be between 24-26 degrees C (75-80 degrees F) for optimal activity.
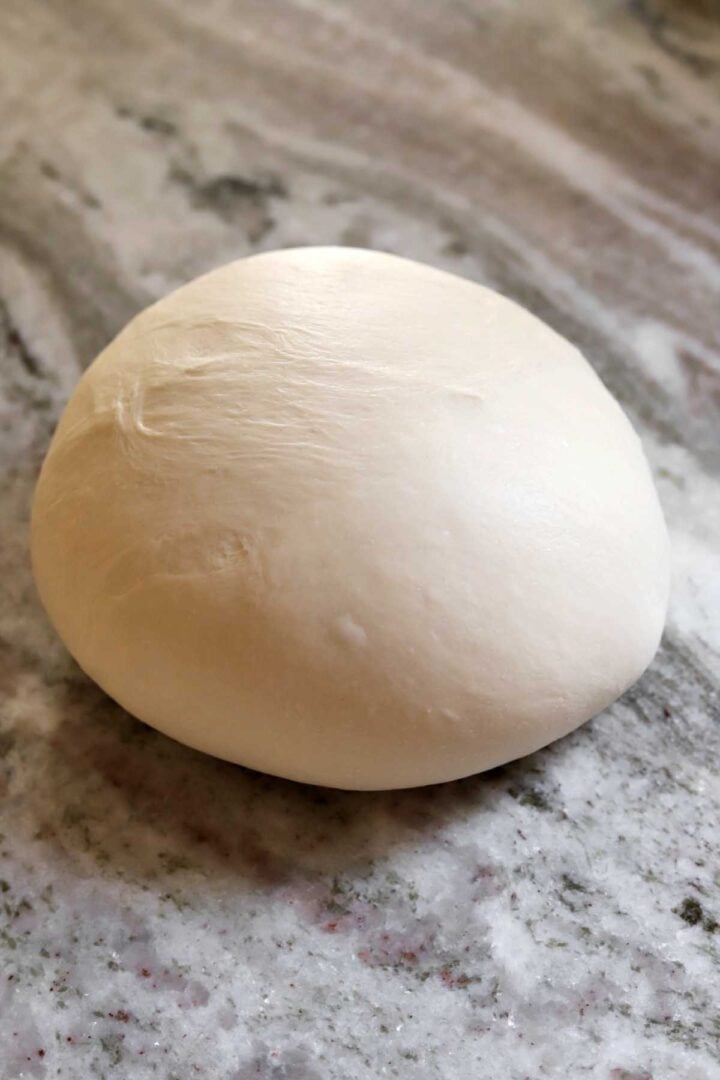
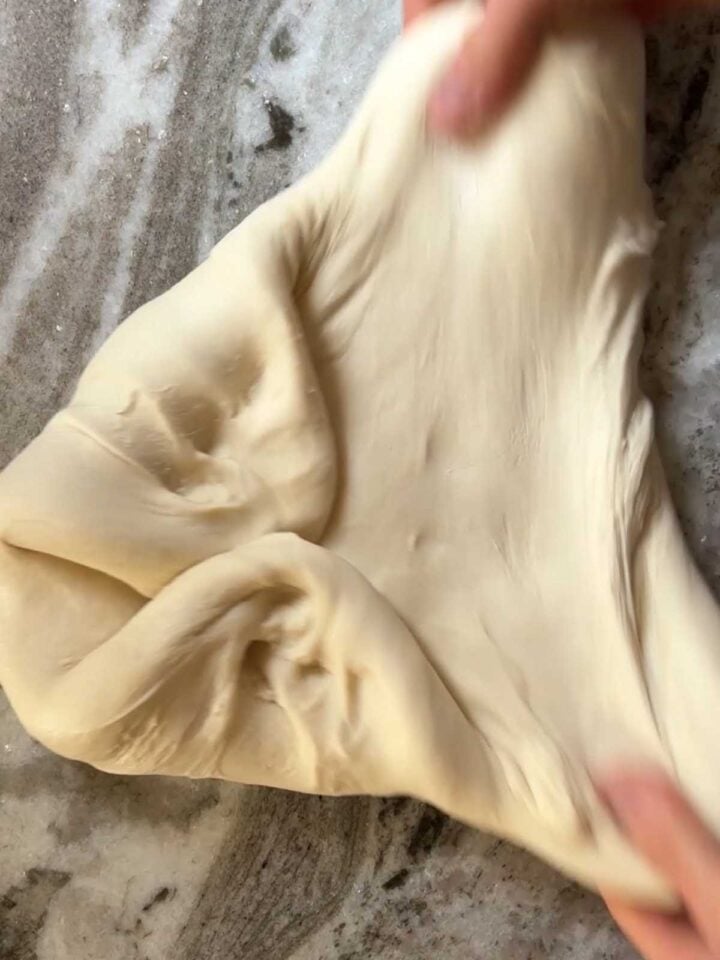
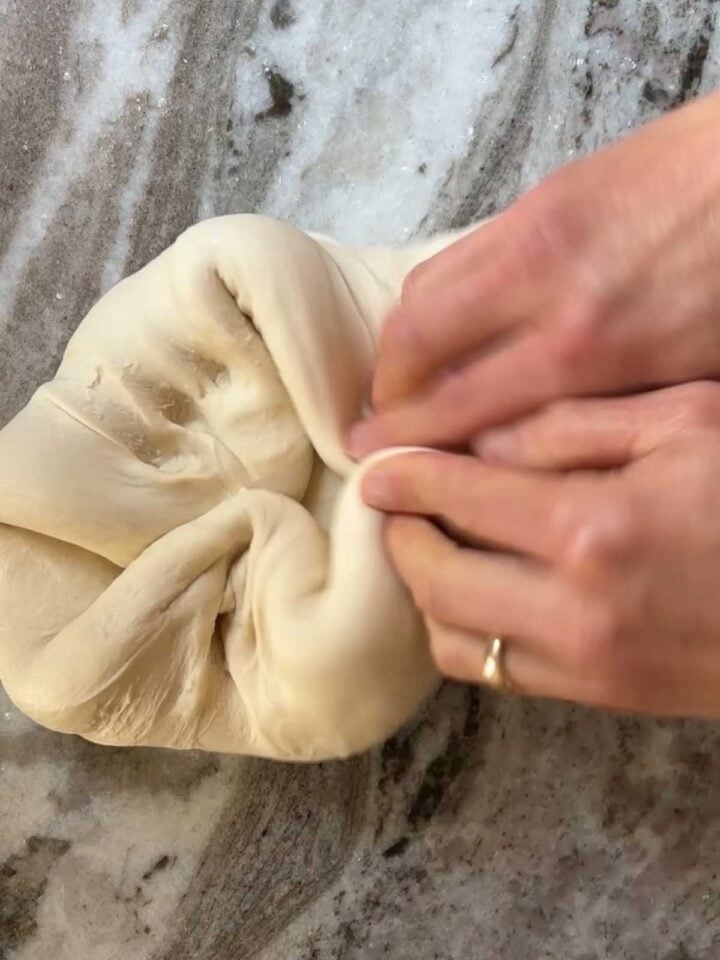
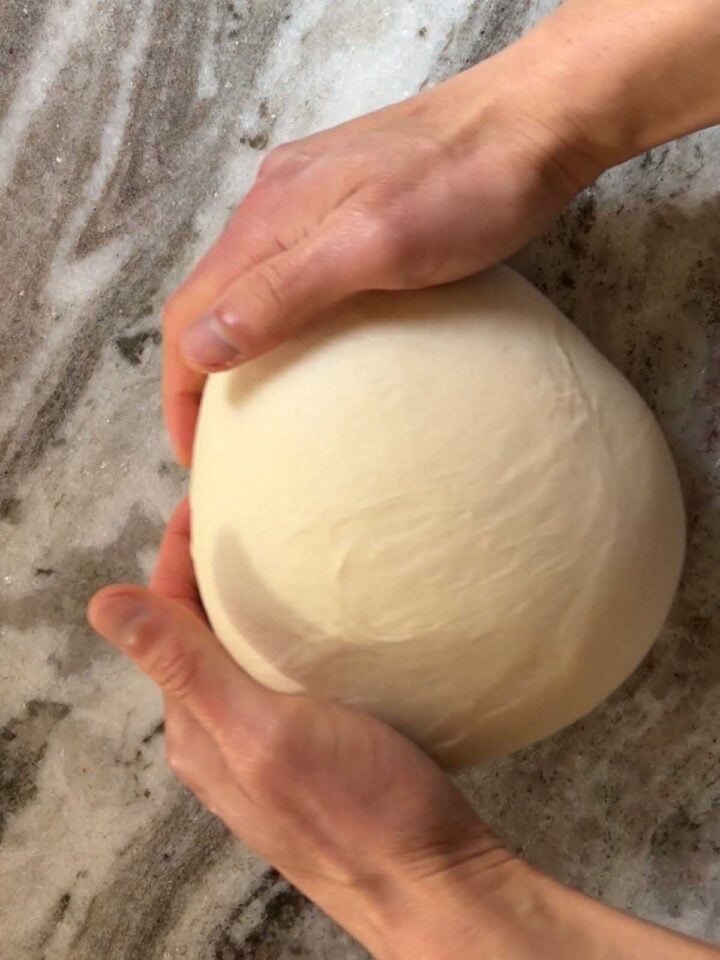
- STEP 4). Knead the dough. Transfer the dough to a lightly floured work surface. Now you will stretch and fold the dough to help develop the gluten structure. Using both hands, grab both sides of the dough, pull it outwards (this is the "stretch"), then fold it inwards over itself. Rotate the dough and continue to stretch and fold until the dough feels very smooth. Watch my video for a full tutorial. Shape the dough into a ball by tucking the sides underneath and rolling it around the counter. The surface of the dough ball should pull smoothly without tearing.
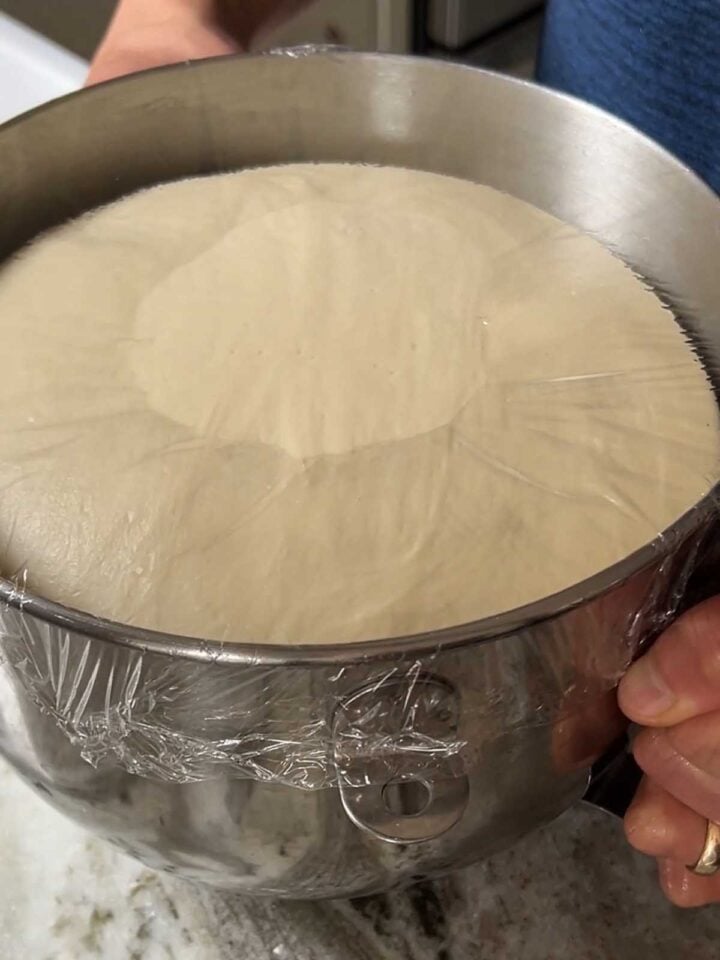
- STEP 5). Bulk Fermentation (first rise). Place the ball into a lightly oiled bowl. Cover the bowl with plastic and then cover with a kitchen towel. Set it aside in a warm dark place and let it rise for 1-2 hours until nearly doubled in size. Note that the amount of time required will depend on the temperature of your kitchen.
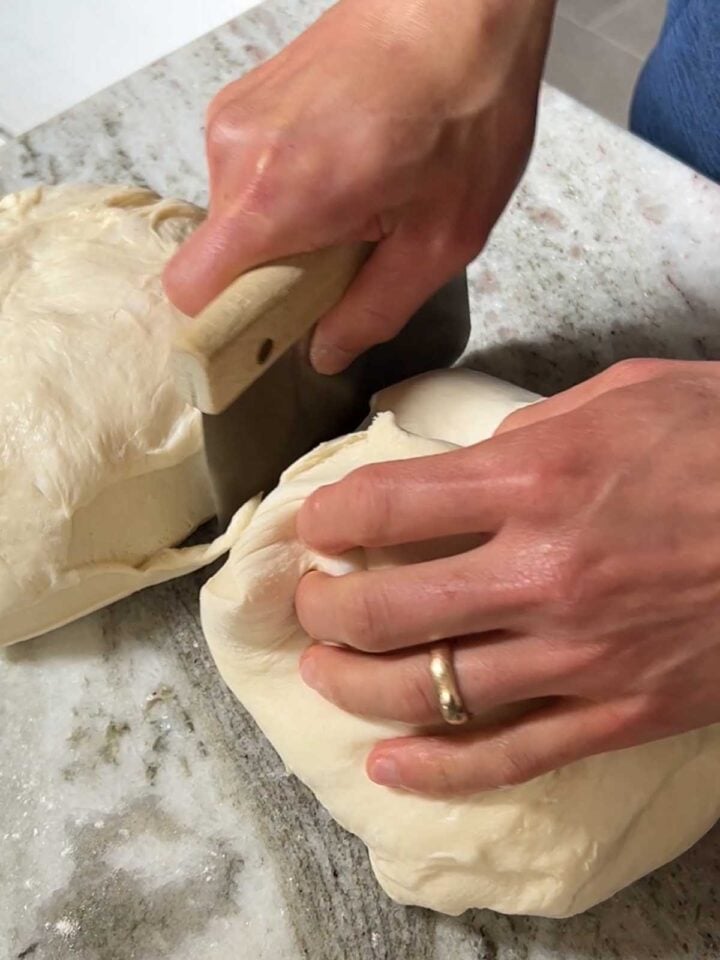
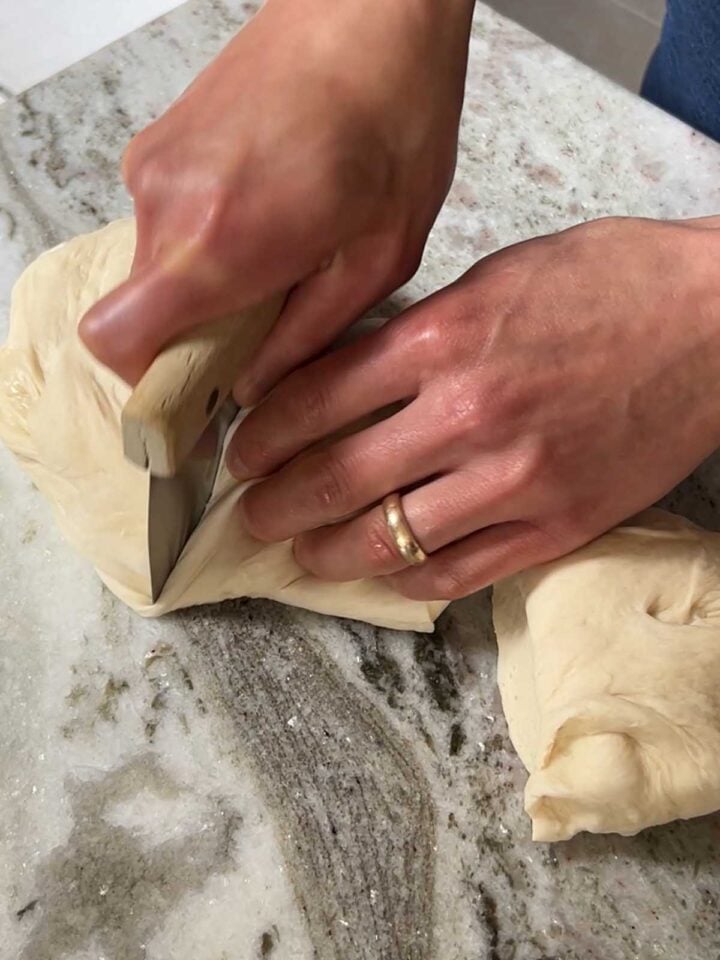
- STEP 6). Divide the dough into two equal portions and pre-shape. Very lightly dust a work surface with flour and tip to dough out onto the surface. Divide the dough into 2 equal portions (approximately 750g each) and shape into balls. If you want to make three-piece loaves, you can divide into 6 equal portions (approximately 250g each) and shape into balls.
- STEP 7). Rest the dough. Cover the dough balls and rest them for 20 minutes. This will allow the gluten to relax from the tension built up during rounding.
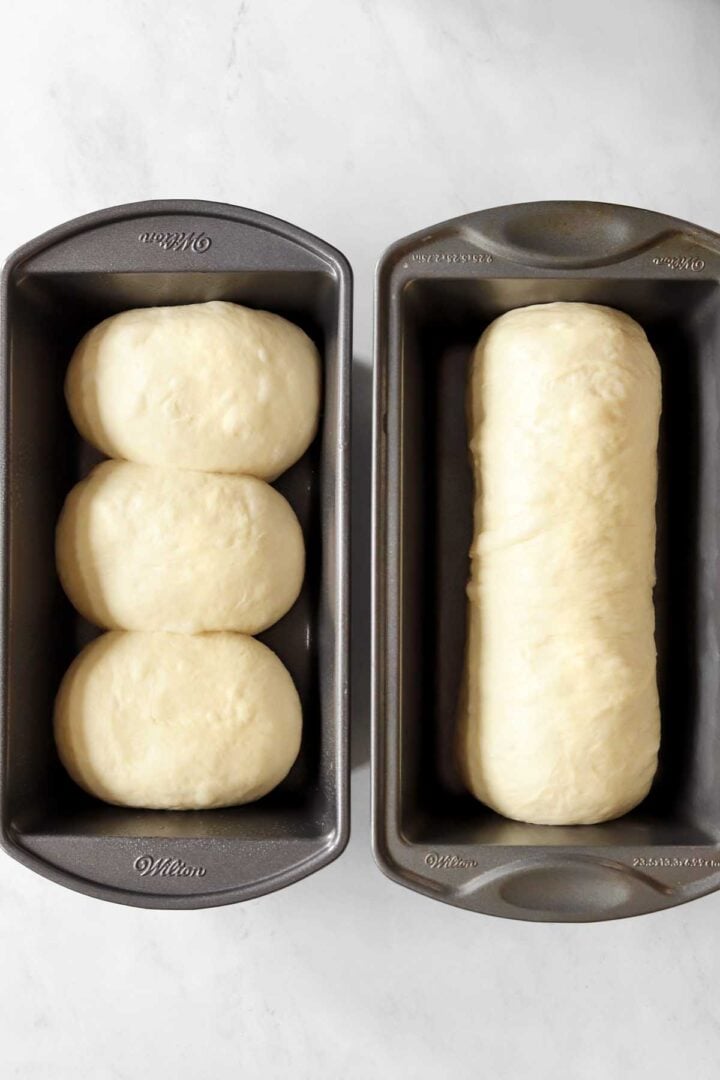
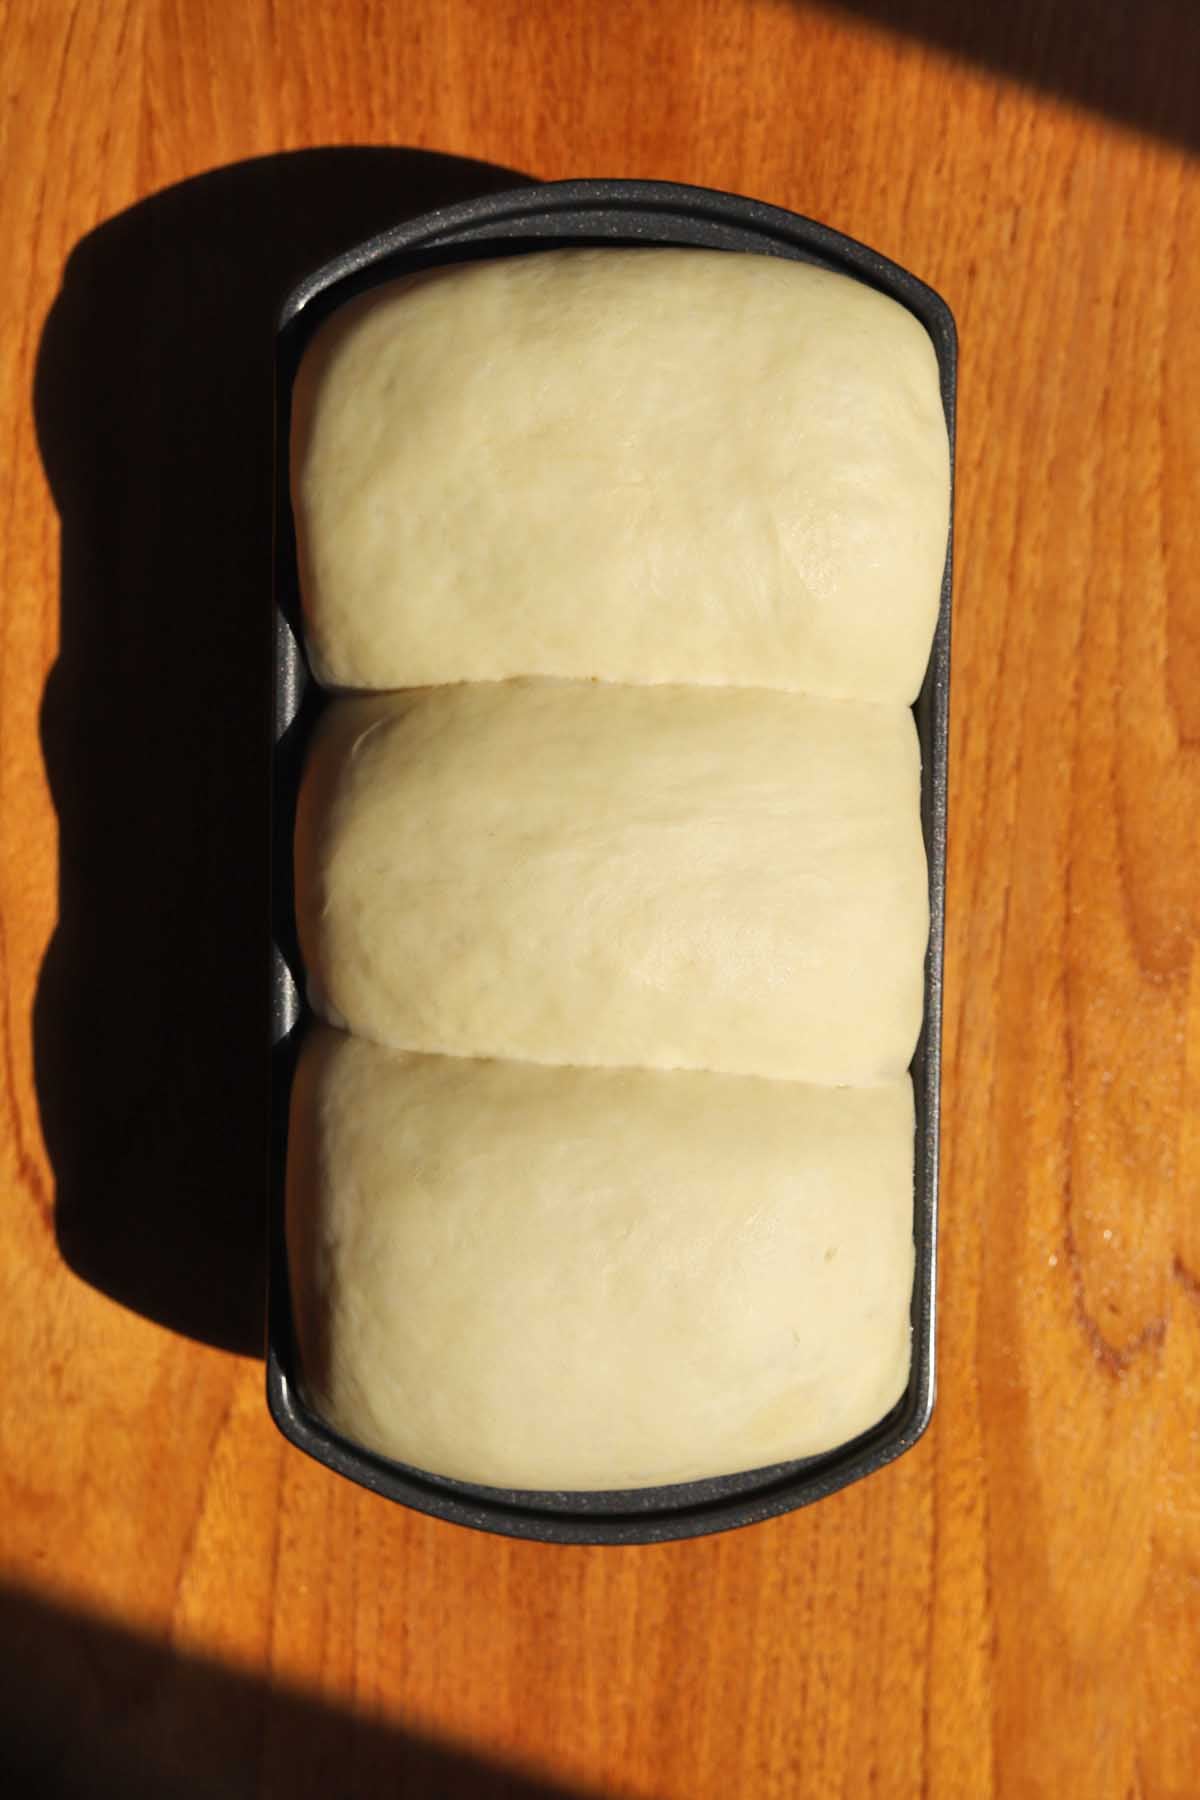
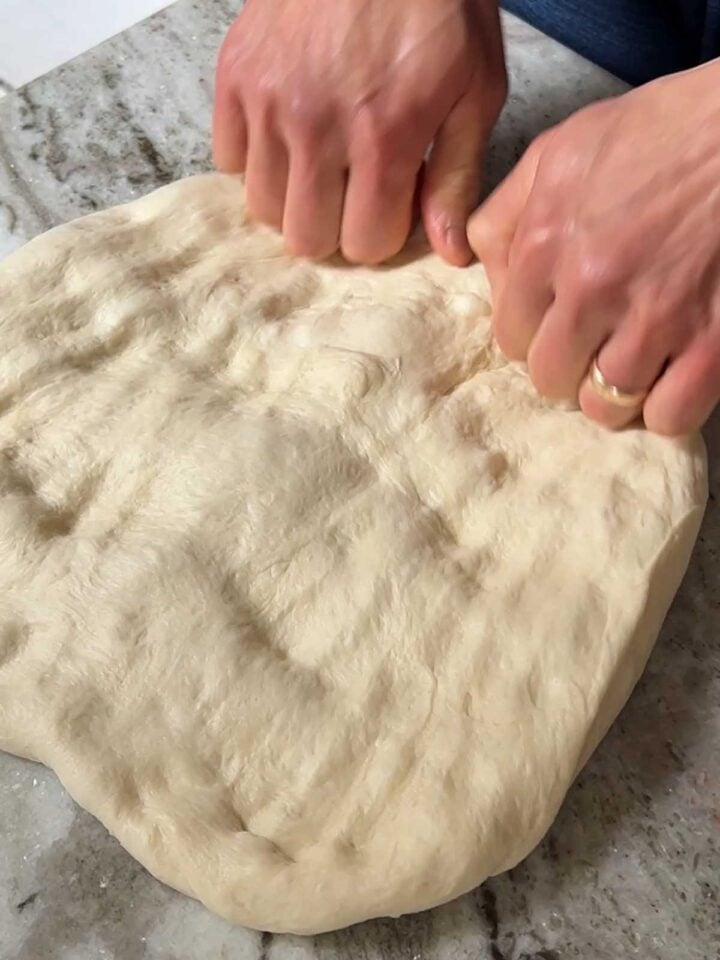
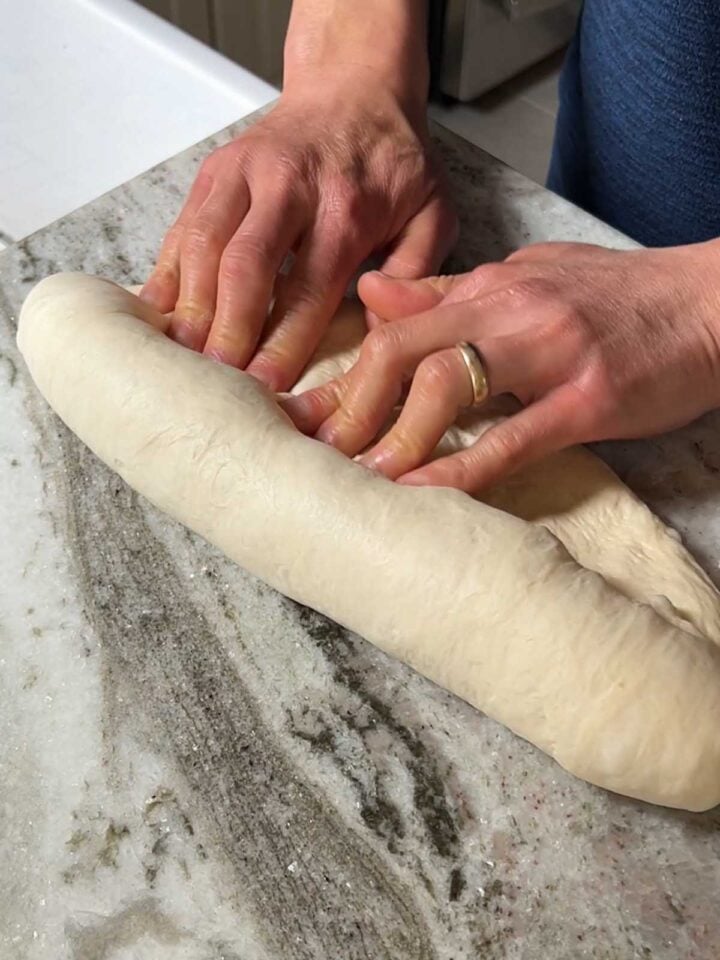
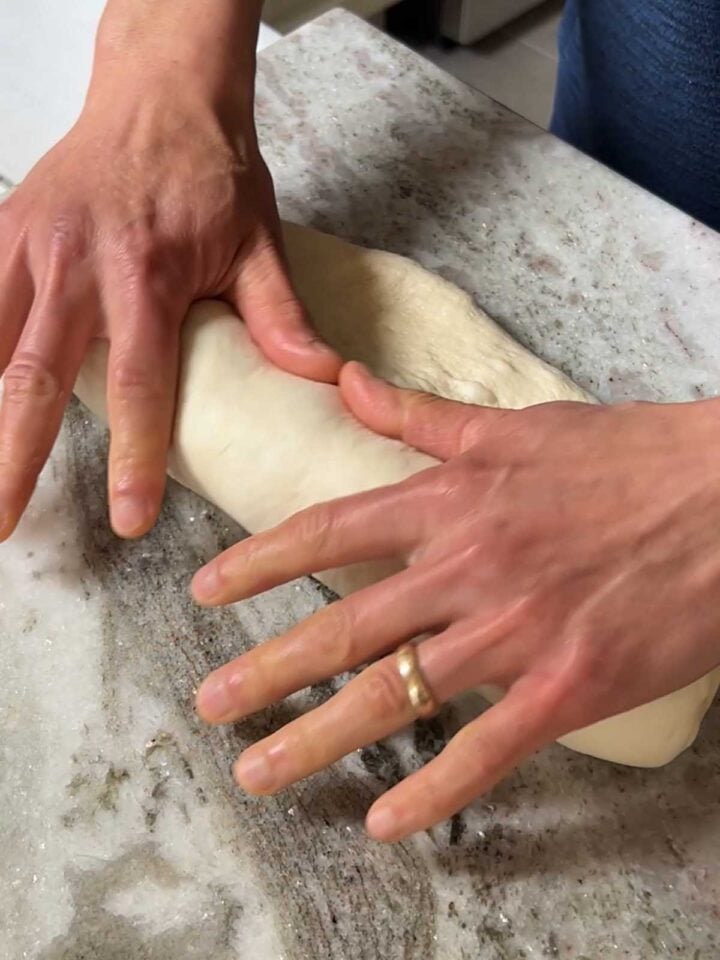
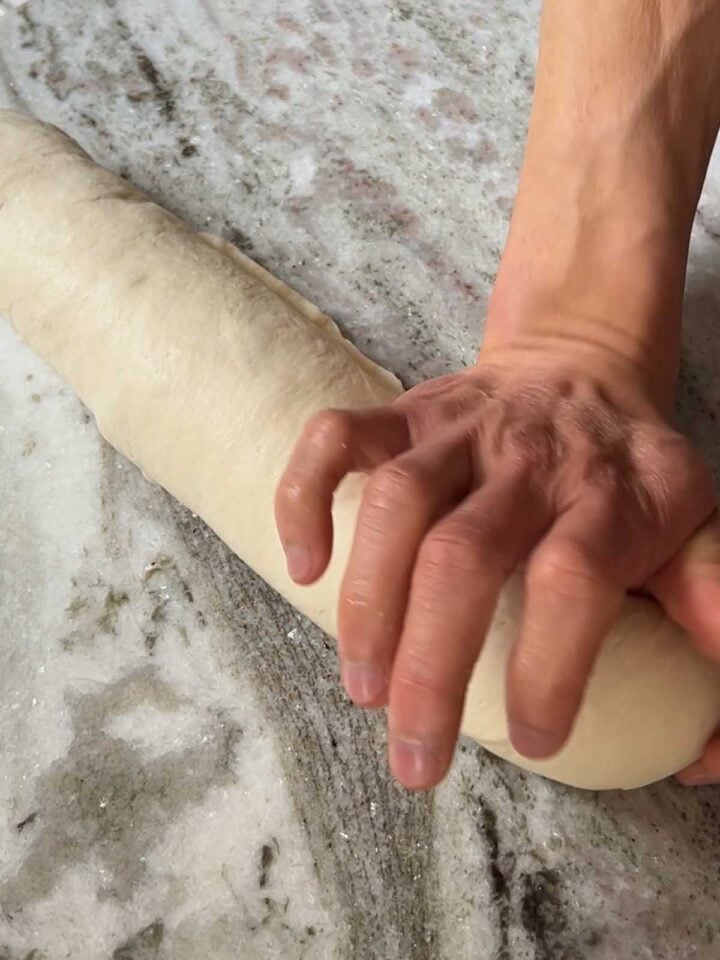
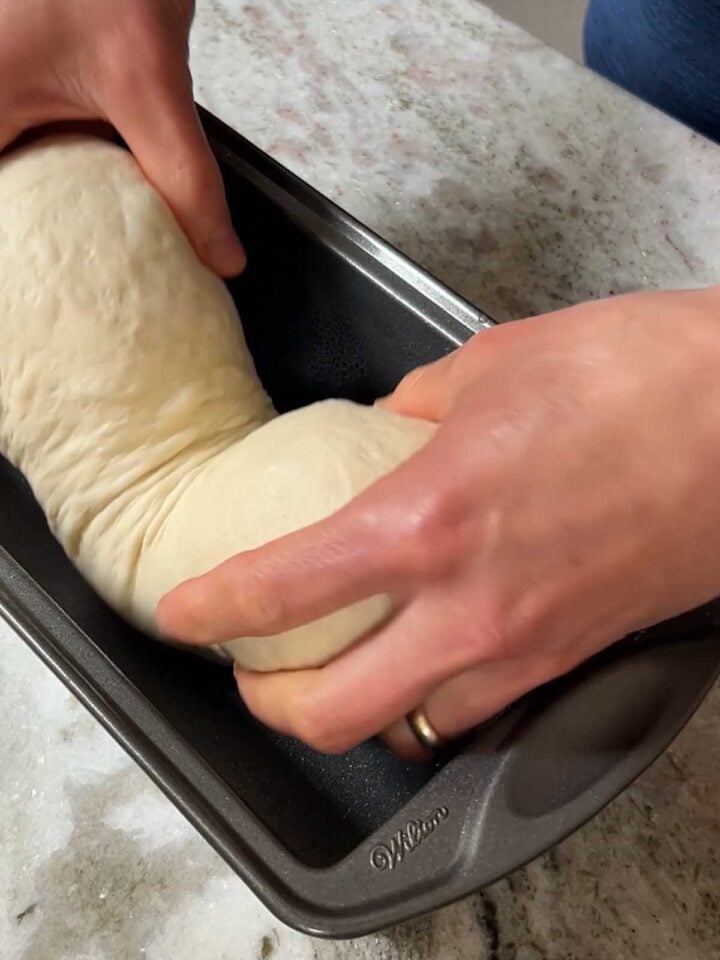
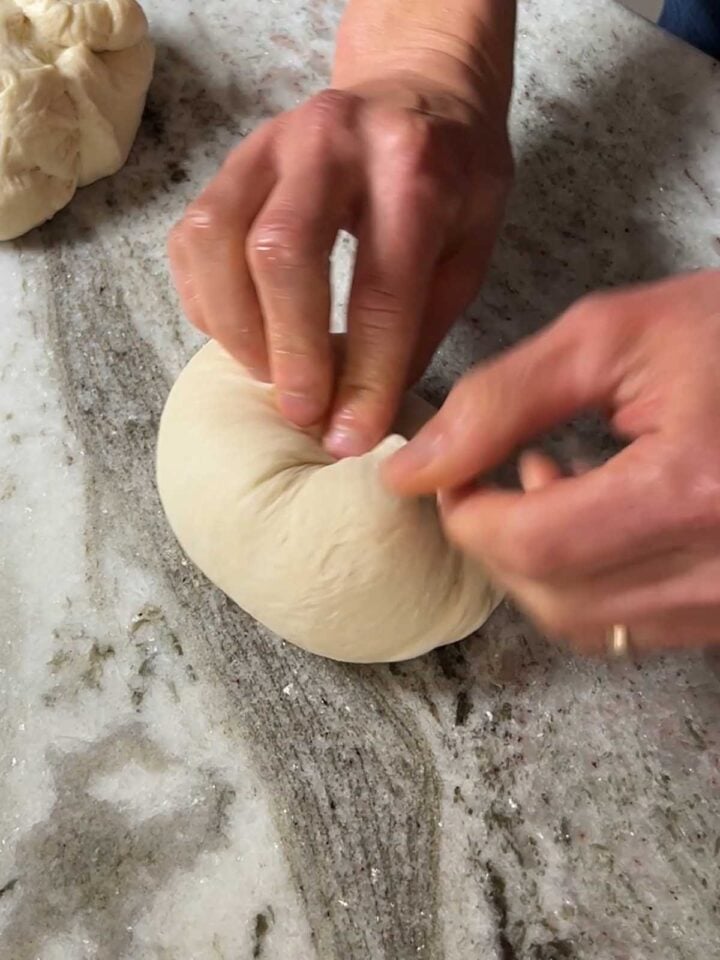
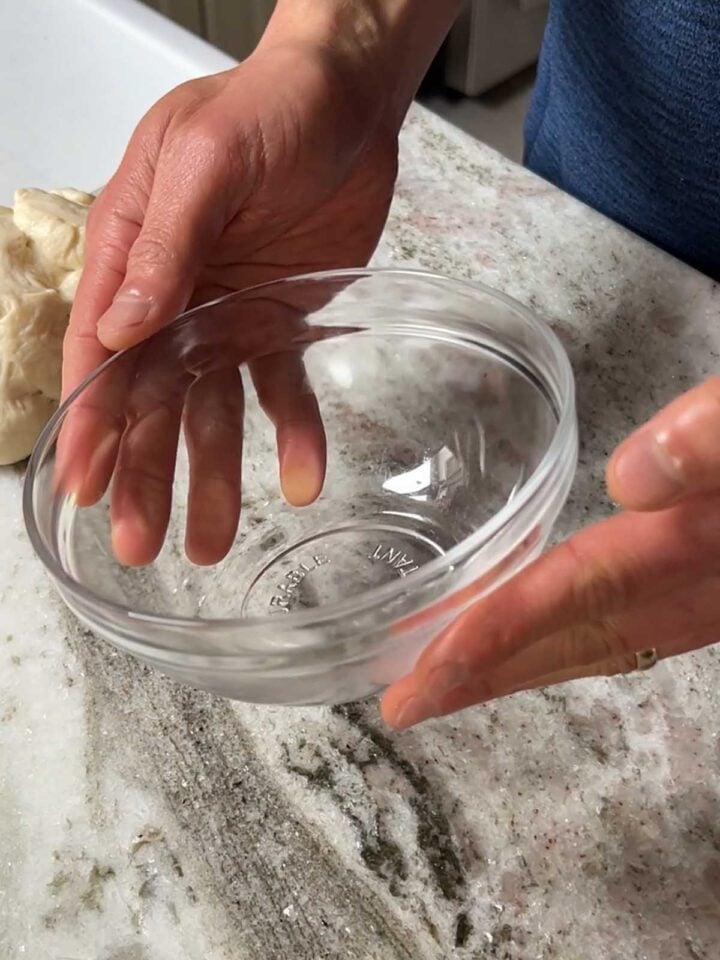
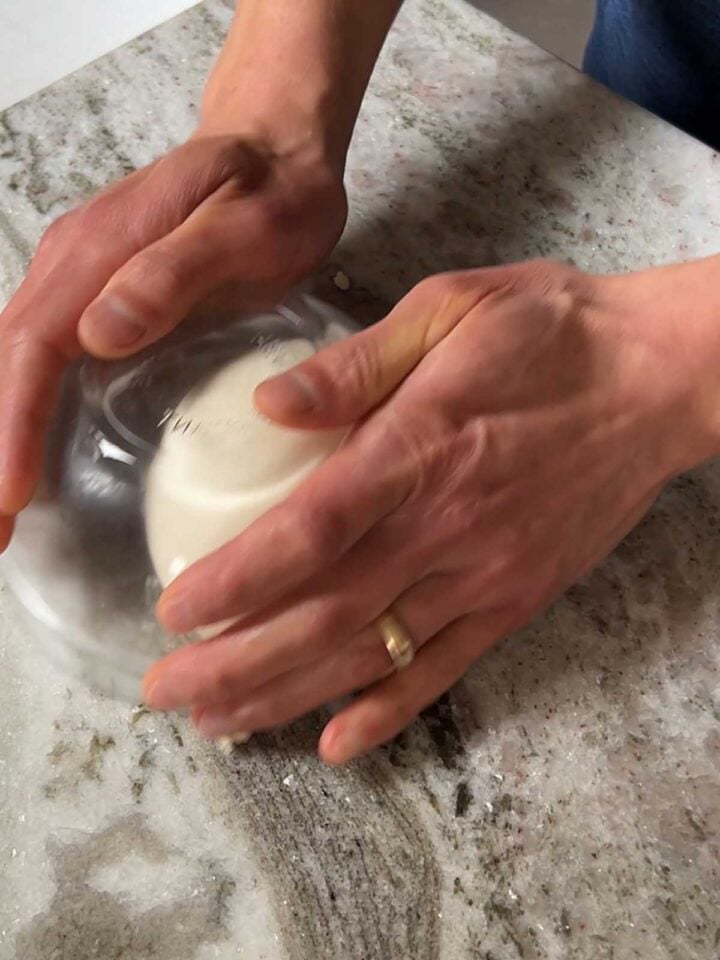
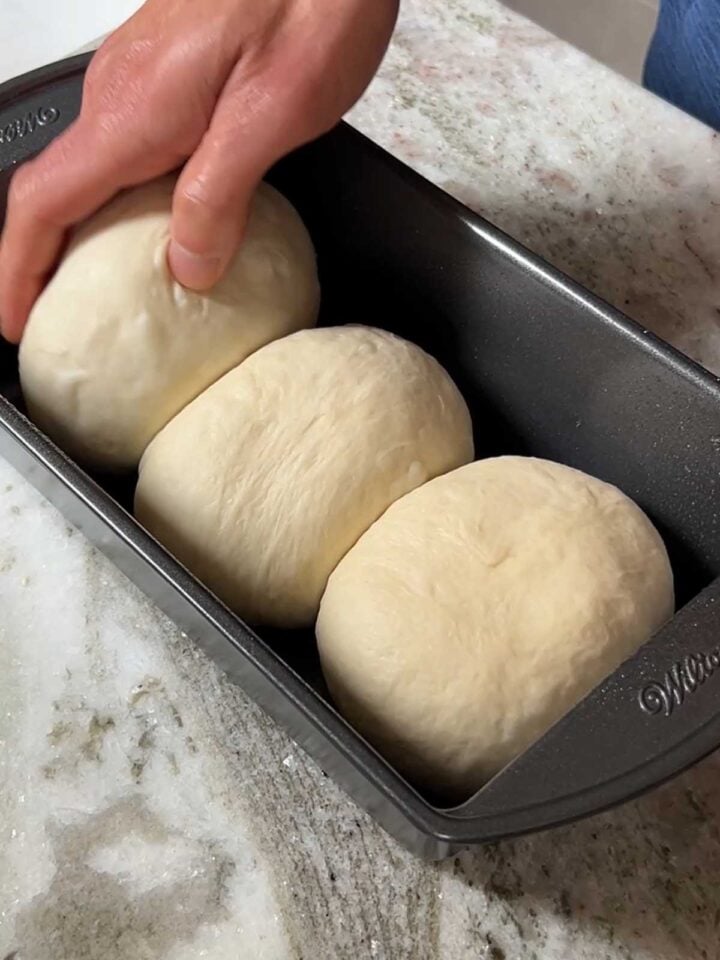
- STEP 8). Prepare the pans and perform the final shaping. Spray or coat two 9x5 inch loaf pans lightly with oil. Use minimal to no flour when shaping as you need the dough pieces to adhere somewhat to the working surface. If shaping into logs, flatten and degas the dough balls with your knuckles. Pull the dough into a rough rectangular shape about 8-inches wide or just less than the width of the pan. Roll up the dough by starting at one end and moving across the width of the dough piece for a tight curl. Continue rolling up the dough until it is a log shape and seal the seam with heel of your palm. (Watch video for molding technique). It is important to build tension on the surface of the dough so it rises upward for better volume, as well as a nice dome shape vs. a flat top. Place the logs into the pan. If making three piece loaves, place three smaller dough balls into each pan and press them down with with your knuckles to fill out the corners of the pan.
- STEP 10). Proof the loaves (second rise). Cover the loaf pans to prevent the dough from drying out and place them somewhere warm to rise until fully proofed, or when the surface just slightly retains a finger imprint when pressed. You can also proof them uncovered in the oven on proof setting. I like to place a tray of off the boil water on a rack below the pans to keep the oven humid to prevent skinning of the dough. The optimal proofing conditions for this type of bread is around 30 degrees C (86 degrees F) at 85% humidity. If you proof at a lower temperature, it will take longer, but you will be rewarded with better flavor.
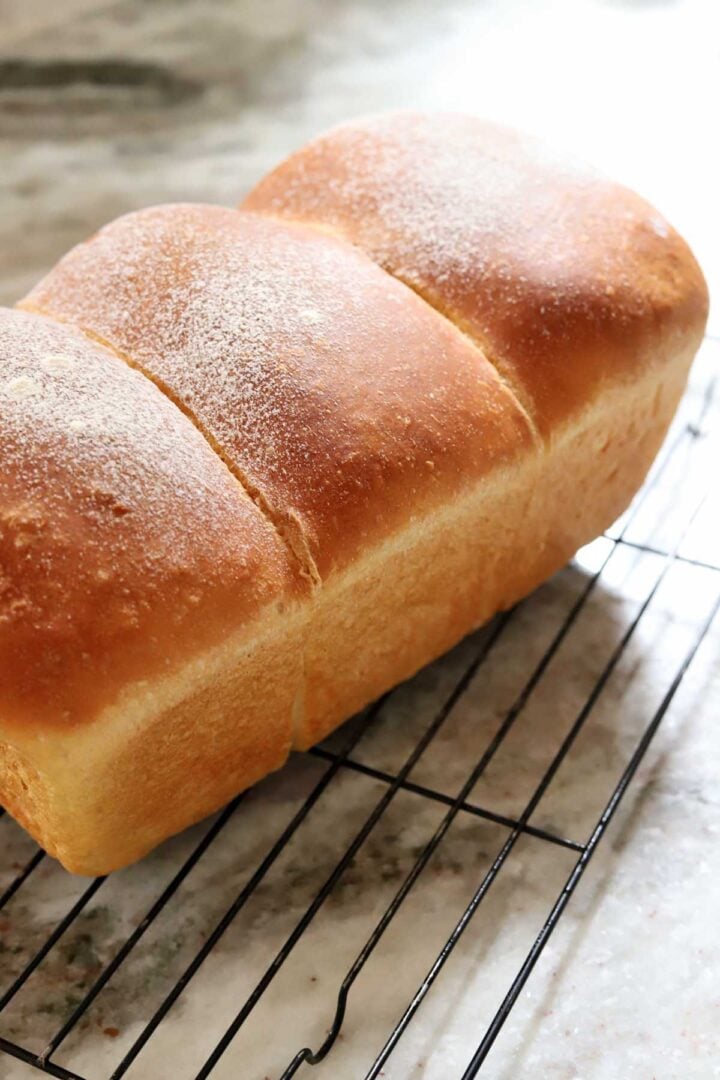
- STEP 11). Bake. Once fully proofed, handle the pans gently and bake them at 175 degrees C (350 degrees F) for around 35 minutes. Since they are quite large loaves you may need to lower your oven racks or they might brown too quickly on the top. You can check the internal temperature with a digital thermometer, which should read at least 94 degrees C (200 degrees F). Remove the loaves from the pan and place on a wire rack to cool to below 35 degrees C (95 degrees F) before slicing and/or packaging.
STEP BY STEP INSTRUCTIONS (watch the recipe video at the bottom of the page for a full tutorial)
HOW TO SHAPE BREAD DOUGH FOR SANDWICH LOAF
EXPERT BAKING TIPS FOR SANDWICH BREAD
- Have a well hydrated dough. This dough has 65% hydration which is a well hydrated for this type of bread. You may be tempted to add more flour as you may feel it is a bit tacky, but this is correct. Conversely, different flours can absorb different amounts of water, so depending on the quality of your flour, you may need to increase hydration. A well developed hydrated dough will feel tacky, not sticky and it is the best way to ensure you have nice soft internal crumb.
- Don't over-heat the dough. Yeast thrives at 24-26 degrees C (75-79 degrees F). The friction of the mixer often heats the dough alone, so I often even use cool to room temperature water and don't even need warm water for this dough in my stand mixer. If the temperature is too high, the dough will be sticky and it will proof too fast. A controlled temperature creates controlled fermentation for optimum flavor.
- Knead thoroughly. The dough should be smooth like a baby's bottom and will not tear when it is ready. A dough that is well developed will hold in the gas bubbles produced by yeast to yield fluffy rolls. This usually takes at least 10 minutes in a stand mixer on medium-low speed, although this can vary depending how effective your mixer is at kneading dough.
- Build tension after final shaping. Final shaping or molding of the dough involves building tension on the surface of the dough so it rises upward. If there is not enough tension the loaves will have poor volume and a flat top.
- Prepare the pans. There is nothing worse than not being able to release your loaves from the pan. To ensure they release properly, use a pan lightly coated with oil.
- Proof correctly. Over-proofing and under-proofing will result in poor loaf volume and crumb structure. Be gentle with the pans when fully proofed as any physical trauma can cause the dough to deflate as it is more fragile.
- Do not over-bake. Over baking will dry out any type of bread so make sure the oven is at the right temperature. You may need to lower the racks since these are tall loaves and you don't want the top of the loaves might burn before it is baked through in the middle.
- Do not under-bake. Raw bread is not good. As important as it is to avoid over-baking, it is equally important to avoid under-baking as this will cause the bread to collapse and /or will be difficult to slice. Ensure the internal temperature reads minimum of 94 degrees C (200 degrees F) and the sides of the loaf are browned.
- Wait until the loaves are cooled sufficiently before slicing or packaging. Cool the loaves on a wire rack until the internal temperature is below 35 degrees C (95 degrees F). If they are too warm they will be very difficult to slice without damaging the crumb and they will steam up the bag.
RECIPE FAQ
Any neutral tasting oil will work. I prefer sunflower oil for it's clean flavor profile.
You can use butter in the dough in place of the oil, but the bread may have slightly less volume and won't be as soft.
The sugar has a functional role to improve volume and softness in bread, however you may reduce the total quantity to 25g in the dough at the least if desired. The result will be different in that the bread will be slightly less soft, the dough will take longer to proof and it won't brown as quickly during baking.
You can store the bread at room temperature for a few days in a airtight bag or container, however it is best practice to store bread in the freezer that will not be consumed within a couple days. Freezing bread and thawing when needed retains its freshness better than keeping it at room temperature for two days or longer. Never store your bread in the refrigerator as that is at the temperature that bread stales the fastest (starch retrogradation).
It is possible to leave the dough to "bulk" ferment slowly over night in the fridge. In this case, place the dough in a large bowl and cover it tightly with plastic. The next day, divide the dough and process as directed.
Yes, you can perform an "overnight" process. Make the dough and perform the final shaping in the afternoon or evening. After placing the dough into the prepared pans, cover them with plastic so they don't dry out and refrigerate. You may need to dust the top of the dough with a little bit of flour so the plastic does not adhere to the top of the dough. The next morning, bring them out and let them come to room temperature. If they have not fully risen, let them proof as required before baking as directed in the recipe card below. *Additional tip: if you live in a warm climate, work quickly to get the dough into the fridge because if they proof a lot during forming, they could end up over-proofing in the fridge overnight. In contrast, if the dough is really cold going into a cold fridge, they might not rise much overnight and will require further proofing time in the morning.
Yes you can, but you will need to proof or "bloom" the yeast before adding to the dough. You can do this by adding the active yeast to a portion of tepid water with a pinch of sugar. When it is frothy, then add it to the remaining ingredients in the bowl just before mixing.
To know that they are proofed sufficiently, press on the dough gently with your fingertip. If it leave and indent that fills back out slowly, then they are ready. If the indent springs back right away then they are not ready and still need more time. On the other hand, if the indent holds and doesn't spring back, then the dough is over-proofed.
The correct proofing will provide the best volume and soft fluffy texture. You can check this by pressing your forefinger gently into the dough. If it fills back out slowly, it is ready. If it springs back too fast, it is under-proofed, and if the indentation stays in, then it is over-proofed.
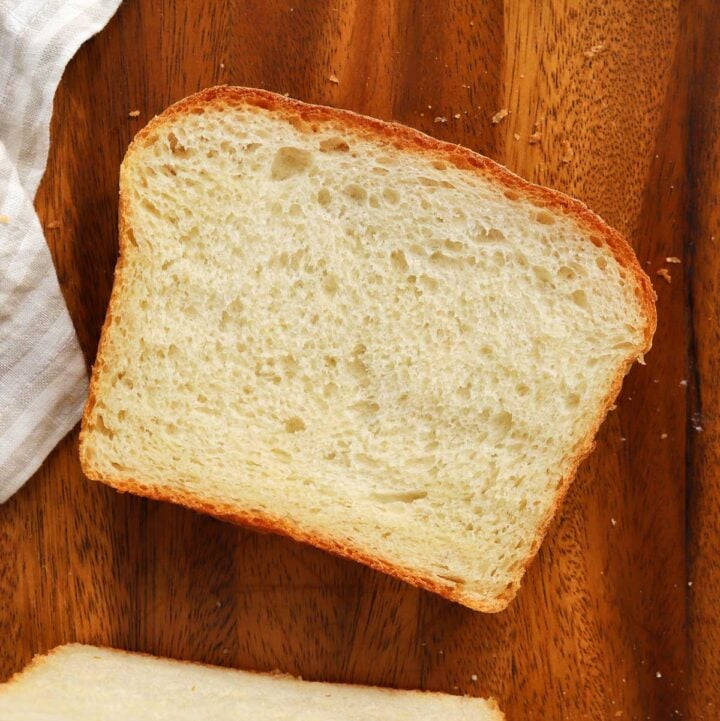
TROUBLESHOOTING SANDWICH BREAD
If your bread collapsed when you took them out then it is likely that it was under-baked.
Most likely the bread would be dry if they are over-baked, not enough moisture in the dough (low hydration) or you have used too much flour for dividing and shaping.
If your dough is not rising, you may have used active yeast instead of instant active yeast, the yeast was too old, or the dough and/or surrounding environment is too cold. Yeast that is too old will lose the ability to leaven the dough and can even cause the dough to become more sticky. Its activity is highly dependent on temperature, so it is important to have a final dough temperature between 24-26 degrees (75-79 degrees F). If the dough is too cold, or kept in a very cool place, the yeast will ferment very slowly and proof times may be very long.
If your loaves are cracking, usually at the weakest point on the surface, it is likely under-proofed or the dough was too stiff. Ensure the dough is sufficiently proofed and that the hydration is adequate.
If you have poor loaf volume, you either did not have enough gas retention (strong enough gluten network) or not enough gas production (yeast fermentation). You need both for good loaf volume. Ensure your gluten network is properly developed and that you have the right conditions for your yeast to thrive and ferment. Also make sure you achieved some surface tension on the dough and that it is proofed correctly. If they deflate during baking they may have been over-proofed.
If you love making loaf cakes, check out these recipes!
Walnut Chocolate Chip Zucchini Bread Brown Butter Chocolate Chip Pumpkin Bread Best Chocolate Chip Banana Bread Copycat Starbucks Lemon Loaf Apple Cinnamon Bread with Maple Crumble Double Chocolate Loaf Cake DOUBLE CHOCOLATE ZUCCHINI BREAD CLASSIC BANANA BREAD RECIPE MAPLE PECAN BANANA BREAD WITH DARK CHOCOLATE DOUBLE CHOCOLATE BANANA BREADMore carbs please
Check out some more delicious homemade bread recipes:



Loaf recipes...
Here are some of my favorite loaf cakes:
Video
Homemade Sandwich Bread
Ingredients
- 6 cups (850g) unbleached bread flour
- 1 tablespoon (17g) fine salt
- 3 tablespoon + 2 tsp (50g) liquid oil such as vegetable, canola, sunflower or olive oil
- 2 ¼ teaspoon (7g) instant dry yeast
- ¼ cup (50g) granulated sugar*
- 2 ¼ cups (540g) water, plus more if needed (add in 20ml increments)
*See notes in FAQ section about reducing the sugar quantity if desired.
Instructions
- Make the dough. Combine dry ingredients. Place flour in the bowl of a stand mixer. Add in yeast, sugar and salt in little piles in separate places over the flour in the bowl so that they are not touching. You do not want the salt in direct contact with the yeast for a prolonged period of time without mixing or it can inhibit its activity.
- Add wet ingredients. Add in the oil and water. (Note: if using a stand mixer at standard room temperature, use cool water around 16 degrees C (60 degrees F)).
- Mix the dough. Attach the dough hook and mix on medium-low for 10-15 minutes until it the surface looks smooth. Stop after a 2 minutes to scrape down the sides of the bowl and ensure all of the flour is incorporated and the dough is a uniform mixture. It will still be wet and rather loose at this point. Continue mixing for another 2-3 minutes. The dough should start to climb up the dough hook and will still be webbing around the bottom of the bowl. (Note: if the dough seems rather dry and stiff at this point, add water at 20ml increments until you reach a softer consistency as described). Stop the mixer and scrape around the inside of the bowl to release the dough. Continue mixing for another 3 minutes. Stop again, pull the dough off of the hook and scrape around the inside of the bowl to release the dough again. Continue mixing for another 3-5 minutes. At this point the dough should start forming a mass and come away from the bowl as it is mixing. You can check the temperature of the dough now if you have a digital thermometer - it should be between 24-26 degrees C (75-80 degrees F) for optimal activity.
- Knead the dough. Transfer the dough to a lightly floured work surface. Now you will stretch and fold the dough to help develop the gluten structure. Using both hands, grab both sides of the dough, pull it outwards (this is the "stretch"), then fold it inwards over itself. Rotate the dough and continue to stretch and fold until the dough feels very smooth. Watch my video for a full tutorial. Shape the dough into a ball by tucking the sides underneath and rolling it around the counter. The surface of the dough ball should pull smoothly without tearing.
- Bulk Fermentation (first rise). Place the ball into a lightly oiled bowl. Cover the bowl with plastic and then cover with a kitchen towel. Set it aside in a warm dark place and let it rise for 1-2 hours until nearly doubled in size. Note that the amount of time required will depend on the temperature of your kitchen.
- Divide the dough into two equal portions and pre-shape. Very lightly dust a work surface with flour and tip to dough out onto the surface. Divide the dough into 2 equal portions (approximately 750g each) and shape into balls. If you want to make three-piece loaves, you can divide into 6 equal portions (approximately 250g each) and shape into balls.
- Rest the dough. Cover the dough balls and rest them for 20 minutes. This will allow the gluten to relax from the tension built up during rounding.
- Prepare the pans and perform the final shaping. Spray or coat two 9x5 inch loaf pans lightly with oil. Use minimal to no flour when shaping as you need the dough pieces to adhere somewhat to the working surface. If shaping into logs, flatten and degas the dough balls with your knuckles. Pull the dough into a rough rectangular shape about 8-inches wide. Roll up the dough by starting at one end and moving across the width of the dough piece for a tight curl. Continue rolling up the dough until it is a log shape and seal the seam with heel of your palm. (Watch video for molding technique). It is important to build tension on the surface of the dough so it rises upward for better volume, as well as a nice dome shape vs. a flat top. Place the logs into the pan. If making three piece loaves, place three smaller dough balls into each pan and press them down with with your knuckles to fill out the corners of the pan.
- Proof the loaves (second rise). Cover the loaf pans to prevent the dough from drying out and place them somewhere warm to rise until fully proofed, or when the surface just slightly retains a finger imprint when pressed. I recommend to proof them uncovered in the oven on proof setting. I like to place a tray of off the boil water on a rack below the pans to keep the oven humid to prevent skinning of the dough. The optimal proofing conditions for this type of bread is around 30 degrees C (86 degrees F) at 85% humidity. If you proof at a lower temperature, it will take longer, but you will be rewarded with better flavor.
- Bake. Once fully proofed, bake them at 175 degrees C (350 degrees F) for around 35 minutes. Since they are quite large loaves you may need to lower your oven racks or they might brown too quickly on the top. You can check the internal temperature with a digital thermometer, which should read at least 94 degrees C (200 degrees F). Remove the loaves from the pan and place on a wire rack to cool to below 35 degrees C (95 degrees F) before slicing and/or packaging.
Hi…I love your recipes & your scientific take on baking. I’d love to make this bread & am interested in incorporating a tangzhong with it; can I pull out an equal ratio of flour, water, cook & cool it then add back in? maybe 200g? Thanks
I can’t wait to make this! Question, if I wanted to swap some of the AP flour for wheat could I just swap out for 1•1 ratio?
Hi Juliet! Yes you can use AP flour at the same ratio. Depending on the flour quality you might need to adjust/lower hydration slightly. You can hold back 40ml of water and add back or more as needed.
Hi , first off , i love all your recipes, esp the pumpkin series !!
Why oil and not butter ? Also , what changes do I make if i cannot get unbleached flour ? Thank you .
Thanks Manil! Oil helps maintain a soft texture, as it is unsaturated and liquid at room temperature. You can use butter but it won't be as soft. If all you have is bleached flour, you can use it, but you might need to adjust the hydration. Depending on the flour quality, there may be differences to the texture and volume.
Hi Christine
Does the water have to be a certain temperature before adding it to the dry ingredients? I just love all of your recipes.
Hi Tonya! Yes, if using a stand mixer at standard room temperature, use cool water around 16 degrees C / 60 degrees F. You want to aim for a final dough temperature after mixing of 24-26 degrees C / 75-80 degrees F.