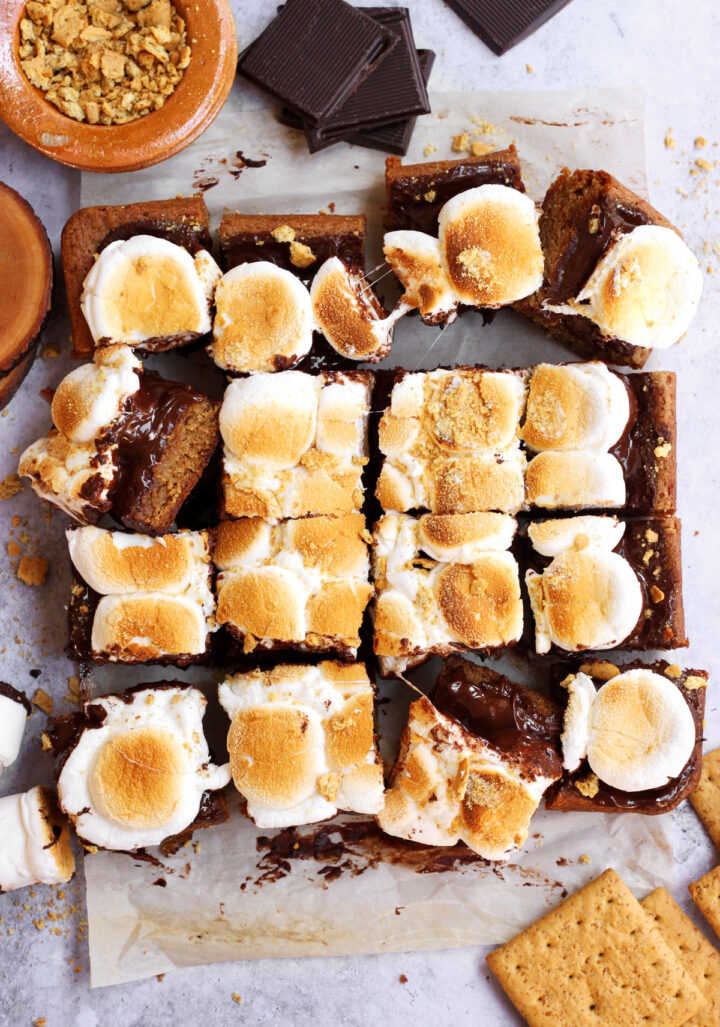
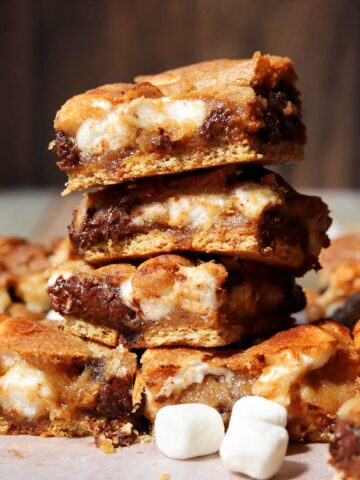
Toasted S'mores Bars
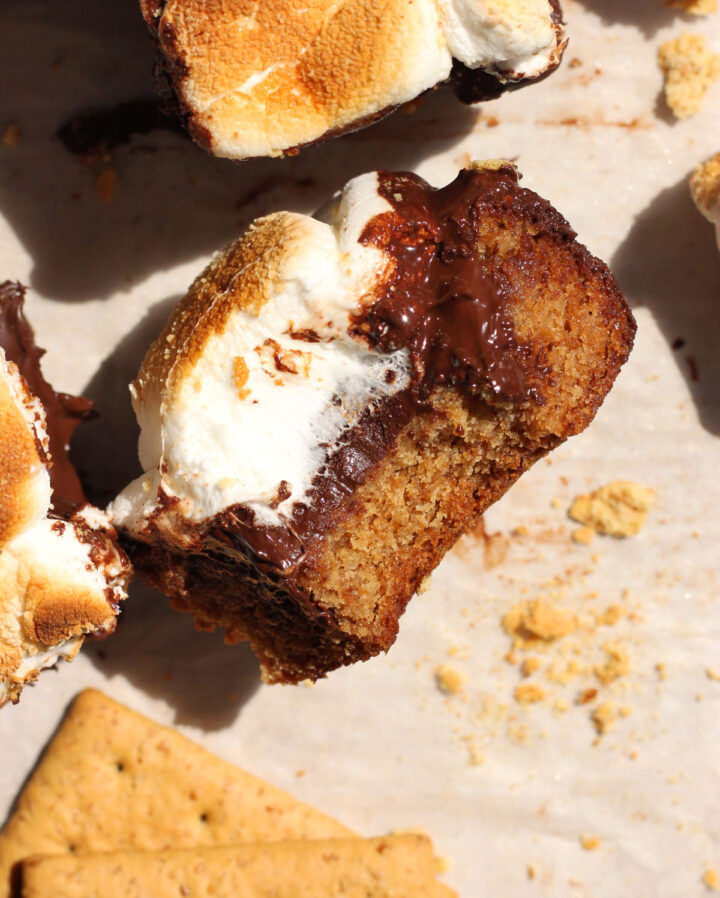
There's probably nothing s'mores-flavored that I don't like. These S'mores Bars are everything you love about s'mores baked all together in one pan; no campfire necessary. First there's a chewy brown sugar, honey-graham blondie base topped with a layer of dark chocolate and toasted marshmallows with extra graham cracker crumbs sprinkled on top. If you love s'mores as much as I do, try my S'mores Cookies too!

WHY THIS RECIPE WORKS
- Soft and chewy blondie bars - the base is like a blondie with a nice soft and chewy texture thanks to the honey in the recipe.
- Honey graham cracker flavor - the ingredients in the blondie batter, such as brown sugar, honey and cinnamon, make these bars taste just like graham crackers so you really don't miss out on having a traditional s'mores.
- Dark chocolate - although some might argue that classic s'mores use Hershey's milk chocolate, I prefer dark chocolate to balance the sweetness of the cookie dough and the marshmallows.
- Toasted marshmallows - what's a s'more without toasted marshmallows?! All you need to do is carefully toast the marshmallows under the broiler until nice and caramelized, then smash them down to make an ooey gooey topping.

INGREDIENTS
- Butter - you need melted butter to make the blondie base. Unsalted or salted butter works here. In fact, I really like salted butter to counteract the sweetness from the marshmallows.
- Granulated sugar - this recipe uses a combination of simple white granulated sugar and brown sugar. White sugar helps create the crunchy caramelized edges.
- Brown sugar - light brown sugar or dark brown sugar will work for this recipe. I prefer light brown sugar for its milder taste so that it doesn't overpower the honey.
- Honey - this is what makes the bars taste like graham crackers. Honey will add flavor but it will also give them a chewy texture as well as a very rich amber color.
- Egg - you'll need one whole egg for this recipe. Make sure it is at room temperature and not cold from the fridge. A cold egg will not blend evenly with the butter and sugar.

- Pure vanilla extract - vanilla is a very important ingredient in many sweet recipes. I like this Madagascar Bourbon Vanilla extract.
- Salt - a bit of salt rally elevates the rich buttery flavors in the blondies and balances the sweetness.
- Cinnamon - that's right! A hint of spice makes the cookie dough taste like graham crackers.
- All purpose flour - regular unbleached all-purpose flour makes the best chewy blondies in my opinion.


- Dark chocolate - you can use your favorite kind of chocolate in this recipe, but I really prefer bittersweet chocolate.
- Marshmallows - regular size marshmallows get smashed right on top after a minute under the broiler to get nice and toasty. You can also use mini marshmallows, but then you will need at least twice as many to cover the surface.
- Graham crackers - this is optional since the blondie base tastes like a graham cracker, but if you have a few laying around, you can crumble some graham crackers on top after baking.

STEP BY STEP INSTRUCTIONS
- STEP 1). Blend wet ingredients. Combine melted butter, brown sugar, vanilla, honey and egg in a large bowl and whisk to blend well until well combined, smooth and glossy.
- STEP 2). Add dry ingredients. Mix in salt, cinnamon and baking soda. Add flour and fold it in until evenly combined.
- STEP 3). Bake. Spread the thick batter evenly into your prepared pan. Bake until the top is evenly golden brown and the edges are browned. Leave the oven on.
- STEP 4). Spread on chocolate. Immediately lay squares of chocolate over the surface while it is still warm. Once the chocolate is melted after about 5-8 minutes, spread it out evenly.
- STEP 5). Toast the marshmallows. Place marshmallows round-side-up over the chocolate to completely cover it then place the pan back in the oven for 8-10 minutes to gently melt the marshmallows. Then, turn on the broiler and watch very carefully until the tops of the marshmallows are toasted. This should only take a minute - do not take your eye off of them since they can go from toasted to burnt in a matter of seconds! If your broiler has different heat settings, choose "low".
- STEP 6). Smush the marshmallows. As soon as you pull the bars out of the oven, press on the tops firmly with the back of a spatula to squish the marshmallows down. Sprinkle graham cracker crumbs on top.
- STEP 7). Cool. Let them cool completely and then slice with an oiled knife so that the marshmallow doesn't stick. Store in an airtight container for up to 3 days.

EXPERT BAKING TIPS
- Let the butter cool a bit. If you make the blondie batter with hot butter, it will have a tendency to be greasy.
- Make them by hand. This simple recipe is best made by hand so you can ensure you don't over-mix the batter.
- Be cautious with the broiler. Marshmallows can go from toasted to burnt in a matter of seconds so watch them carefully and don't look away.
- Don't skimp on the salt. Salt really helps enhance the flavor of these bars and balances the sweetness from the marshmallows.
RECIPE FAQ
I wrote this recipe with unsalted butter so you can control the salt that you add, however you can also use salted butter. If you choose to use salted butter, then reduce the added salt by half to ¼ teaspoon.
There is no one secret, but there are many techniques and ingredients that contribute to the chewy texture of blondies. Firstly, brown sugar contains molasses which is a liquid sugar that traps moisture and keeps the them soft and chewy. Then the honey is a powerful moisture binding ingredient that prevents the bars from drying out.
You can use regular or mini marshmallows for this recipe. If you use mini marshmallows you will need enough to cover the surface which will be about 3 cups and the time to toast under the broiler will be shorter, so keep a close eye.
To make blondies stay soft and chewy it is important to NOT over-bake them, then store them in an airtight container. Honey is also a secret ingredient that keeps the texture soft for days.
Although milk chocolate is typically used for s'mores, I most definitely prefer dark chocolate! There is so much sweetness from the marshmallows and in the cookie dough that the dark chocolate really helps to counteract that.

STORING AND FREEZING
Store these bars in an airtight container at room temperature for up to 3 days.
To freeze these bars, let them cool completely and then wrap each on in plastic. Then place each on in a resealable freezer bag and freeze for up to 3 months.

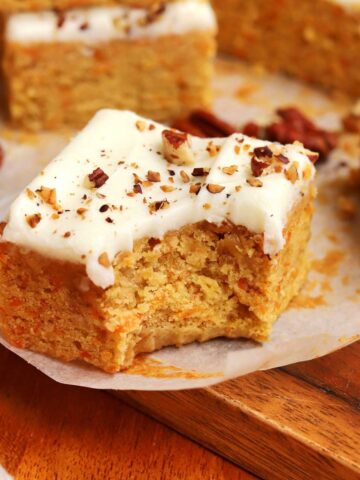
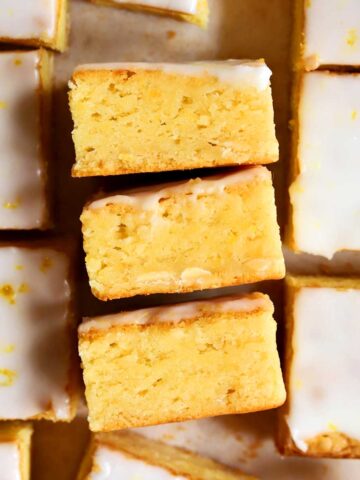
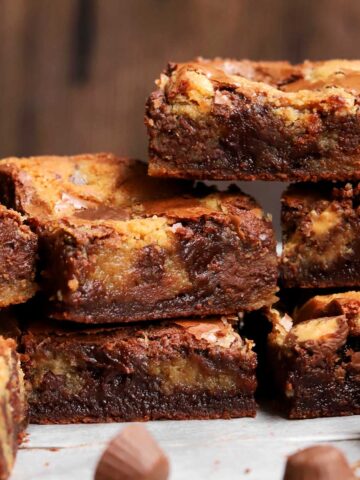
More Bars & Squares
Looking for more bar recipes like this? Try these:
Summer Baking
Here are more Summer baking ideas:

If you love bars, check out these recipes!
Peanut Butter Fudge Swirl Brownie Bottom Cheesecake Better Than Box Brownie Mix Recipe The BEST Small Batch Fudge Brownies Buckeye Peanut Butter Fudge Brownies BEST Fudgy Brownie Recipe with Shiny Crust The BEST Fudgy Flourless Brownie Cookies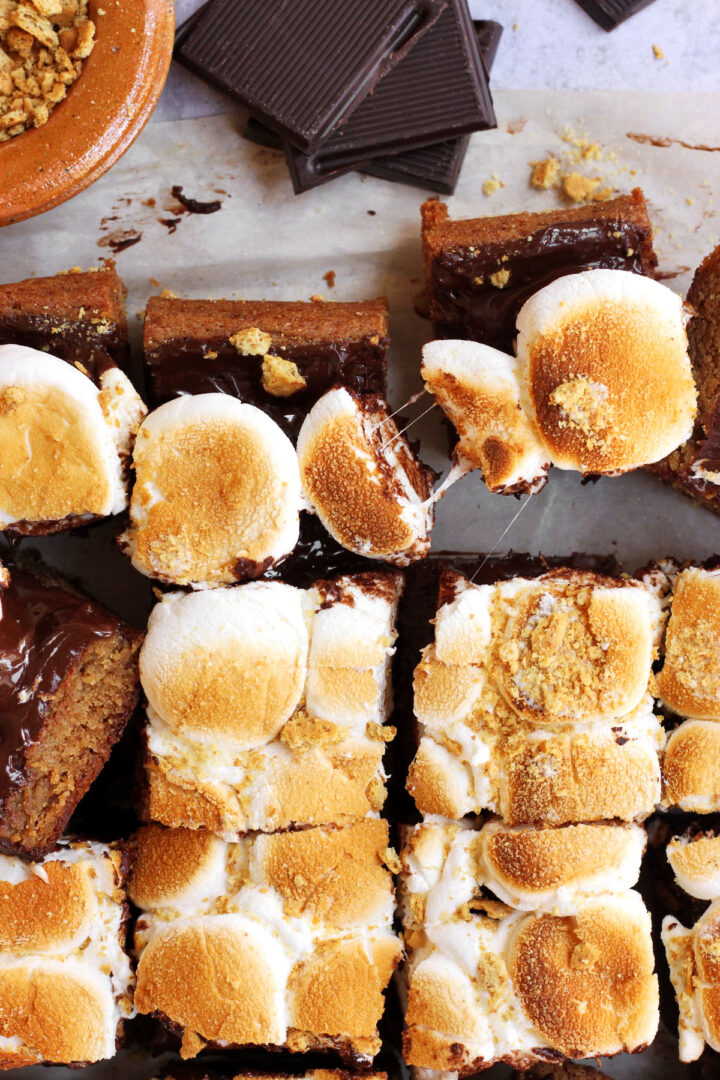
Video
S'mores Bars

Ingredients
- ½ cup 113g unsalted butter, melted
- ¾ cup 165g packed light brown sugar
- 1 tablespoon 15ml honey
- 1 teaspoon 5ml pure vanilla extract
- 1 large egg at room temperature
- ½ teaspoon salt
- ½ teaspoon ground cinnamon
- ¼ teaspoon baking soda
- 1 cup plus 2 tbsp 160g all-purpose flour
- 6 oz 170g dark chocolate from about 2 bars of chocolate (enough to cover the surface)
- 27 regular sized marshmallows
- 2 graham crackers crushed for topping (optional)
Instructions
- Preheat oven to 350°F. Line an 8x8-inch pan with parchment paper leaving a 2-inch overhang at each side.
- Combine melted butter, brown sugar, vanilla, honey and egg in a large bowl and whisk to blend well until well combined, smooth and glossy. Mix in salt, cinnamon and baking soda. Add flour and fold it in until evenly combined.
- Spread the thick batter evenly into your prepared pan. Bake for 22-25 minutes until the top is evenly golden brown and the edges are browned. Leave the oven on.
- Immediately lay squares of chocolate over the surface while it is still warm. Once the chocolate is melted after about 5-8 minutes, spread it out evenly. Place marshmallows round-side-up over the chocolate to completely cover it then place the pan back in the oven for 8-10 minutes to gently melt the marshmallows. Then, turn on the broiler and watch very carefully until the tops of the marshmallows are toasted. This should only take a minute - do not take your eye off of them since they can go from toasted to burnt in a matter of seconds! If your broiler has different heat settings, choose "low".
- As soon as you pull the bars out of the oven, press on the tops firmly with the back of a spatula to squish the marshmallows down. Sprinkle graham cracker crumbs on top. Let them cool completely and then slice with an oiled knife so that the marshmallow doesn't stick. Store in an airtight container for up to 3 days.
Hello!
😍😍
How long can these be left in the fridge? I am thinking of making it for a holiday potluck.
Thanks
Hi Ym! You can store these bars in an airtight container at room temperature for up to 3 days. If you keep them in the fridge they will firm up and you will need to bring them to room temperature.
Thank you for the quick response 😊
One more Q - any recommendations for a work potluck dish that will impress?
I'm partial to Thai food, so anything authentic Thai 🙂
These are great! I loved the honey blondie base.
I loved these! The honey cookie base is nice and chewy with all that chocolate and toasty marshmallows on top. It’s very creative.
These are fantastic. Everyone loves them.
Whoa these are so good! What a treat. They turned out fantastic.