
No Churn Chocolate Crackle Ice Cream
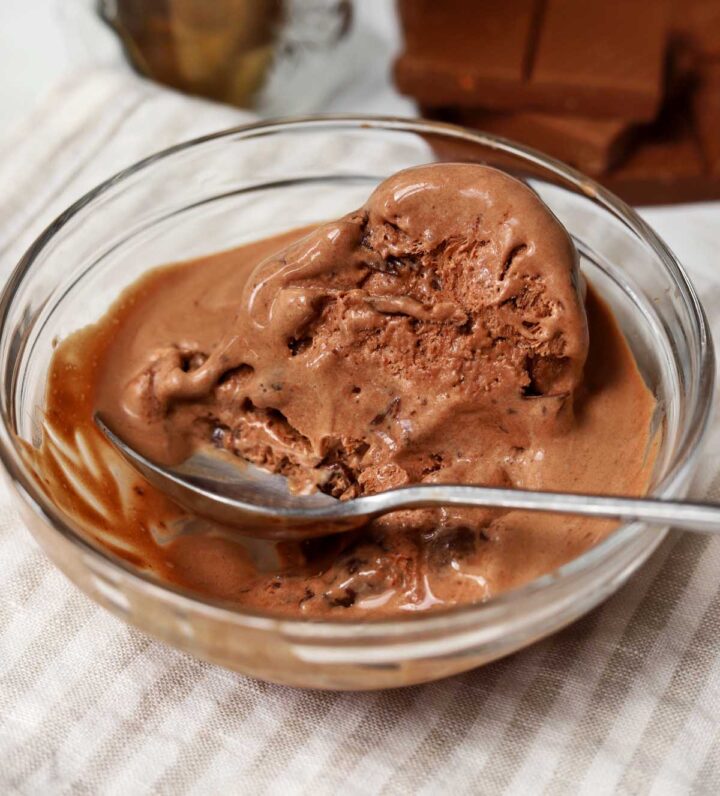
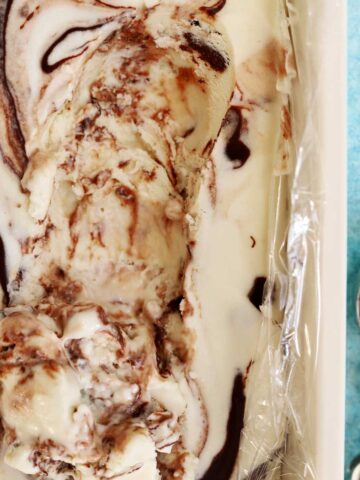
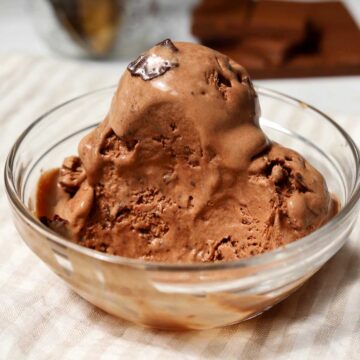
Smooth, creamy and with intense chocolate flavor, this No Churn Chocolate Crackle Ice Cream is the ultimate homemade Summer treat. You don't need any special equipment to make chocolate no churn ice cream. This recipe has both cocoa powder and melted chocolate for the purest chocolate taste and there's a cracking chocolate swirl that creates flakes of chocolate in every bite, similar to Straciatella. It's rich, creamy and completely irresistible. If you love this idea, you may also like my No Churn Espresso Fudge Ice Cream, as well as these Strawberry Banana Popsicles and Creamy Mango Popsicles too!
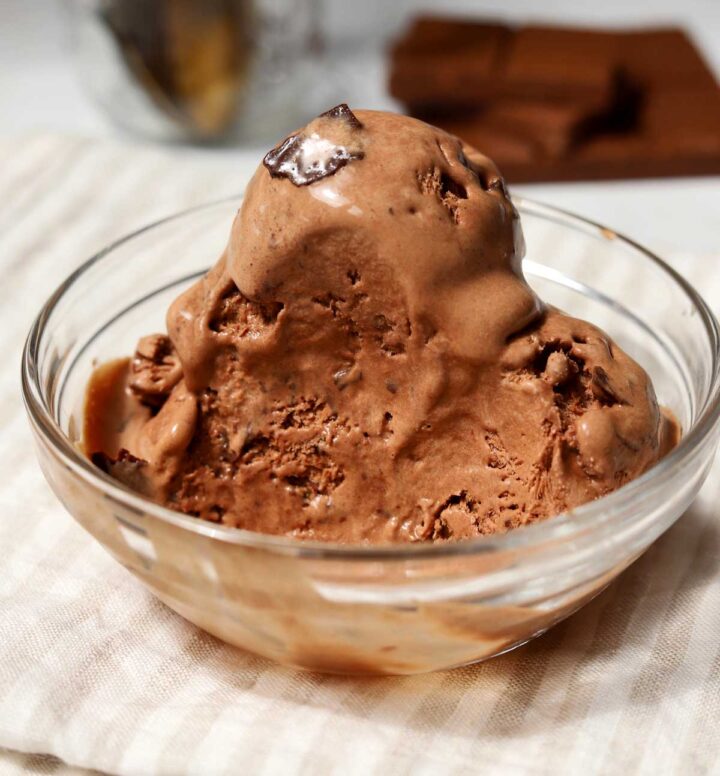
WHY THIS RECIPE WORKS
- Easy to make - this is a simple recipe with few steps. You don't need special equipment to make no churn ice cream.
- Simple ingredients - you only need a few ingredients to make this ice cream, including pure chocolate, cocoa, cream and sweetened condensed milk. I also use evaporated milk which adds another dimension of rich flavor and creaminess.
- Rich creamy chocolate ice cream - pure melted dark chocolate and cocoa powder add so much chocolate flavor that I always find lacking in store-bought chocolate ice cream. Evaporated milk makes it extra luxurious with a smooth and creamy texture.
- Whipped cream for air incorporation - ice cream gets its creamy texture and structure from a fine network of air bubbles trapped by frozen fat globules (fat coalescence). Pre-whipping cream adds the air that an ice cream machine would normally incorporate.
- Small ice crystallization - small ice crystals are what give ice cream a smooth texture and an ice cream machine that freezes the base evenly creates those fine crystals. To help prevent large ice crystals in no churn ice cream, it is important to increase the solids content in the water phase by using liquid sugars and condensed milk. A little bit of corn syrup or honey can reduce the freezing point so that ice cream is still scoopable at very low temperatures, as well as prevent large ice crystals from forming.
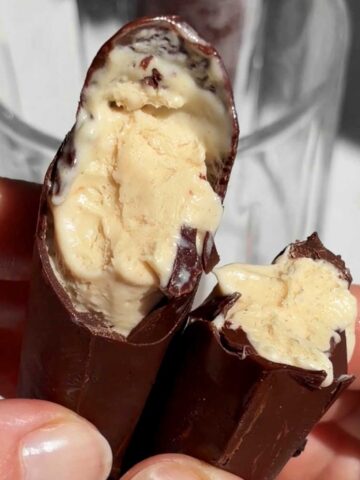
- Chocolate crackle - a unique mixture of chocolate and coconut oil creates this hard cracking chocolate swirl that melts only when it hits your tongue. It is such a wonderful textural experience with the creamy ice cream.
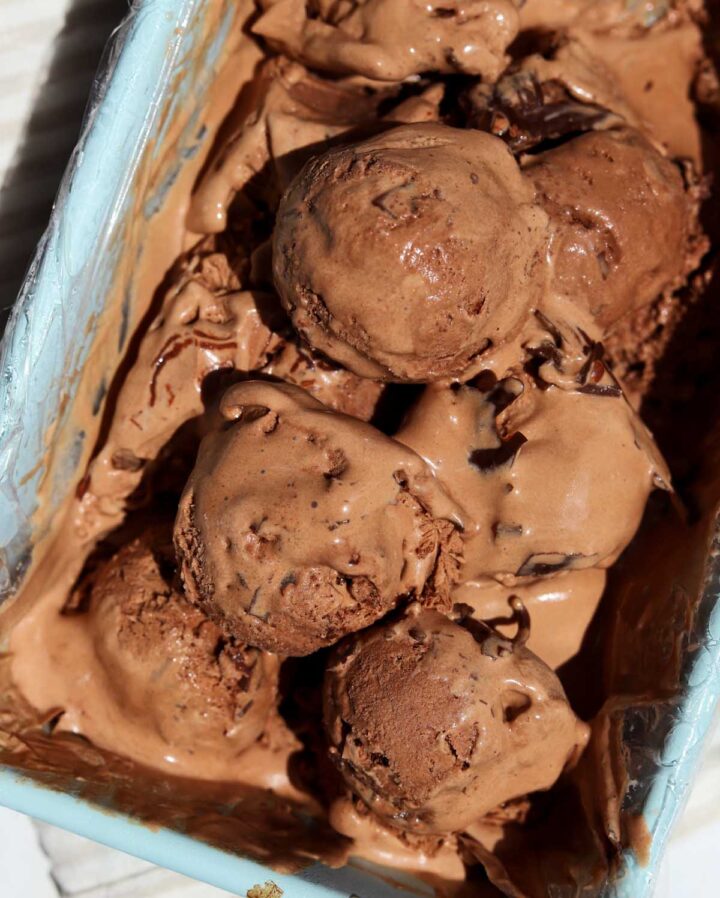
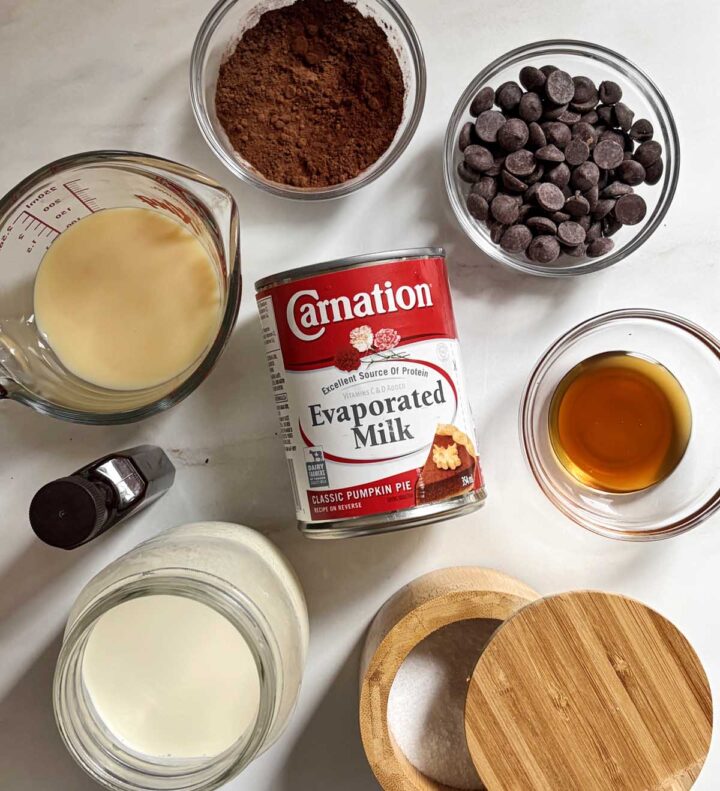
INGREDIENTS FOR NO CHURN CHOCOLATE ICE CREAM
- Dark chocolate - use pure dark chocolate for the best texture and flavor. Although I love bittersweet chocolate, I recommend semisweet chocolate for this recipe since it has the right sugar content to create that creamy texture.
- Sweetened condensed milk - this product is milk with added sugar that has been cooked long enough that it reduced to a thick syrup with almost 50% sugar content. It adds milk solids (protein, fat and sugar) to the ice cream base which helps soften the texture and lower the free water content, which makes less water available for freezing into large ice crystals.
- Evaporated milk - this is my secret ingredient to elevate the rich creamy flavor. Evaporated milk is around 6% milk fat and also has a cooked dairy flavor (almost caramel-like) that enhances the chocolate taste.
- Cream - you'll need whipping cream which has 35% milk fat content to whip to nice soft peaks.
- Vanilla extract - use the best vanilla here as it will really shine.
- Corn syrup or honey - a little bit of corn syrup will help to prevent large ice crystal formation.
- Cocoa powder - this adds intense chocolate taste without adding high amounts of cocoa butter which is a very hard fat that can make the ice cream more "dry" or chalky since it melts at higher temperatures.
- Salt - this is so important for chocolate desserts and elevates the flavor while balancing the sweetness.
STEP-BY-STEP INSTRUCTIONS
- STEP 1). Make the chocolate crackle. Place chopped chocolate and coconut oil in small heatproof bowl and microwave on 50% power in 20 second increments while stirring in between until melted and smooth. You can also melt it over a double boiler. Add cocoa powder and salt and stir it in. Set aside to cool slightly.
- STEP 2). Make the chocolate base. Combine evaporated milk and cocoa powder in a 1 quart saucepan and whisk to blend. Place it over medium-low heat and continue whisking until the cocoa powder is well incorporated and the mixture resembles hot cocoa. It should not boil, but it should be quite hot. Remove from the heat and add the chopped chocolate. Let it stand for a minute then whisk until smooth and the chocolate is completely melted. Pour it out into a clean bowl. Mix in vanilla and salt, then mix in condensed milk and corn syrup or honey.
- STEP 3). Chill the chocolate base. Place it in the freezer for 20-30 minutes until thoroughly chilled. Stir it once after 10 minutes to ensure it cools evenly.
- STEP 4). Whip the cream. Place cold cream in a medium bowl and use an electric hand mixer (or a stand mixer fitted with a whisk attachment) to whip it until it forms soft peaks. This will take 2-3 minutes on medium-high speed.
- STEP 5). Combine whipped cream and chocolate base. Add the chilled chocolate mixture to the bowl with the whipped cream and fold it together until evenly blended.
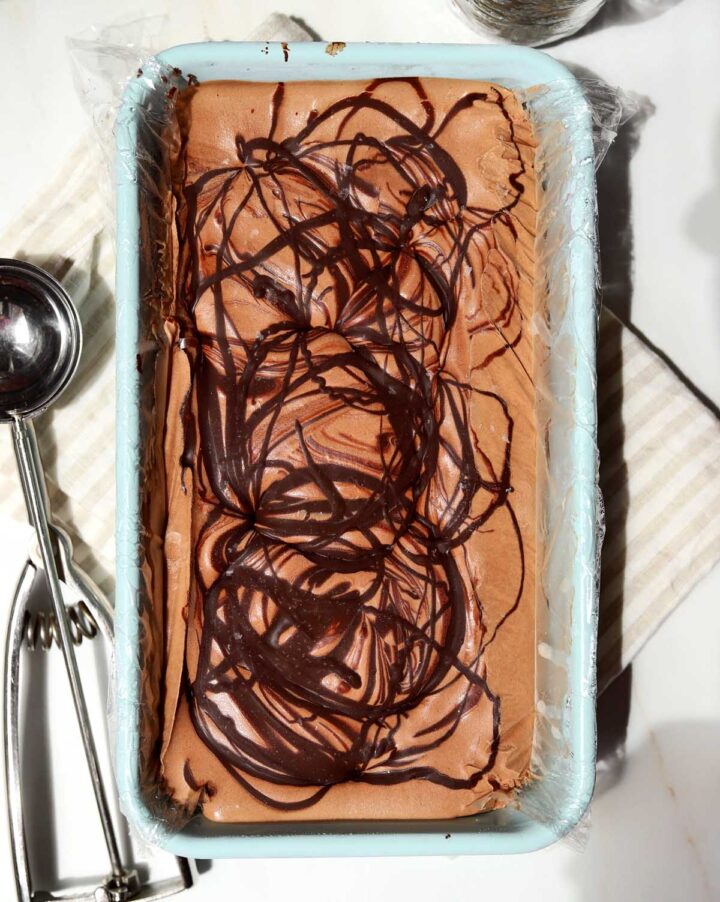
- STEP 6). Assemble ice cream. Transfer the ice cream mixture to the prepared loaf pan, then drizzle the chocolate crackle mixture across the top. Use a butter knife to barely swirl it in. Do not swirl too much or the crackle will just blend in instead of staying as distinct chocolate shards in the final ice cream. If you're using a tall 1L freezer container, then add half of the ice cream, followed by half of the chocolate crackle and then repeat these layers one more time.
- STEP 7). Freeze. Cover tightly with plastic wrap and place it in the freezer for at least 8 hours. Keep it tightly covered and enjoy it for up to 2 months. Let it soften in the fridge for about 20 minutes before scooping.
EXPERT TIPS FOR NO CHURN CHOCOLATE ICE CREAM
- Let the chocolate mixture cool completely and chill until cold. This will ensure it doesn't melt the whipped cream when you mix it in.
- Whip cream to soft peaks. For the creamiest flavor, do not over-whip the cream or it can become grainy.
- Use pure dark chocolate. Pure chocolate contains only cocoa butter as the fat source and does not contain any vegetable oils like palm oil or coconut oil. It will create the best texture and flavor.
- Use some liquid sugar to prevent large ice crystallization. Although it is optional, corn syrup will help to preserve the smooth texture.
RECIPE FAQ
I do not recommend using milk chocolate as there is already enough cream and milk in the recipe, and it will add a lot more sugar which can increase the sweetness. It will make a very creamy texture due to the extra sugar, however the chocolate flavor will be muted.
This chocolate no churn ice cream takes at least 6 hours to freeze solid.
This no churn chocolate crackle ice cream will keep in the freezer for up to 2 months.
More No-Bake Treats
Looking for more recipes that don't require an oven? Try these:
Summer desserts
Here are more delicious recipes to make in the Summertime:
Video
No Churn Chocolate Crackle Ice Cream
Ingredients
Chocolate Ice Cream Base:
- ½ cup (120ml) evaporated milk
- ¼ cup (21g) cocoa powder (I prefer this Dutch cocoa or this one)
- 3 oz (85g) semisweet dark chocolate
- ½ teaspoon pure vanilla extract
- pinch of salt
- ⅔ cup (160ml/210g) sweetened condensed milk
- 1 tablespoon (15ml) golden corn syrup or honey
- 1 ¼ cup (300ml) 35% whipping cream
Chocolate Crackle:
- 2 oz (56g) semisweet dark chocolate
- 2 teaspoon (10g) coconut oil
- 1 teaspoon (2g) cocoa powder
- two big pinches of salt
Instructions
- Line a standard 1-pound loaf pan with parchment paper or set out a large freezer-safe container. I also use a one quart or 1L deli container.
- Make the chocolate crackle. Place chopped chocolate and coconut oil in small heatproof bowl and microwave on 50% power in 20 second increments while stirring in between until melted and smooth. You can also melt it over a double boiler. Add cocoa powder and salt and stir it in. Set aside to cool slightly.
- Make the ice cream. Combine evaporated milk and cocoa powder in a 1 quart saucepan and whisk to blend. Place it over medium-low heat and continue whisking until the cocoa powder is well incorporated and the mixture resembles hot cocoa. It should not boil, but it should be quite hot. Remove from the heat and add the chopped chocolate. Let it stand for a minute then whisk until smooth and the chocolate is completely melted. Pour it out into a clean bowl. Mix in vanilla and salt, then mix in condensed milk and corn syrup or honey.
- Place it in the freezer for 20-30 minutes until thoroughly chilled. Stir it once after 10 minutes to ensure it cools evenly.
- Place cold cream in a medium bowl and use an electric hand mixer (or a stand mixer fitted with a whisk attachment) to whip it until it forms soft peaks. This will take 2-3 minutes on medium-high speed.
- Add the chilled chocolate mixture to the bowl with the whipped cream and fold it together until evenly blended.
- Transfer the ice cream mixture to the prepared loaf pan, then drizzle the chocolate crackle mixture across the top. Use a butter knife to barely swirl it in. Do not swirl too much or the crackle will just blend in instead of staying as distinct chocolate shards in the final ice cream. If you're using a tall 1L freezer container, then add half of the ice cream, followed by half of the chocolate crackle and then repeat these layers one more time.
- Cover tightly with plastic wrap and place it in the freezer for at least 8 hours. Keep it tightly covered and enjoy it for up to 2 months. Let it soften in the fridge for about 20 minutes before scooping.
Hi Christina! Your recipes are always so interesting to read because of the science behind each ingredient. I have a question for you. I was wondering if you think I could turn this recipe into a frozen yogurt by using 1 1/4 cups of yogurt (and halving the other ingredients), or 2 1/2 cups of yogurt (and keeping all other ingredients the same quantities, since the heavy cream would double in volume upon whipping)? I'd love to try it, but I thought I'd ask your thoughts before doing so even if you've not tried it yourself. Thank you for your input.
Hi Lauren! You are welcome to try it; however, I think it will yield a very dense frozen product with coarse/large ice crystals. This is due to less air incorporation and a lot less fat vs the whipped heavy cream. It will be very hard and more difficult to scoop even with some tempering in the fridge.
Excellent recipe
Thanks Shami!
Can we add some brownie chunks to it...will it make it too sweet or we need to adjust the recipe or use the chunk just as a add in???
HI Sulochana! Sounds delicious. I would just fold them in at the end.