Your favorite Halloween candy? Go: ______! If you say "Reese's" then you will love my recipe for Homemade Chocolate Peanut Butter Cups with a healthier sweet and salty peanut butter filling and smooth dark chocolate shell! Mine was the mini Aero bars. I was obsessed with Aero as a kid... and then Caramilk and then Reese's cups. Halloween candy is so great, and then when you taste it 20 years later you're like, "Damn, that's sweet!"

Funny how our taste in food develops over time. I mean... I like sweet, but sometimes even I have a threshold.
These homemade Chocolate Peanut Butter Cups are not only delicious, but they are good for you! They taste just like Reese's peanut butter cups, except way better!
They're made with just 4 ingredients and you can use the darkest chocolate you can find. It's up to you.

HOW TO MAKE PEANUT BUTTER CUP FILLING
All you need to do is combine the ingredients until it forms a thick paste.
It's made from just these 4 ingredients:
- peanut butter
- almond flour
- maple syrup
- salt

Once the paste comes together, you simply portion it out and form little disks or patties. It's that easy! The texture of the filling is just perfect - it's very similar to a Reese's peanut butter cup, but without the hydrogenated oils and all that sugar. Plus, these have intense peanut butter flavor which makes them that much better!

WHAT TYPE OF CHOCOLATE TO USE FOR HOMEMADE CHOCOLATE PEANUT BUTTER CUPS?
Once you have all of your filling disks ready, it's time to melt the chocolate for the coating. I strongly recommend dark chocolate for these homemade chocolate peanut butter cups. Chocolate with greater than 60% cocoa solids is best because it will have a higher cocoa butter content which means it will flow more easily, and also taste great! I used 85% cocoa chocolate for this recipe and loved it. The chocolate is melted down with a bit of coconut oil which helps to make it more fluid chocolate for easy coating, and it also softens the texture of the coating so it has a soft bite at room temperature.
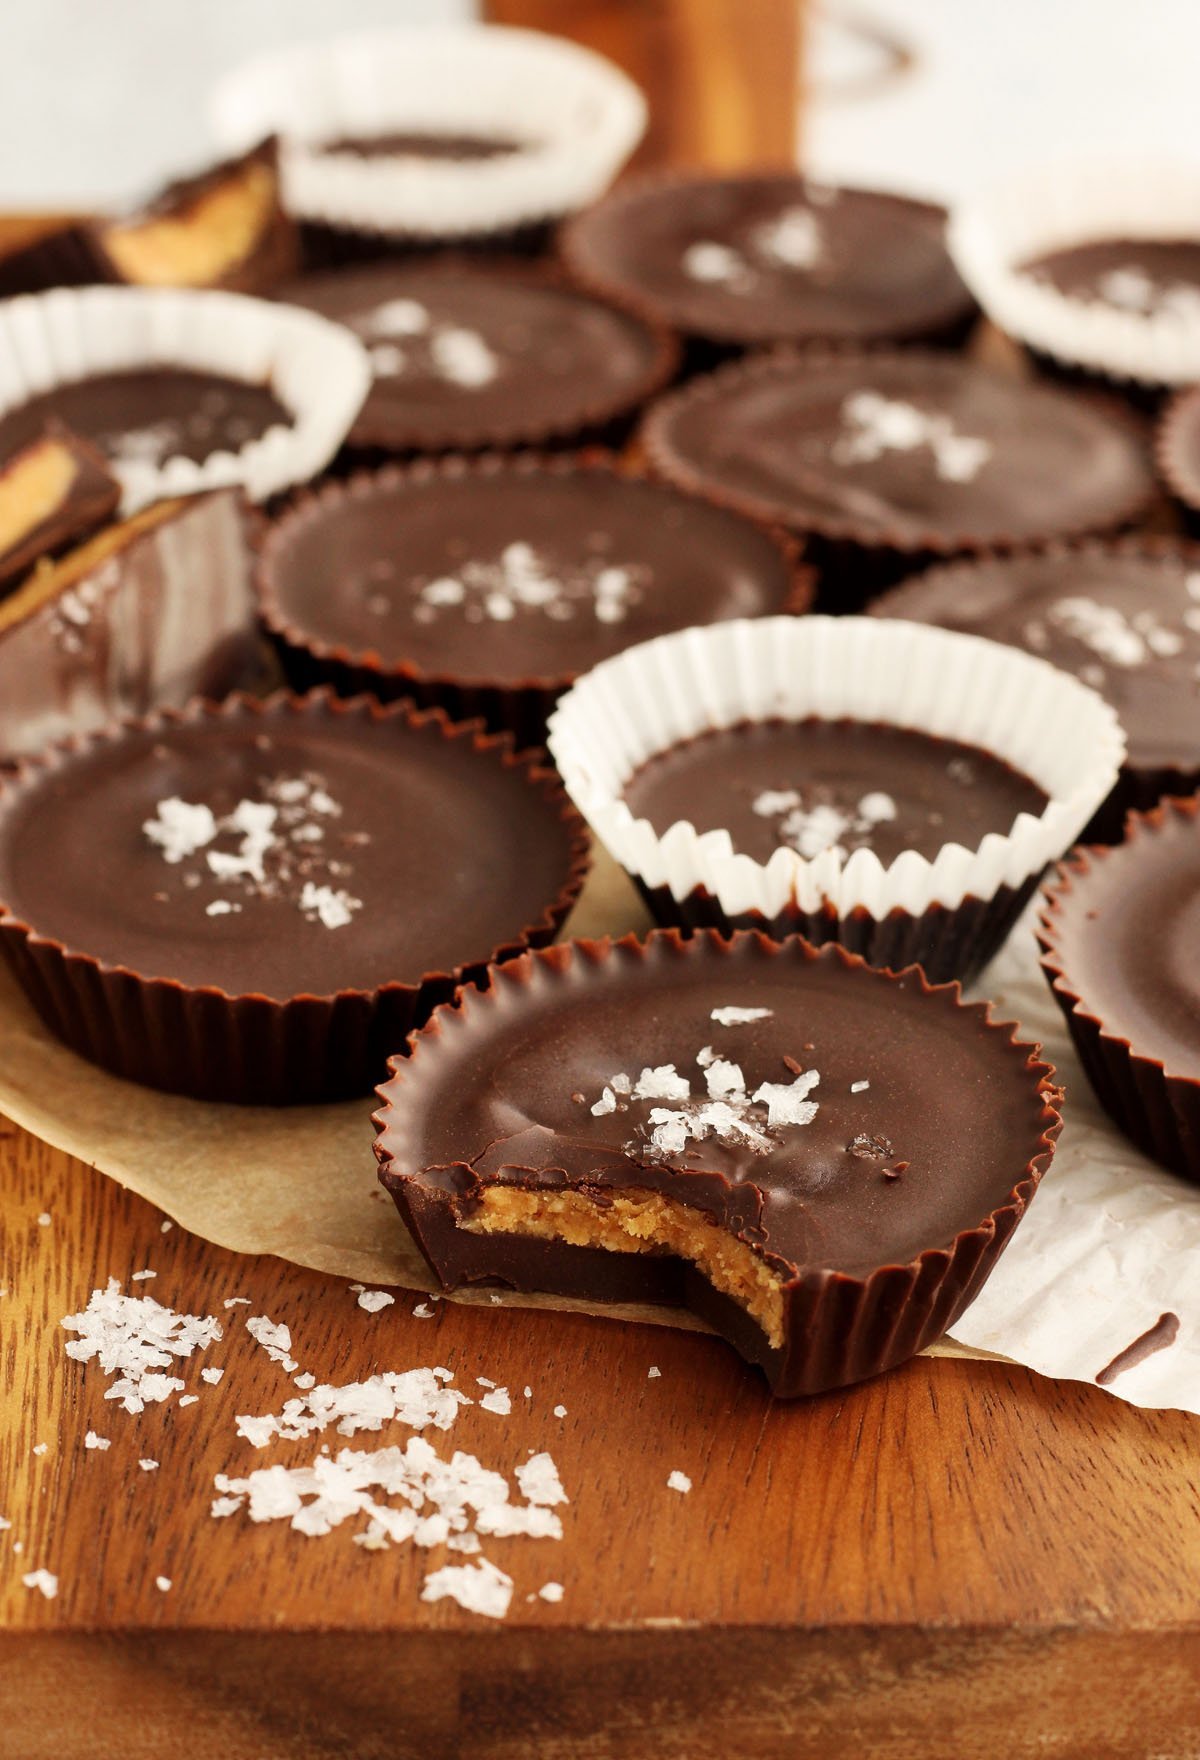
HOW TO MAKE HOMEMADE CHOCOLATE PEANUT BUTTER CUPS:
To make these cups, it is important to have paper cupcake liners. You can use the standard size or make mini ones!
- STEP 1). Stand the cupcake liners up on a baking tray or place them in a muffin pan to hold them upright.
- STEP 2). Spoon about a teaspoon of melted chocolate coating into the base of each paper. Push it out slightly to the sides to build up an edge and completely cover the bottom.

- STEP 3). Place a peanut butter patty into the center of the chocolate base, but make sure that the disk is just slightly smaller than the diameter of the base so that it fits in nicely with chocolate all around it. Gently press the disk into the chocolate to help push some of the coating up around it, but don't let it touch the bottom.
- STEP 4). Spoon some more chocolate over the peanut butter disk to cover it completely. Smooth it out with the back of a spoon or tap the pan on the counter to level it out. Sprinkle with flaky salt if desired and then refrigerate until set!

HOW LONG TO STORE CHOCOLATE PEANUT BUTTER CUPS?
These delicious little treats will keep at room temperature for up to 2 weeks, and up to a month in the fridge. If you like them soft, keep them at room temperature, but if you like the texture of a crackly chocolate shell, then eat them straight from the fridge. I like them both ways!

These homemade peanut butter cups are naturally gluten free, dairy free and vegan as well!
If you prefer healthier recipes, check out more of Christina's vegan recipes here:
Healthier Homemade Tahini Twix Bars (Vegan and Gluten-free)
Double Chocolate Zucchini Bread
Easy Almond Raspberry Lemon Bars (gluten free)
Healthier Homemade Dark Chocolate Peanut Butter Cups
Ingredients
Filling:
- ½ cup 120ml smooth natural unsalted peanut butter
- 2 tablespoon 30ml maple syrup
- ¼ - ⅓ cup 25g-35g fine almond flour
- ⅛ teaspoon salt
Coating:
- 7 oz 200g dark chocolate (60-70% cocoa)
- 2 teaspoon 10ml coconut oil
Instructions
- Line a standard cupcake pan with paper liners, or place liners standing up on a baking tray.
- For the filling, stir together peanut butter, maple syrup, ¼ cup almond flour and salt until it forms a stiff paste. Add more almond flour if it is still too loose, then refrigerate for about 15 minutes until it is stiff enough to shape.
- Roll heaped teaspoons of the mixture into smooth balls then flatten them in your hands and shape them into little disks or patties with a diameter just slightly smaller than the base of your paper liners.
- Melt together dark chocolate and coconut oil until smooth over a double boiler or in the microwave. Spoon about a teaspoon of the melted chocolate into each cup, spreading it out to cover the base and pushing it slightly up the sides to form an edge. Place a peanut butter patty into each cup and press it down gently so that some of the chocolate comes up the sides. Spoon more chocolate over top to cover evenly. Sprinkle with sea salt and refrigerate until set.



Paige
I made these for my friend who can't eat gluten and she loved them! She asked me to make them again.
christina.marsigliese
I guess you’re baking again this week lol
KB
these are so addictive!
christina.marsigliese
They are!
melike
wow these are so delicious and so easy to make! I will definitely make them again.
Tammy
I made these on the weekend to share with my book club friends and they were loved by all! Thank you.
christina.marsigliese
Thanks Tammy! Glad everyone enjoyed them.
Marielle
I made these at Christmas to add to my cookie tray and they were a huge hit!
christina.marsigliese
That's fantastic! So great that you tried something new!
Steph
These are so super easy to make and taste way better than reese’s. Healthier too!