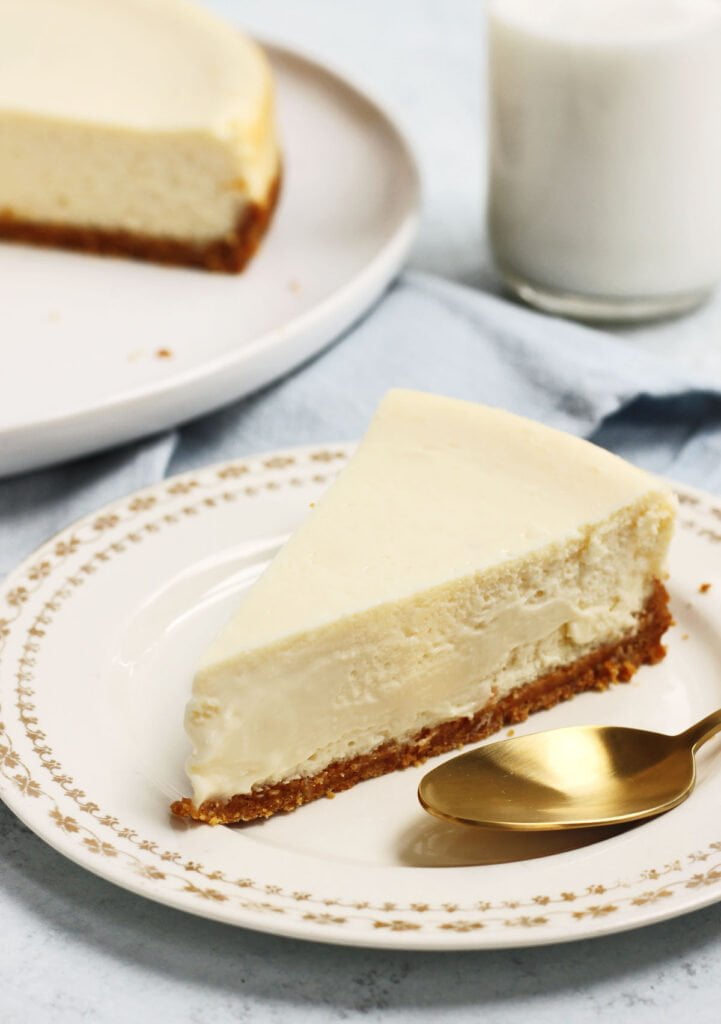
Perfect Creamy Vanilla Cheesecake
Everyone needs a go-to cheesecake recipe and this is mine! My Perfect Vanilla Cheesecake Recipe is so silky smooth with a creamy filling over a classic graham cracker crust. It makes a modest cheesecake from just 2 packages of cream cheese to feed a small crowd. Cheesecake is very rich so I think most people enjoy it in small slices, and it is a perfect canvas for this beautiful raspberry topping. Best part? No water bath required with my secret ingredient! If you love cheesecakes, be sure to check out my Caramel Apple Crumble Cheesecake, Strawberries & Cream Cheesecake and my New York Style Cheesecake.

WHY THIS RECIPE WORKS
- Easy to make - this cheesecake is simple to prepare with only a few ingredients. There's also no fancy tricks required to make it smooth and without cracks.
- No water bath cheesecake - this cheesecake stays nice and smooth without cracking even without using a water bath! Instead, you create a steamy environment in the oven with a separate pan of water. Continue reading below to learn how to prevent cracks in cheesecake, and alternatives to using a water bath.
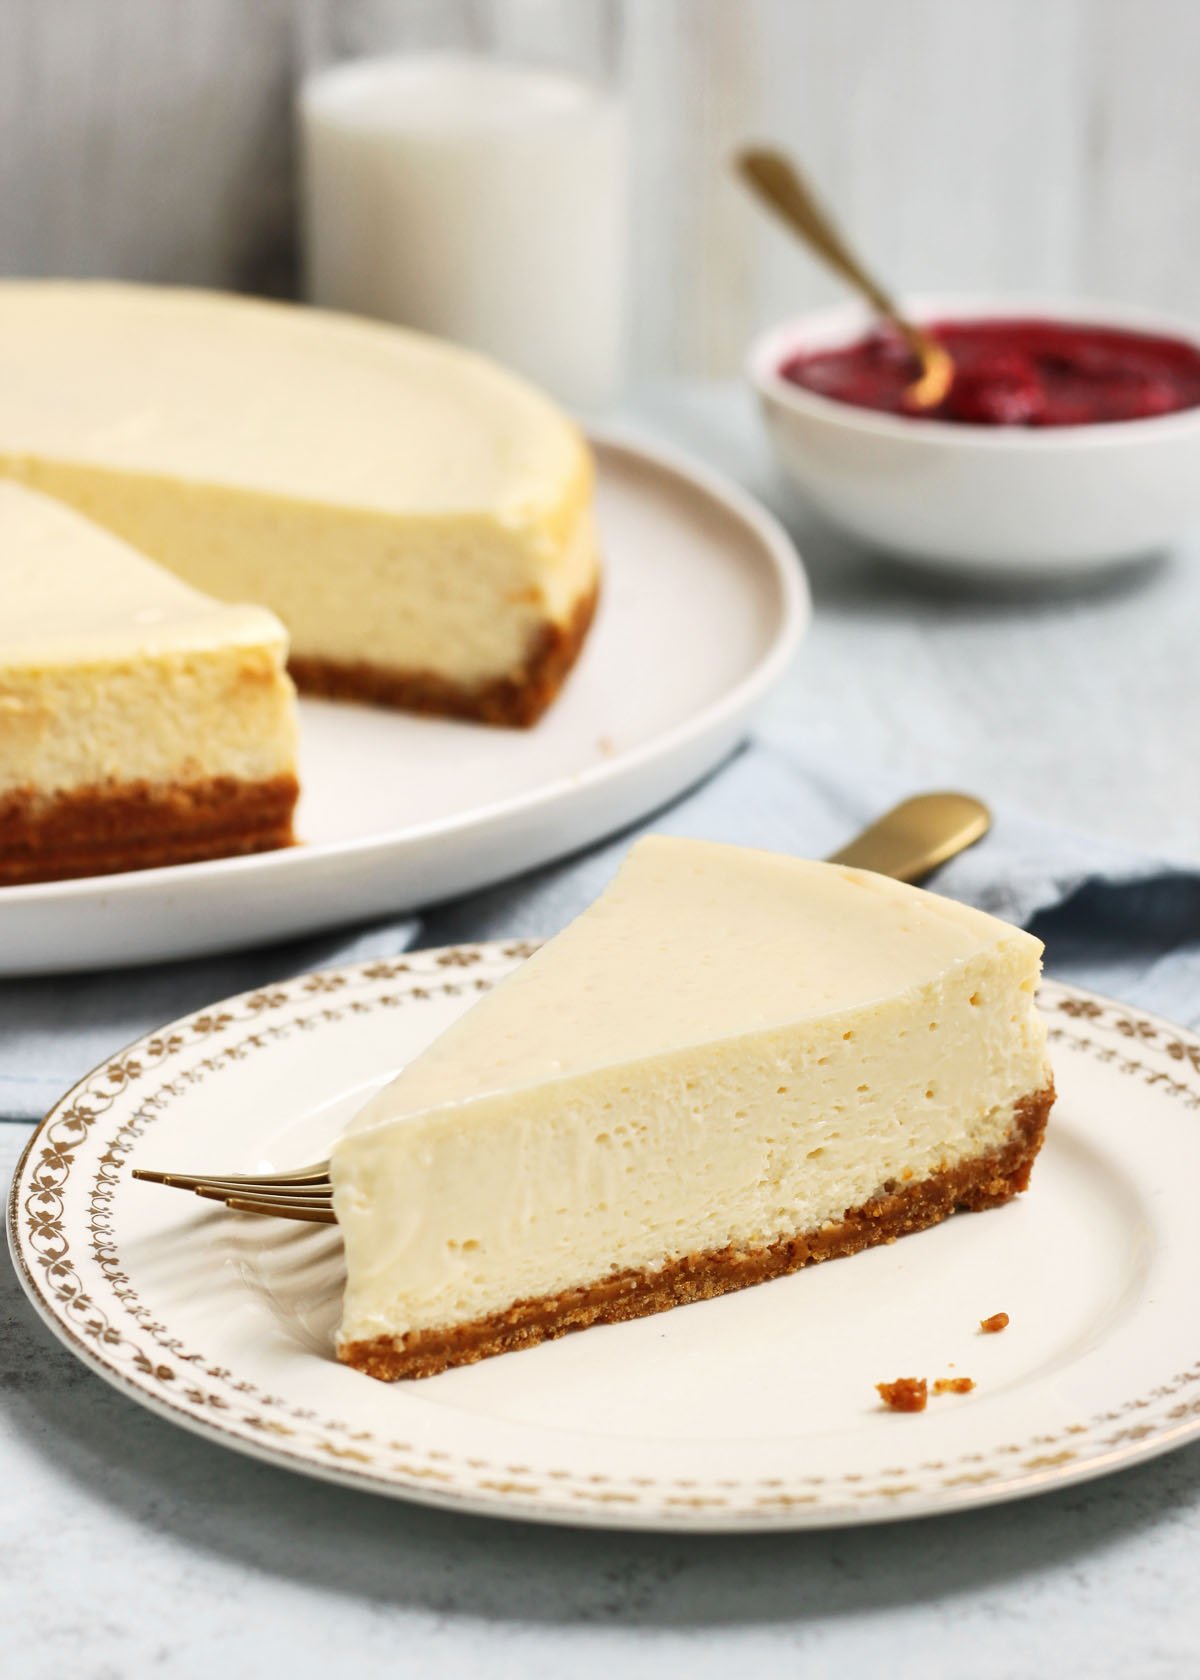
- EXTRA creamy texture - the filling is super creamy and silky. It is the best cheesecake you will ever taste! Read below to see the *not so secret* ingredient.
- Pure vanilla cheesecake flavor -the simplicity of pure vanilla shines so well in this creamy cheesecake and it tastes so classic. You can pair it with anything, and I suggest you dress it up with fresh fruit or this ruby raspberry topping.

WHY DOES CHEESECAKE CRACK?
It's not uncommon for cheesecake to crack right down the center shortly after you pull it from the oven as it starts cooling. There are several reasons for cracks in cheesecake:
- Large air bubbles - using electric mixers is necessary, but incorporating a lot of air into the batter, especially after adding the eggs, will create large air pockets that expand during baking and then contract on cooling to cause cracks.
- Lumps in the batter - it is very important to use room temperature ingredients and blend them evenly so that the batter is emulsified and smooth before baking.
- High and dry baking - baking at a high temperature and in a very dry environment can cause the eggs to soufflé or puff up and the surface to dry out. As the cheesecake cools and contracts, the depression of the eggs and the tension on the dry surface will cause it to crack.
- Rapid cooling - the sharp temperature difference from the hot oven to the ambient air will cause rapid contraction as the air bubbles collapse on cooling.

HOW TO AVOID CRACKS IN CHEESECAKE
- Use room temperature ingredients. Ensure that the cream cheese, eggs and sour cream are at room temperature. Having soft cream cheese is imperative to have a smooth batter and all the ingredients will combine more smoothly and evenly if they are at room temperature. Using room temperature ingredients also means that less mixing is required to bring them together.
- Tap out large air bubbles. Once you pour the cheesecake batter into the pan over the crust, tap it on the counter top about 10 times to let large air bubbles rise to the surface and pop.
- Make a steamy oven. Using a direct water bath will inevitably prevent cracks as it creates a moist, uniform cooking environment so that the eggs in the batter cook evenly and it prevents the cheesecake from drying out in the oven. However, you can also place a large pan of boiling water in the oven which helps cheesecake rise evenly and modestly so that it doesn't fall as much on cooling.
- Bake at a low temperature. Cheesecake is essentially a type of custard and it requires gentle baking to create the silkiest texture and prevent the eggs from puffing up or soufflé-ing in the oven. When the eggs puff up rapidly, they aren't strong enough to sustain this amount of air and they will deflate quickly on cooling to cause cracking.
- Do not open the oven door. When you open the oven, the temperature inside reduces drastically which causes the cheesecake to bake unevenly.
- Do not over bake! An over-baked cheesecake will almost certainly crack as it dries out and the egg proteins bind too tightly.
- Release the edges. Just minutes after the cheesecake comes out of the oven, run a thin knife or small offset spatula around the edges to separate it from the springform pan. If the cheesecake sticks to the sides, then it won't be able to contract inward as it should when it cools. This causes surface tension so it splits right down the middle to relieve it. Loosening the edges will allow the cake to contract uniformly.
- Cool gently. Rapid cooling causes a drastic change in air pressure so large air bubbles will contract and the cheesecake will collapse quickly which causes tension at the surface and makes it crack.

INGREDIENTS FOR VANILLA CHEESECAKE
- Cream cheese - you will need brick cream cheese for this recipe. Do not use the whipped or spreadable kind as it can have a higher water content and thus a lower fat content.
- Sour cream - full fat sour cream adds creamy, tangy dairy notes to this cheesecake and also lightens it up since it has a lower fat content than cheese. If you can't get sour cream where you live then you can substitute with full fat yogurt.
- Pure vanilla extract - vanilla is the main flavor aside from the tangy sweet cheese taste, so use high quality vanilla. I prefer this Madagascar Bourbon Vanilla extract.
- Granulated sugar - simple fine white granulated sugar keeps the flavor clean so the vanilla shines. Bonus points if you use extra fine (caster) sugar which will create an even lighter texture.
- Eggs - two whole eggs will set the filling into a silky smooth custard. After all, cheesecake is essentially a baked cheese custard!
- Water - yes, water! A bit of water in the batter will ensure that the filling stays silky and smooth to replace the water loss during baking. You can also use milk as the purpose is to dilute the protein content from the cheese and eggs so that the cheesecake batter (which is essentially a custard) doesn't set too firmly when the proteins interlock and form a gel during baking.


STEP BY STEP INSTRUCTIONS
- STEP 1). Make the crust. Combine graham crumbs, brown sugar and melted butter in a medium bowl and blend until well combined. Press the crumbs firmly and evenly into the bottom and just about ½-inch up the sides of the pan. I like to use a straight edged drinking glass or the bottom of a ½ cup measuring scoop to pack it evenly and smooth it out along the bottom and push it gently up the sides. Bake for 10-12 minutes until lightly golden and feels dry.
- STEP 2). Make the filling. Mix cream cheese in a large bowl with an electric hand mixer on medium speed until smooth. Gradually add sugar and mix until very smooth and creamy. Stop to scrape down the sides of the bowl several times to ensure there are not lumps at this stage and everything is well combined. The mixture should be lump-free before you move on to the next step.
- STEP 3). Add liquids. Add lemon juice and mix until smooth, then mix in sour cream, vanilla extract and vanilla bean paste until just combined. Scrape down the sides and around the bottom of the bowl again and mix on low for 5 seconds to ensure everything is blended.
- STEP 4). Mix in egg. Add one egg and mix on medium speed until JUST combined. Scrape down the sides and bottom of the bowl, add the other egg and mix just until incorporated.

- STEP 5). Prepare the pan. Pour the batter onto the pre-baked crust (it's ok if it is still warm) and spread it out evenly. Tap the pan on the counter top 10 times and pop any air bubbles that you see rising to the surface, then use the pointed end of a knife or skewer to pop any large air bubbles that float up. Place cheesecake in the oven on the center rack. Place a large metal rimmed baking sheet or a 9×13 inch baking pan on the bottom oven rack of the preheated oven. Pour boiling water into the pan about 1 inch deep.
- STEP 6). Bake. Bake for 30 minutes. Turn the oven off and, without opening the oven door, leave it in for another 15 minutes. It is ready when the filling is set and slightly puffed around the edges, but the center is slightly wobbly or jiggles when the pan is shaken.
- STEP 7). Cool. Transfer pan to a wire rack to cool. After 10 minutes of cooling, run a knife around the edges of the cake to loosen it from the sides and then remove sides of pan. Let cake cool completely and refrigerate for 2 hours before serving.


EXPERT TIPS FOR PERFECT VANILLA CHEESECAKE
- Start with room temperature ingredients. This is so important! Take the cream cheese out of the fridge for 2 hours prior to baking so it is soft. Also make sure your eggs are at room temperature since a cold egg will not incorporate smoothly.
- Blend the cream cheese with sugar FIRST. You need to mix the cream cheese so it is smooth, then add the sugar and mix the cream cheese with sugar thoroughly before adding the other ingredients. The sugar crystals are abrasive and will tear through the cheese and break it down so it is creamy. Sugar is also hygroscopic so it pulls the moisture from the cheese, binds it tightly and smooths it out. You'll notice that once it is well combined, it will turn glossy. This is a sign that the sugar has bound the moisture.
- Add the egg only AFTER the sugar is blended. If you add the egg before the sugar, it will most likely leave you with a lumpy batter. That's because eggs have a very high moisture content and it will be difficult to blend smoothly unless there is sugar present to bind the water.
- Do not over-mix. Over-mixing or mixing at a very high speed will incorporate too much air into the mixture. Large bubbles will cause the cheesecake to crack during baking and cooling.

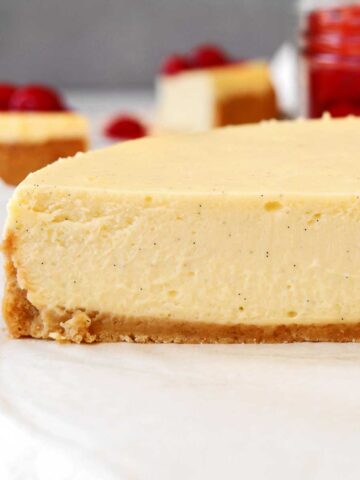
- Gentle baking. To ensure the filling is extra silky smooth, it is important bake gently at a low temperature.
- Do not over-bake. Cheesecake is ready when the edges are set but the center jiggles just slightly. It will continue to set with the residual heat of the pan as it cools. Keep an eye on the baking time. Set a timer for the first time stated in the recipe and check for the jiggle. If it is still wet then set the timer for another 2 minutes and keep checking.
- Chill for at least 2 hours. This is actually one of the most important steps of making cheesecake! Let it cool completely at room temperature and then refrigerate for at least 2 hours or even overnight. This time lets the proteins set to make a smooth custard gel and will give you the best texture.

RECIPE FAQ
The trick to making clean slices on cheesecake is to refrigerate it for at least 4 hours and then slice with a hot dry knife. Run the blade under very hot water, wipe it dry before slicing and then wipe it clean between each slice.
A water bath is almost always a good idea when making cheesecake. It essentially creates a humid environment in the oven to prevent the surface of the cheesecake from drying out which is what causes it to crack. However, this recipe bakes beautifully without a water bath thanks to my not-so-secret ingredient and cheat's method that prevents it from drying out.
The key to making any great cheesecake is to be careful not to over bake it. Once the edges are slightly golden and the middle is JUST set with a slight wobble in the middle, then it is ready. The residual heat will continue to gently set the filling as it cools. After all, cheesecake is basically a cheese custard and relies on the gentle cooking of the egg to set the structure. Let it cool completely and then refrigerate for at least 2 hours before slicing for the best texture and cleanest slices.
Cheesecakes that are baked in a dry oven (no steam at all) will look very underdone even when ready, so if you choose not to use even the steam tray, then remove it from the oven when it is puffed around the edges and still very wobbly in the middle.
If sour cream is not available to you where you live, you can also make this recipe using an equal amount of full fat Greek yogurt. Another suitable substitution is crème fraîche which is a type of fermented dairy product somewhere between yogurt and sour cream.
This cheesecake should be stored in the refrigerator in an airtight container.
Yes it is important to let the cheesecake chill in the fridge for at least 2 hours before serving. This cooling time will allow the custard to set completely for the silkiest texture.
This cheesecake is lovely served with fresh berries. You can also top it with Raspberry Topping or Blueberry Sauce and a dollop of fresh cream or Small Batch Lemon Curd.
STORAGE AND FREEZING
This cheesecake should be stored in an airtight container in the refrigerator for up to 5 days.
You can freeze this cheesecake without any topping. Either freeze it whole, or slice it and freeze individual slices. Wrap the completely chilled cheesecake in plastic, then in aluminum foil and place in a resealable freezer bag for storage for up to 3 months.
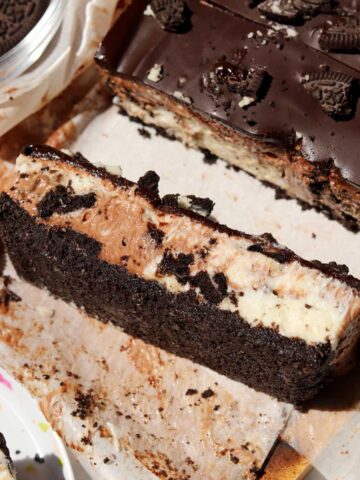
If you love cheesecake, check out these recipes!
Peanut Butter Fudge Swirl Brownie Bottom Cheesecake Cookies & Cream Oreo Cheesecake Bars Blueberry White Chocolate Cheesecake Bars Creamy Burnt Basque Cheesecake Creamy Black Cherry Cheesecake Bars Chocolate Peanut Butter Cheesecakes
More Cheesecake
Looking for more cheesecake recipes? Try these:
Video
Perfect Vanilla Cheesecake Recipe

Ingredients
Graham Cracker Crust:
- 1 ¼ cups (130g) graham cracker crumbs
- 2 tablespoon (30g) packed light brown sugar
- 4 tablespoon (56g) unsalted butter, melted
Vanilla Cheesecake Filling for 8-inch pan:
- 18 oz (500g) brick cream cheese, at room temperature
- ¾ cup (150g) granulated sugar
- 2 tablespoon (30ml) warm water (or use 1 tablespoon water + 1 tablespoon lemon juice)
- ⅓ cup plus 1 tbsp (95ml) full fat sour cream, at room temperature
- 1 ½ teaspoon (7ml) pure vanilla extract
- 1 tsp (5ml) vanilla bean paste (optional)
- 2 large eggs, at room temperature
Vanilla Cheesecake Filling for 9-inch pan:
- 27 oz (750g) brick cream cheese, at room temperature
- 1 cup plus 2 tbsp (225g) granulated sugar
- 3 tablespoon (45ml) warm water (or use 1 tablespoon water + 2 tablespoon lemon juice)
- ⅔ cup (160ml) full fat sour cream, at room temperature
- 2 teaspoon (10ml) pure vanilla extract
- 1 ½ teaspoon (7ml) vanilla bean paste (optional)
- 3 large eggs, at room temperature
Instructions
- Preheat your oven to 350°F. Lightly grease the sides of an 8-inch round non-stick springform pan for the smaller batch or 9-inch round non-stick springform pan for the larger batch and line the bottom with a round of parchment paper.
- Make the crust. Combine graham crumbs, brown sugar and melted butter in a medium bowl and blend until well combined. Press the crumbs firmly and evenly into the bottom and just about ½-inch up the sides of the pan. I like to use a straight edged drinking glass or the bottom of a ½ cup measuring scoop to pack it evenly and smooth it out along the bottom and push it gently up the sides. For a 9-inch pan, you will just have enough to make a flat crust. Bake for 10-12 minutes until lightly golden and feels dry. Meanwhile, make the filling.
- Reduce oven temperature to 300°F.
- Make the filling. Mix cream cheese in a large bowl with an electric hand mixer on medium speed until smooth. Gradually add sugar and mix until very smooth and creamy. Stop to scrape down the sides of the bowl several times to ensure there are not lumps at this stage and everything is well combined. The mixture should be lump-free before you move on to the next step.
- Add water (and lemon juice if you're using it) and mix until smooth, then mix in sour cream, vanilla extract and vanilla bean paste until just combined. Scrape down the sides and around the bottom of the bowl again and mix on low for 5 seconds to ensure everything is blended.
- Add one egg and mix on medium speed until JUST combined. Scrape down the sides and bottom of the bowl, add the other egg and mix just until incorporated.
- Pour the batter onto the pre-baked crust (it's ok if it is still warm) and spread it out evenly. Tap the pan on the counter top 10 times and pop any air bubbles that you see rising to the surface, then use the pointed end of a knife or skewer to pop any large air bubbles that float up. Place cheesecake in the oven on the center rack. Place a large metal rimmed baking sheet or a roasting pan on the bottom oven rack of the preheated oven. Pour boiling water into the pan about 1 inch deep.
- For an 8-inch pan with the smaller batch, bake for 35 minutes. Turn the oven off and, without opening the oven door, leave it in for another 15 minutes so it cooks gently. This will create the silkiest texture. It is ready when the filling is set and slightly puffed around the edges, but the center is slightly wobbly or jiggles when the pan is shaken. The jiggly portion should span no greater than 3 inches through the middle.For a 9-inch pan with the larger batch, bake for 50 minutes. Turn the oven off and, without opening the oven door, leave it in for another 15 minutes.
- NOTE: if you're unsure about your oven, you can open the door to check on the cheesecake after the 30 minute mark for an 8-inch pan and 45 minutes for a 9-inch pan. At this point it should look matte and set around the edges about 1 ½ inches inward, and then it should be quite wobbly in the middle. If all looks well, close the door and finish baking at 300°F for the remaining 5 minutes then proceed to turn off the oven and leave it inside the slowly cooling oven for 15 minutes.
- Transfer pan to a wire rack to cool. Immediately run a thin knife or small offset spatula around the edges of the cake to release it from the sides and then leave it to cool completely.
- Once completely cooled, refrigerate for at least 4 hours before serving. I like to leave mine overnight and serve it the next day.


I have made this recipe during Christmas. I baked it for another 15 mins and let it sit in the over for about 10 more mins, just wat I preferred and it was still amazing, one of the easiest and better tasting recipes and cheesecake I was tested. If you want to impress your family with you baking skills, make this recipe 🙂
Thanks Archie! It's so nice that this recipe was a success for the holidays 🙂
Made this Cheesecake for my family as a Christmas dessert and it was very popular and delicious ! Easy to follow the recipe, I highly recommend !
Thank you Grace!
Can I use brown sugar in the cheesecake safely?
Hi, yes you can.
My fiance and I both moaned at the first bite. You can't help yourself.
Magnificent cheesecake, so creamy and light. We really enjoyed this, thank you for posting. BTW: I only had 16 oz. of cream cheese so that's all we used and it came out fine.
Hi Kira, thanks so much for your feedback. I'm so glad it worked out for you!
How long would you bake for a 6in pan?
Maybe 15 minutes longer.
Same here. Mine is baking so hopeful for a great cheesecake. It's for my hubby's birthday tomorrow 🤪
Just made its fool proof and delicious .
Berry sauce berry nice ! 💜
I accidentally grabbed light sour cream! I have full fat cream cheese though. Think it'll still be okay?
I think this is the creamiest cheesecake I’ve ever tasted. I love the technique and it was easy to do. It will become my go-to cheesecake recipe.
Can I substitute full fat sour cream to full fat Greek yogurt. We don't get sour cream where we live.
Hi Aisha, yes that works well.
You are truly a magician ? i huge fan of your recipes almost all that I have tried till now are bomb. Kudos to the efforts you put in really love all your recipes and looking forward to many more?☺️
Thank you so so much Pooh!
Amazing cheesecake! If I want to increase the size to 9 inch or 10 inch- how can I change the ingredient proportions + baking time?
Hi Raheej, thank you! For a 9-inch pan, you can increase the proportions by 50% and maybe increase the baking time by 10-20 minutes.
This is definitely the creamiest cheesecake I’ve ever made . It was the perfect size for our small family too.
Thank you Katie! I'm glad your family enjoyed it.
YES! So creamy. Thanks Katie!
Followed the recepie to a T and its undrrdone 🙁 I'm sad now
Mine was underdone, too! It's not my oven.
Hi Lee, just bake it longer. It's best to learn visual cues for baking since every oven is different.
Hi Christina, can I substitute whipping cream for sour cream?
Hi Josephine! I would not recommend that since it will complete change the consistency of the filling. You can use full fat yogurt instead. Always make sure to read the FAQ section at the bottom of my blog post where I talk about substitutions!
Best cheescake I've made or even tasted . Thank you!
Wow wonderful! Thanks Therese.
I will never use another vanilla cheesecake recipe again! Christina called this recipe foolproof, and it truly is. The recipe is written so clearly that I knew what I should be looking for each step of the way, which ensured I got a beautiful result. I ended up with a silky smooth cheesecake with no hint of a crack anywhere and a beautiful vanilla flavor that I’m still dreaming about. Thanks for another wonderful recipe!
This is so great! Thanks so much Carolyn! I'm so glad that you are enjoying this recipe!
BEYOND perfect! This is my go-to recipe now.
Awesome! Thanks so much Andray!
I am not a big fan of cheesecakes in general, but this one feels so light, like it melts in your mouth.
So amazing. Best cheesecake I’ve ever made. So easy. Fool proof. Thanks again Christina
Wonderful! Thanks Malvina.
I’m not even a fan of cheesecake, but I make it for my family and I LOVE this one! It was like eating silk.
It really is so silky! Thank you!
This is the silkiest cheesecake I’ve ever had! Everyone loved it. Thanks so much Christina!
You’re welcome Lauren!
I was waiting for this recipe, I will try and let you know how it turned out.
Can’t wait!
Can’t wait to make this. If I only have a 9 inch spring form do I need to buy myself an 8 inch or can I still do the recipe in the one I have? Thanks!
I would really recall an 8 inch pan. If you use 9 inch it will be quite thin and you will need to adjust the baking time but if you don’t mind that then it’s ok.
I couldn’t wait for you to post this recipe and so I made it right away and OMG it has changed my life! So creamy!