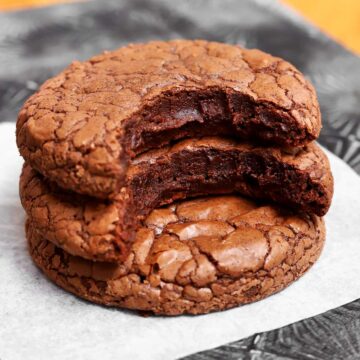
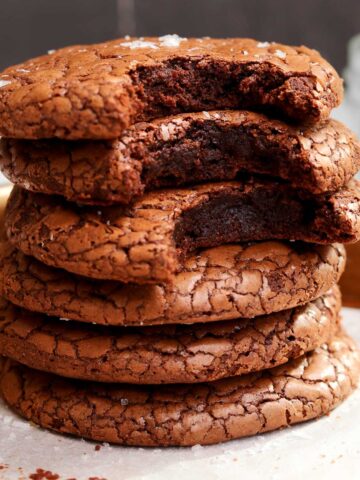
Classic Fudgy Brownie Cookies
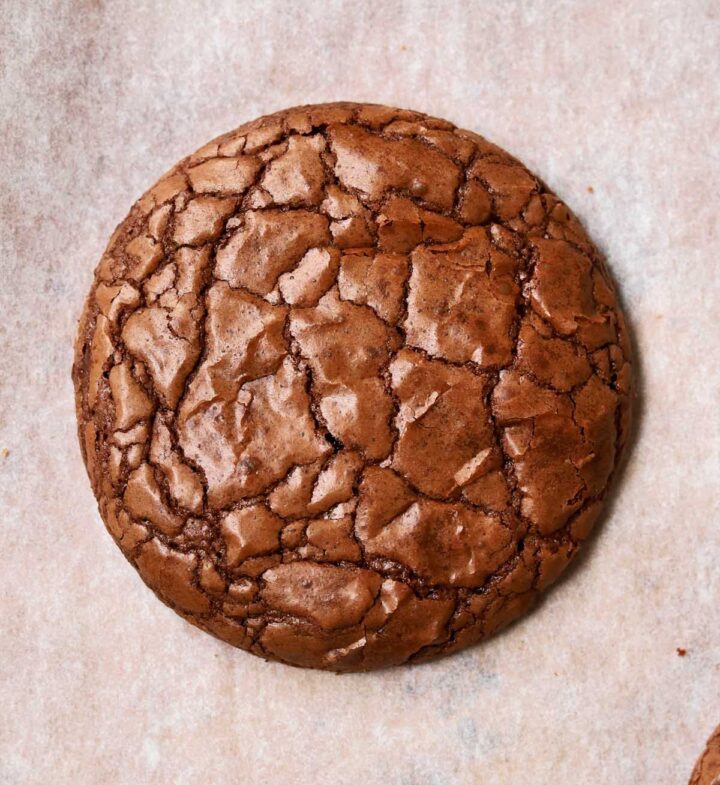
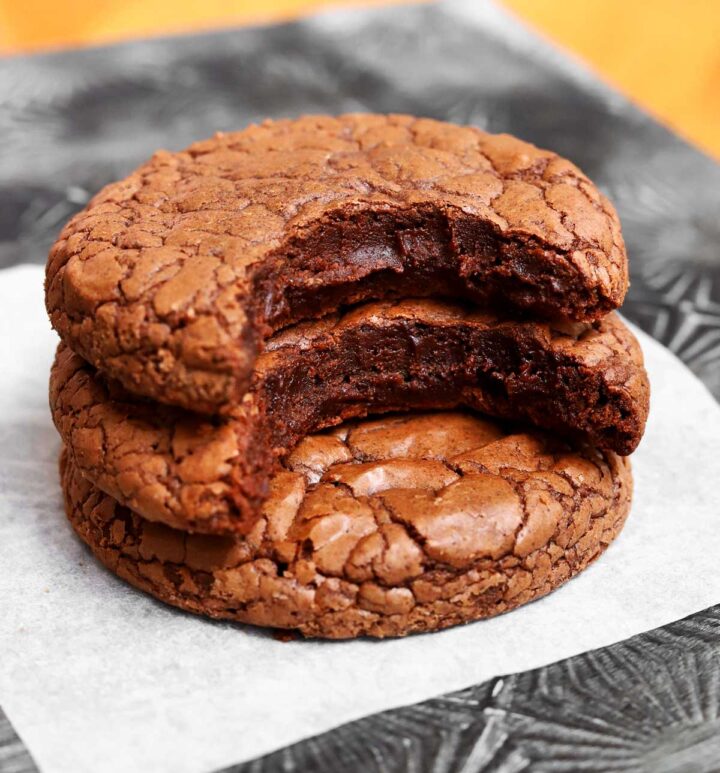
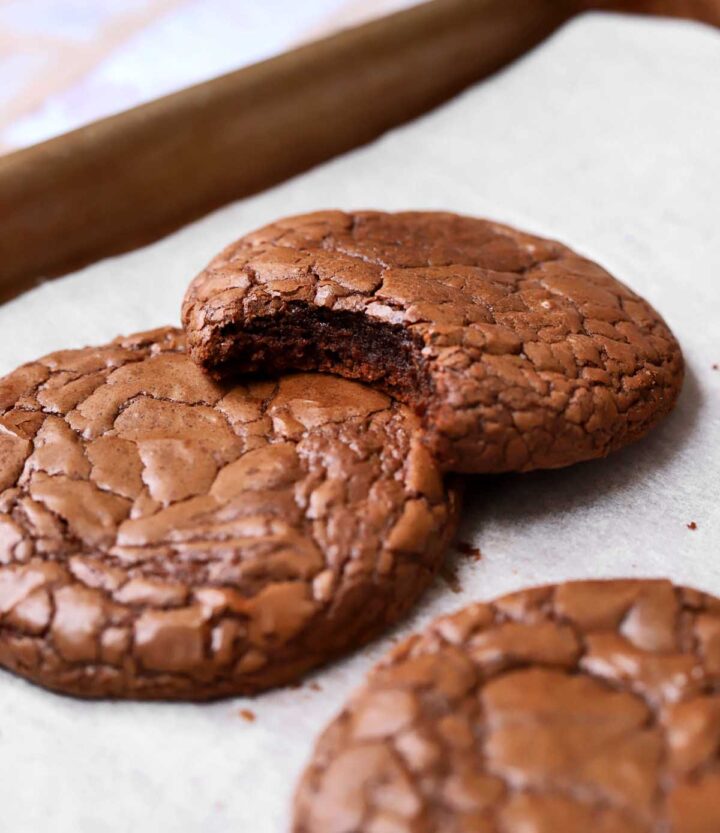
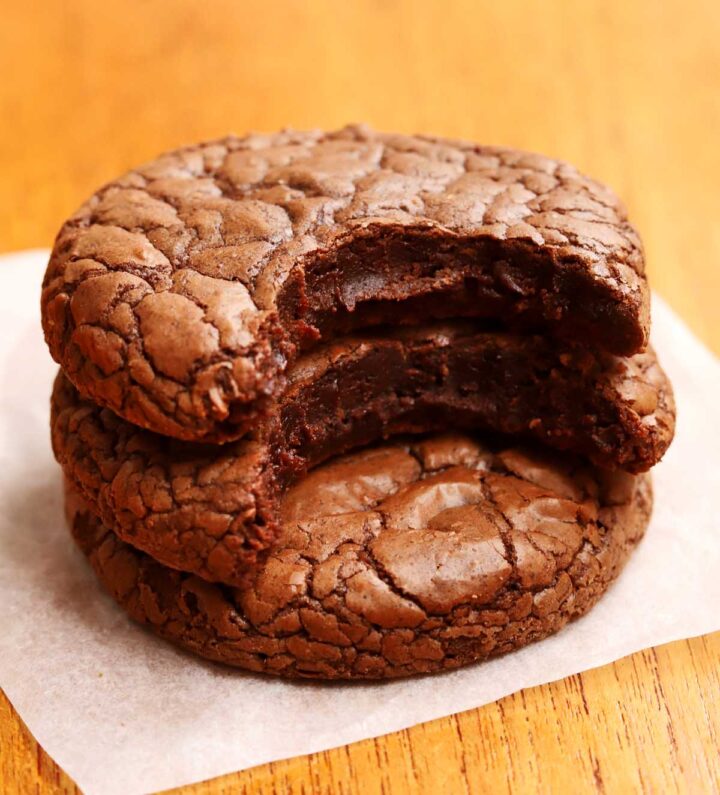
There's nothing more satisfying than biting into a soft, dense brownie and these Classic Fudgy Brownie Cookies are just as rich and indulgent with beautiful shiny crinkle tops. They are so soft and fudgy from edge to edge with a texture that just melts in your mouth. The flavor is perfectly chocolaty and not too sweet. This recipe is easy to prepare with simple ingredients and I love to make them on whim when I'm craving something chocolaty. If you love this idea, check out my ultra fudgy Flourless Brownie Cookies, and if you just want a few, try my Small Batch Flourless Brownie Cookies recipe.
WHY THIS RECIPE WORKS
- Easy to make - brownie cookies are a cinch to make! The method is similar to making regular brownies with different ingredient proportions. You need just a handful of ingredients and 30 minutes. You can also make them all by hand without a mixer.
- Rich chocolate flavor - if you love chocolate then you are in for a treat. There's melted dark chocolate and a bit of cocoa powder in the cookie batter.
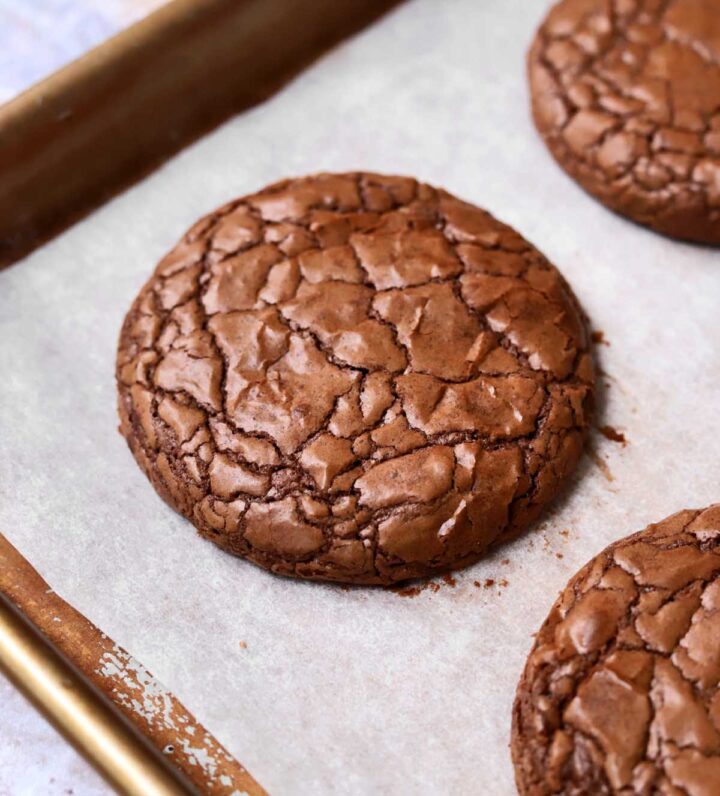
- Perfect fudgy texture - the texture of these cookies is perfectly fudgy without totally falling apart. They hold together well and also melt in your mouth with every bite. It's like having the center square of a batch of brownies. If you're the type of person who loves the edge piece, then try these Chewy Crinkle Top Brownie Cookies.
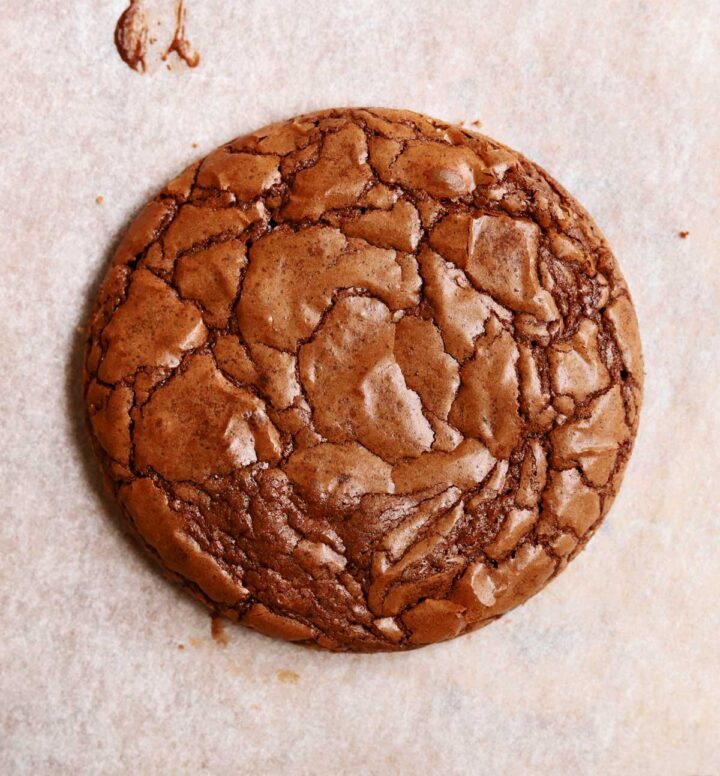
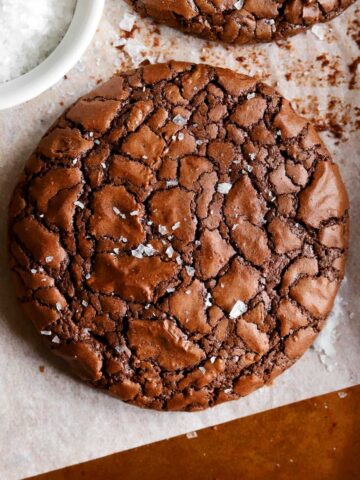
- Shiny crackly top - these cookies bake up with that thin shiny wrinkly crust, just like my Perfect Shiny Crust Fudge Brownies. Using the method I have below for this recipe guarantees that you will get the shiny crust.
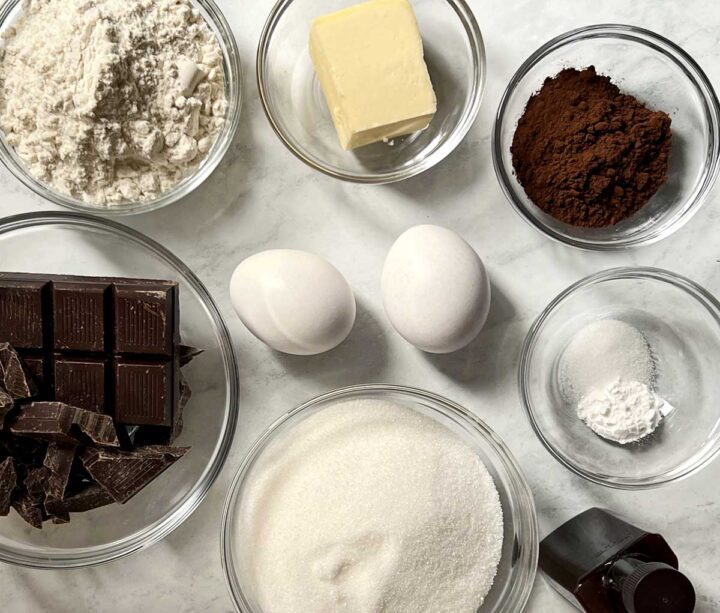
INGREDIENTS FOR BROWNIE COOKIES
- Bittersweet chocolate - it's very important to use bittersweet chocolate with 70% cocoa solids for the right texture and sweetness. If you use sweeter chocolate, the cookies will taste too sweet and be more crumbly. I love this bittersweet chocolate block and these bittersweet callets. Do not use compound chocolate or the cookies will spread into puddles.
- Butter - you can use unsalted butter or salted butter for this recipe. I often love to use salted butter as it enhances the chocolate flavor and gives them an inherent richness. If you use salted butter, then reduce the added salt to a heaped ¼ teaspoon.
- Cocoa powder - a bit of cocoa powder deepens the chocolate flavor without interfering with the structure too much so that these cookies bake up thick and velvety. You can use natural cocoa or Dutch process cocoa powder. I like this Dutch cocoa powder for this recipe to give the cookies rich dark color, but natural cocoa imparts a lovely fruity flavor.
- Eggs - 2 large eggs are the foundation of structure for these brownie cookies.
- Sugar - regular white granulated sugar dissolves more readily into the eggs for the shiny top and creates a fudgy texture. Do not reduce the sugar or it will affect the fudgy texture.
- Pure vanilla extract - vanilla will elevate and complement the chocolate flavor. I love this Madagascar Bourbon Vanilla extract.
- Baking powder - just a small amount of baking powder gives a bit of structure to the batter and that little bit of puff also helps the cookies develop the crackly appearance. Too much would aerate the batter too much and give these cookies a chewy texture. It would also make them spread more which allows the edges to bake harder.
- All-purpose flour - use unbleached all-purpose flour for the best results. Bleached flour will make these cookies more cakey.
STEP BY STEP INSTRUCTIONS: HOW TO MAKE FUDGY BROWNIE COOKIES
- STEP 1). Melt butter with chocolate. Combine butter and chocolate in a heatproof bowl over a saucepan of simmering water and stir until melted and smooth. You can also do this in the microwave with short bursts and frequent stirring. Keep warm.
- STEP 2). Beat eggs with sugar. Whip eggs until frothy in a large bowl, then gradually stream in sugar and mix for 2 minutes until pale and thick using an electric hand mixer or wire whisk. If whisking by hand, then whisk vigorously for about 2-3 minutes. When you rub the mixture between your fingertips, it should feel like much of the sugar is dissolved, with a few gritty granules.
- STEP 3). Add the chocolate mixture. Mix the slightly warm chocolate mixture into the egg mixture until evenly combined. Mix in vanilla and salt.
- STEP 4). Combine dry ingredients. Sift flour, cocoa and baking powder into a bowl and blend well.
- STEP 5). Mix in the dry ingredients. Mix the flour mixture into the chocolate mixture so it is evenly combined.
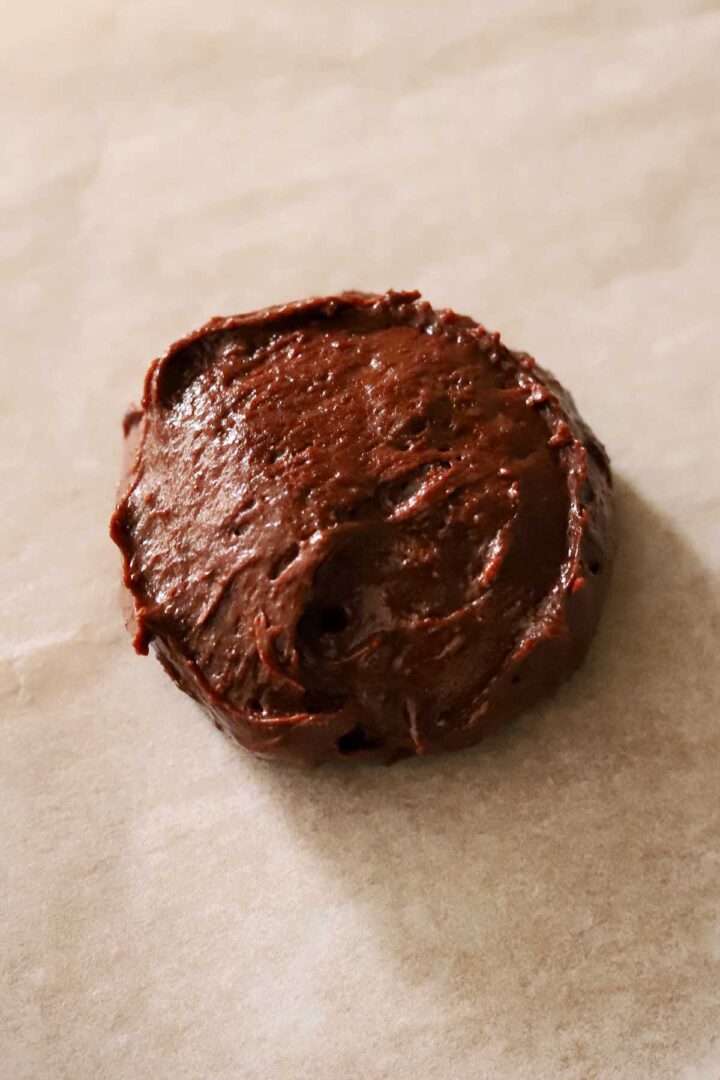
- STEP 6). Let the batter thicken. If your batter is quite runny, cover and set the bowl aside for 5-10 minutes to thicken up so it looks like pudding, but not too long or it will stiffen up as the cocoa butter sets. It should look like thick, glossy brownie batter. Read the tips below to learn what to do if your batter thickens up too much.
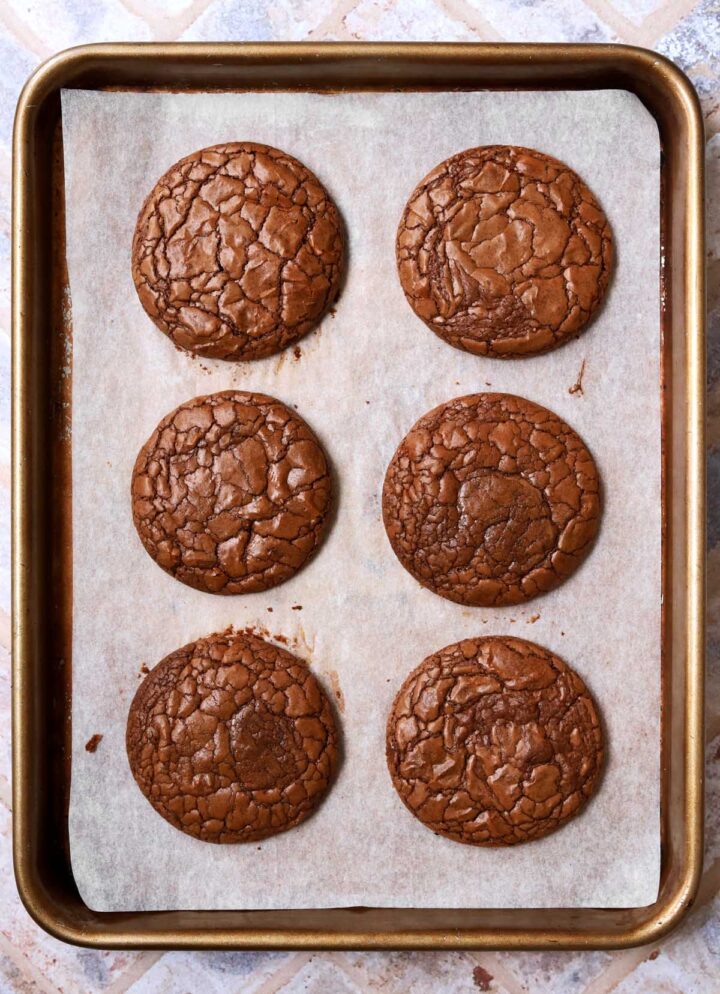
- STEP 7). Bake. Use a 1 ¼-oz cookie scoop to portion batter and release it onto the baking sheets leaving at least 3 inches of space between them. Bake until shiny and cracked on top while still soft in the middle. Let cool completely on the baking tray.
EXPERT BAKING TIPS FOR BROWNIE COOKIES
- Avoid using cold eggs. I recommend warming the eggs in a bowl of warm water for 10 minutes. This will ensure the sugar dissolves properly so you get that shiny crust.
- Add sugar gradually. Slowly stream in the sugar while whipping the eggs. This will help the sugar dissolve and incorporate evenly instead of overwhelming the eggs and creating a supersaturated solution. It also helps create a fine foam instead of a big bubbly one.
- Whip the eggs and sugar thoroughly. I mix mine for 2-3 minutes on medium speed. This helps incorporate enough air to stabilize the batter and add some structure to the cookies while also dissolving sugar.
- BUT, do not whip the eggs and sugar too much. If you incorporate too much air, then the batter will stiffen up very quickly once you add the melted chocolate and it will be difficult to scoop. It will also make them more chewy instead of fudgy. To avoid over-whipping, mix on low or medium low speed if using an electric mixer and add the sugar gradually while mixing instead of adding it all at once.
- Use pure bittersweet chocolate with at least 70% cocoa solids. If the chocolate is too sweet, then the cookies will spread too much and also taste too sweet. I love to use this chocolate to make these cookies. Do not use compound chocolate which contains vegetable oils and will cause the cookies will spread into puddles.
- Use only ¼ teaspoon baking powder. I know it seems like so little, but baking powder is powerful. If you use much more, then the cookies will be more chewy instead of fudgy.
- Rest the batter just until it is thick enough to scoop without running. This highly depends on the temperature and humidity of your kitchen, and it will make sure the cookies aren't too flat. After you fold in the chocolate chips, cover the bowl and let the batter rest for about 10 minutes. It will thicken as the chocolate solidifies. If you live in a hot climate, then you can place it in the fridge, but for only 5-8 minutes. If it gets too cold then the cocoa butter in the chocolate will harden and the batter will become stiff and crumbly. You can still use it, but it will be more difficult to work with. See my FAQ section below for more tips.
- Preheat your oven for at least 15 minutes. It is important that the oven is properly hot and at the right temperature for these to bake with that nice crackly shiny top and the right thickness with fudgy centers. I bake these at a slightly higher temperature to set the edges and the bottoms while the center still stays fudgy.
- Do not over-mix after adding the flour. Gentle folding at this stage will guarantee a melt-in-your-mouth texture. Mixing too much will make cookies that have a tougher and more "bready" texture.
- Use a scale to measure ingredients. The amount of flour in a brownie recipe is very important and even slight changes can impact the texture.
WHAT MAKES THE SHINY TOP ON BROWNIE COOKIES
Brownie cookies can be finicky! Getting that glossy, shiny, crackly top depends on quite a few variables. You may notice that sometimes it happens, and sometimes not. That's because it depends on the type of chocolate you use, the temperature of your ingredients. what season it is, how warm or cold your kitchen is and how hot your oven (actually) is. The main ingredient responsible for the shiny crust is sugar - dissolved sugar to be exact. Using semisweet chocolate creates a more glossy top because chocolate contains finely milled sugar (so fine that you can't detect it on your tongue) and semisweet chocolate has about 20% more sugar than bittersweet chocolate.
The temperature of your ingredients matters. If eggs are cold, they won't dissolve the sugar readily and if the melted chocolate cools down too much, it will affect how the cocoa butter crystallizes and aligns in the batter. It will also cause the batter to stiffen up quickly as the cocoa butter sets. A cool or chilled batter that is released from the scoop will have a rougher appearance that may not entirely smooth out in the oven.
My preference is to work with warm eggs and warm melted chocolate so the batter is still flowing when you scoop it, but not so loose that it spreads into a puddle when you release it. If you find the batter is too loose, simply set it aside for 2-5 minutes to thicken. Do not refrigerate it as it will firm up too fast. If you batter does stiffen up too fast, don't fret. I find that you can gently roll scooped portions in your hands to form balls (it will be a little sticky and a bit messy) but the warmth of your body will help smooth out the surface and melt the cocoa butter.
RECIPE FAQ
I often do use packed light brown sugar instead of granulated sugar for this recipe it works well, giving it a slightly more caramel-like taste. It changes the way the shiny crust develops slightly and it is more difficult to dissolve brown sugar in the egg, but the results are similar.
No. This recipe absolutely requires bittersweet chocolate with minimum 70% cocoa solids. Semisweet chocolate has too much sugar and will make these cookies spread too much.
If you prefer chewier cookies, whip the egg with the sugar for longer (3-5 minutes) using an electric mixer until pale and thick, then scoop the batter immediately to bake as it will stiffen up quickly with all of the air build into it.
The secret to getting the shiny crust for this small batch brownie cookie recipe is in the method of beating the eggs with the sugar until the sugar is well dissolved. This is important. If the sugar is not dissolved then the crust will be dull and grainy. In order to make sure the sugar dissolves well, make sure your egg is at room temperature. If you take it straight from the fridge it will be too cold, so in this case I like to submerge it in warm water for 5-10 minutes until it warms up.
If your flourless brownie cookies spread out too thin, then it could be a couple of things:
1). The chocolate is too sweet. Make sure to use chocolate with minimum 70% cocoa solids for the best results. If you use semi-sweet chocolate with 50% cocoa solids, then it will have 20% more sugar content and the cookies will spread too much.
2). Not enough cocoa. Make sure to weigh your ingredients to get accurate quantities. If they are still spreading too much, try adding 1 tablespoon more flour in the next batch.
3). Too much liquid. Make sure to use a standard large egg. If you use an extra large egg, then it will add almost 1 tablespoon extra water to the batter!
If the batter cools too much (like if you leave it in the fridge too long), the cocoa butter in the chocolate will harden and cause the batter to stiffen up. It will also become crumbly from all the air incorporated into the batter from the gases released from the baking powder. If this is the case, you can still make these cookies and they will bake up just fine, however the batter will be more difficult to work with. I would recommend scooping it with a lightly wetted spoon and roll it into smooth balls. The crust on the cookies will be more dull rather than shiny, but that won't change the taste.

TROUBLESHOOTING: Why did my cookies spread too much and become flat?
If your brownie cookies spread out too thin, then it could be a couple of things:
- The chocolate is too sweet. Make sure to use chocolate with minimum 70% cocoa solids for the best results. If you use semi-sweet chocolate with 50% cocoa solids, then it will have 20% more sugar content and the cookies will spread too much.
- Not enough flour or cocoa. Make sure to weigh your ingredients to get accurate quantities. If they are still spreading too much, try adding 1 tablespoon more cocoa in the next batch.
- Too much liquid. Make sure to use standard large eggs. If you use extra large eggs, then it will add almost 2 tablespoon extra water to the batter!
- Oven was not sufficiently preheated - make sure you pre-heat your oven for at least 20 minutes.
- Inaccurate measurements - weigh out the ingredients using a scale, especially for the flour.
- The batter is too warm - a warm batter will also be runny and thin. If you are making these in the Summer and the temperature in your kitchen is warm and humid, try cooling the batter down to 22℃ to make sure it's thick enough. You can refrigerate but for 10 minutes only! A long chill time puts the cookies at risk of losing the crackly top. When you scoop the batter onto the cookie sheet make sure it doesn't spread out too flat. It should hold a soft dome shape as shown above.
*See my recipe video for how the batter looks when it is firm vs. soft and fudge-like. When it is cooled just the right amount, it will looks like thick hot fudge*
HOW TO GET THE SHINY CRUST ON BROWNIE COOKIES
- Beat eggs with sugar first. This will help the sugar dissolve to create a very moist texture and create the thin shiny crackly crust on the surface.
- Bring your eggs to room temperature. You can do this by taking them out of the fridge 1 hour before baking, or submerge them in warm water for 10 minutes. A room temperature (or even warm egg) will dissolve sugar better than a cold one.
If you love cookies, check out my other popular chocolate cookie recipes below:
THE BEST EVER Chocolate Chip Cookies – Bakery Style! Small Batch Flourless Brownie Cookies Small Batch Double Chocolate Chip Cookies Chewy Brown Butter Snickerdoodles Cookies Brown Butter M&M Cookies Recipe Chewy Pumpkin Chocolate Chip Cookies Coffee Pecan Chocolate Chip Cookies Double Peanut Butter Chocolate Chunk Cookies Hazelnut Double Chocolate Chunk Cookies THE BEST Chewy Chocolate Chip Cookies – Bakery Style!More Cookie Love
Looking for more brownie recipes? Try these:


Chocolate Heaven
Craving more chocolate? Check out these recipes:

Video
Classic Fudgy Brownie Cookies
Ingredients
- ⅔ cup (95g) all-purpose flour
- 1 tablespoon (6g) cocoa powder (I prefer this Dutch cocoa or this one)
- ¼ teaspoon baking powder
- 6 oz (170g) bittersweet chocolate (70% cocoa), coarsely chopped into chunks plus extra for topping (I also love this bittersweet chocolate block and these bittersweet callets)
- ⅓ cup (75g) unsalted butter
- 2 large eggs, warmed under warm running water
- ¾ cup plus 2 tbsp (175g) granulated sugar
- ½ teaspoon pure vanilla extract
- ½ teaspoon salt
*if using salted butter, use ¼ teaspoon salt
Instructions
- Preheat the oven to 375 degrees F. Line two large cookie sheets with parchment paper.
- Sift flour, cocoa powder and baking powder into a medium bowl and whisk to blend evenly.
- Combine chocolate and butter in a heatproof bowl and melt in the microwave in 30 seconds bursts with frequent stirring, or melt in a saucepan over low heat while stirring constantly until completely smooth and glossy. Set this aside but keep it warm - no need to cool it down.
- Crack the eggs into a medium bowl. Gradually add sugar while mixing with an electric handheld mixer on medium speed. Once all of the sugar is combined, continue mixing for 2 minutes until lightened and pale yellow-colored. If whisking by hand, then whisk vigorously for 2-3 minutes. When you rub the mixture between your fingertips, it should feel like much of the sugar is dissolved, with a few gritty granules.
- Add melted chocolate mixture, vanilla and salt and whisk it in until evenly combined. The batter will tighten up and become glossy when the chocolate is properly emulsified. Add the sifted dry ingredients and fold them in gently. At this point, the consistency of the batter highly depends on the temperature of your ingredients and the temperature of your kitchen since it is made of mostly chocolate which has a sharp melting point. If your batter is quite runny, set the bowl aside for 5-10 minutes to thicken up so it looks like pudding, but not too long or it will stiffen up as the cocoa butter sets.
- Use a 1 ¼-oz cookie scoop to portion batter and release it onto the baking sheets leaving at least 3 inches of space between them. Bake for 7-8 minutes until the edges are set but the middle is still gooey. Let them chill on the tray for 5 minutes since they are delicate while warm and will stick to the parchment if you try to release them too early. Top with flaky sea salt and enjoy!


Cookies are delicious and easy to make. But my cookies for some reason did not spread at all why would that be?
Hi Nataliya! Did you use a scale to measure the ingredients? Was the batter very thick?
Does it need to be bittersweet? I have semi sweet chips in the pantry currently. Also could I use applesauce in place of eggs to make vegan? Thanks!
Hi Natalie! No. This recipe absolutely requires bittersweet chocolate with minimum 70% cocoa solids. Semisweet chocolate has too much sugar and will make these cookies spread too much. I haven't tested applesauce so I cannot comment on the outcome.
Hi Christina! Can these be made in advance i.e. can it be made the night before it needs to be baked? Or do you think they would be good the next day if baked the night prior?
Hi Ana! If you keep the batter chilled for too long, it won't have the shiny crust. I would recommend baking them and keeping them in an airtight container.
Can you chill the dough overnight?
Hi Lidia, I wouldn't recommend it.
So yummy! Like a dark chocolate brownie but more satisfying? Would be great for an ice cream sundae. Would also like to try as the cookie for an ice cream sandwich--maybe it stays soft-ish?
Thank you Claudia! Yes, I think it would work well in that application.
Hi Christina, the article mentions preheating the oven to 375 then turning it down to 350 when the cookies go in, but I didn’t see that distinction in the recipe card…
Hi K Lewis! The instructions in the recipe card is correct. I have corrected the troubleshooting tip.