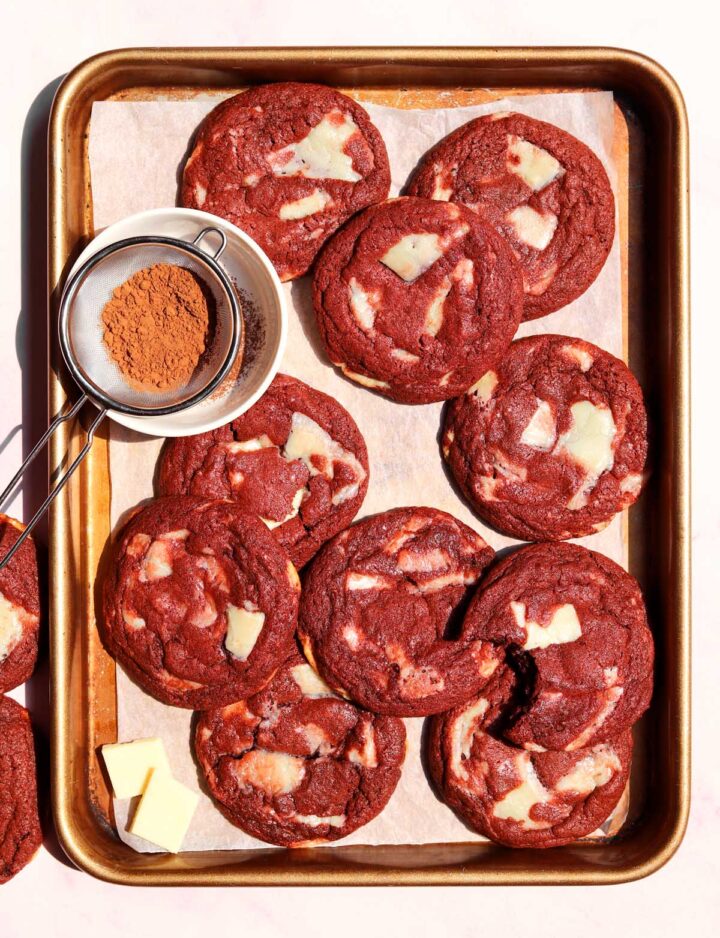
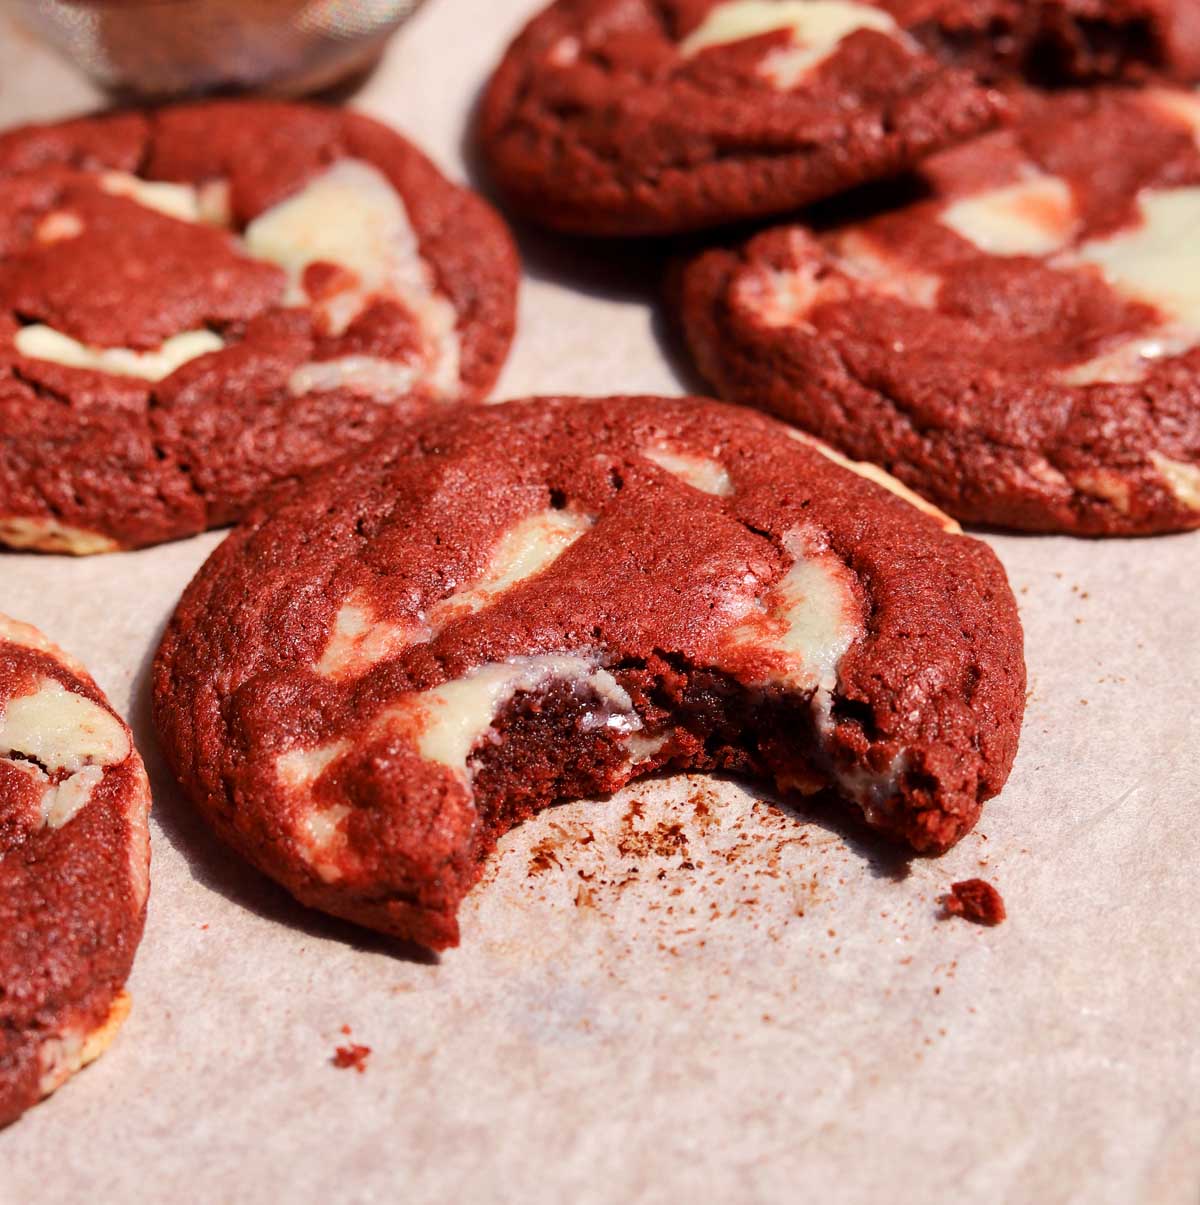
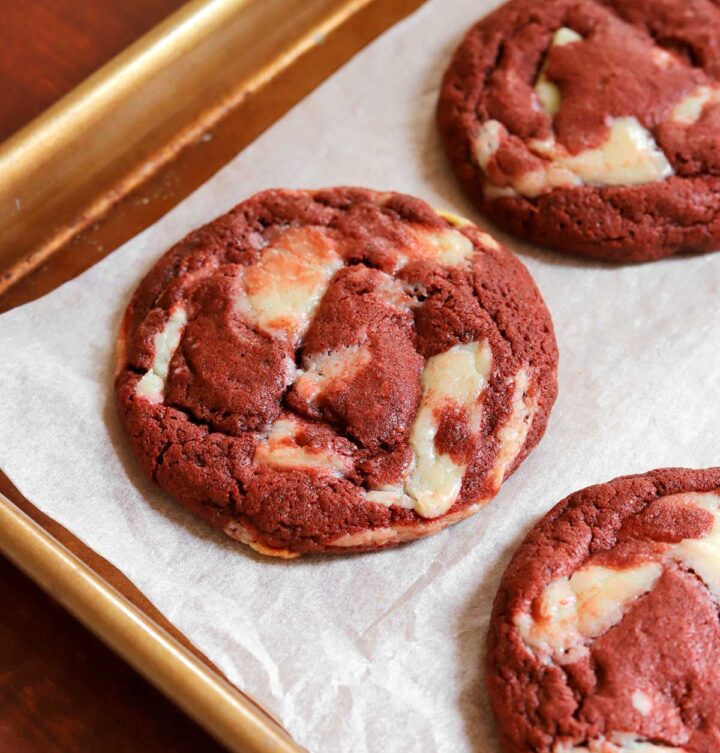
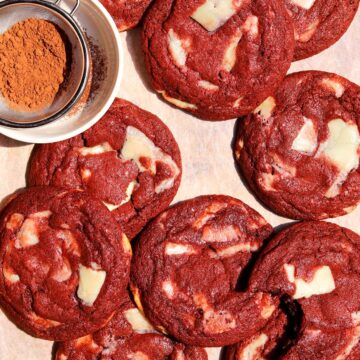
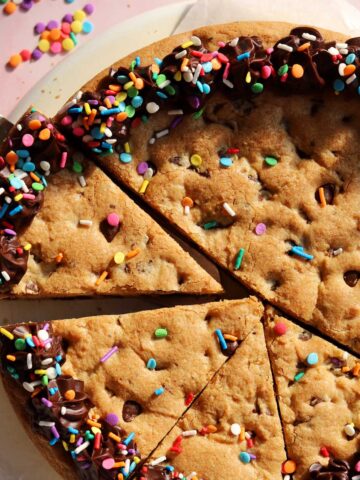
Red Velvet Cookies
These Red Velvet Cookies have all the tangy vanilla flavor, moist texture and rich red color of classic red velvet cake in perfect cookie form. This fudgy cookie dough has a bit of sour cream and vinegar to mimic the tangy cultured dairy flavor of buttermilk as well as natural cocoa powder which provides fruity notes and a rusty red hue. You'll make this white chocolate cream cheese bark to fold into the cookie dough and it essentially tastes like layers of cream cheese frosting baked right into each cookie. They are to die for! If you love red velvet, check out my Red Velvet Cake and Red Velvet Brownies.
WHY THIS RECIPE WORKS
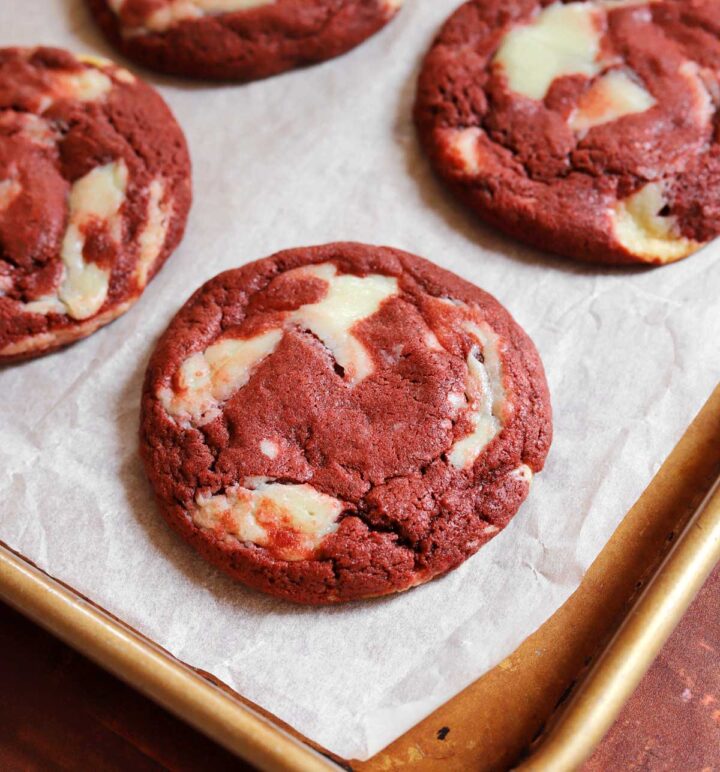
- Fudgy red velvet cookies - you will love the dense, moist and fudgy texture of these cookies as it is in line with the tender, velvet and moist crumb of classic red velvet cake.
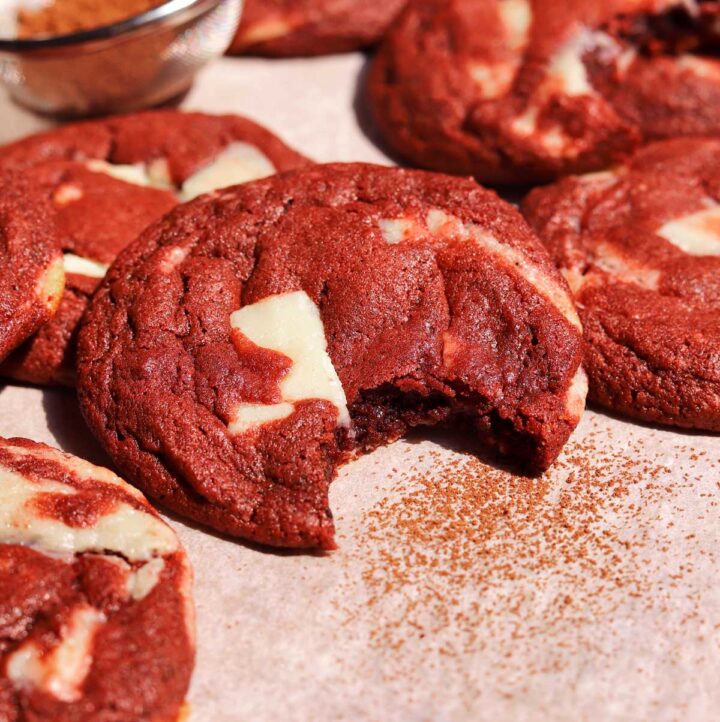
- Cream cheese bark - you'll blend white chocolate with soft cream cheese to make an irresistible chocolate bark that tastes like cream cheese frosting and bakes into a fudge-like texture in the cookie dough.
- Tangy vanilla flavor - the classic combination of cultured dairy and vinegar paired with vanilla creates the traditional red velvet flavor.
- Natural cocoa powder - traditional red velvet cake contains natural, unalkalized (i.e. not Dutch processed) cocoa powder which imparts a lighter reddish hue to the cake crumb as well as adds complex fruity flavors.
WHAT DOES RED VELVET CAKE TASTE LIKE?
Red velvet cake mostly tastes like a tangy vanilla cake with the tiniest hint of chocolate flavor. It's really not a chocolate cake at all and the original purpose of adding cocoa was to add natural coloring, hence the small amount used. Since it relies on natural unalkalized cocoa, the flavor is more fruity than roasted or caramel-like from the cocoa.
WHAT IS RED VELVET CAKE?
Red velvet cake is a tender and moist vanilla cake that has a tangy, slightly fruity flavor from cultured dairy as well as vinegar and a hint of cocoa powder. It has origins in southern USA and is mostly known for its soft, delicate and velvety texture as well as the inclusion of buttermilk. The red color was initially caused by natural (not alkalized) cocoa powder in an acidic batter which created a rusty reddish brown hue in the crumb, but nowadays most red velvet cake recipes include red food coloring for an intense color. A bit of cocoa powder is also what helps create a more delicate and soft texture compared to most standard vanilla cakes.
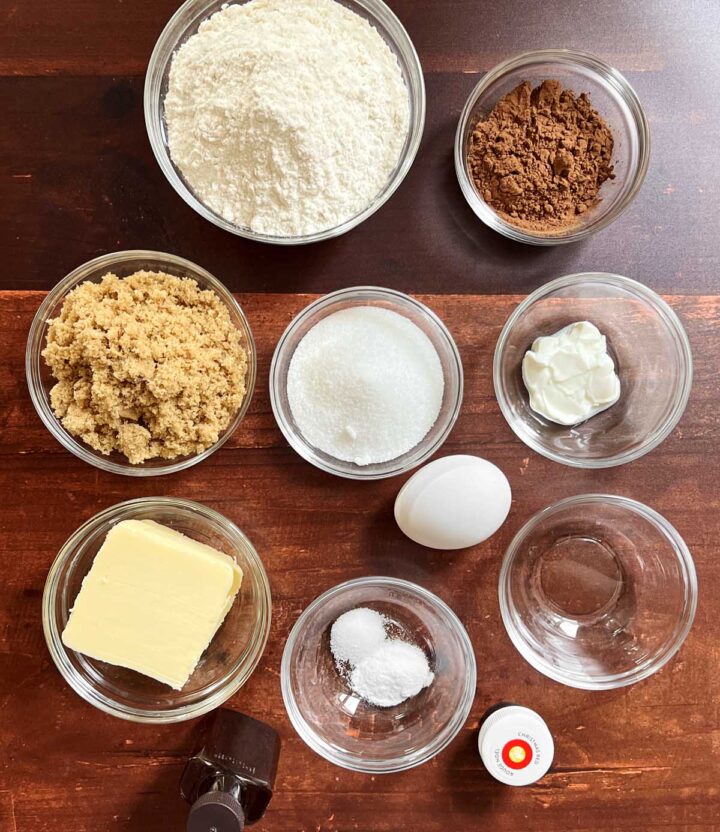
INGREDIENTS FOR RED VELVET COOKIES
- Butter - there is no substitute for butter to make flavorful cookies. It really carries the vanilla and cocoa flavors. You can use salted or unsalted butter, but if you choose salted then I recommend reducing the added salt to ¼ teaspoon.
- Granulated sugar - this recipe uses a combination of simple white granulated sugar and brown sugar. White sugar helps create the crisp edges. I wouldn't recommend reducing the sugar because it will compromise the chewy texture.
- Brown sugar - I prefer light brown sugar for this recipe to give chewiness without the molasses flavor overpowering the red velvet flavor profile.
- Egg - you'll need one whole egg for this recipe. It's the perfect amount of moisture to make these cookies chewy and not cakey.
- Pure vanilla extract - vanilla is essential to making red velvet desserts. I like this Madagascar Bourbon Vanilla extract.
- Sour cream - this is what gives the tanginess like traditional red velvet cake, which uses buttermilk. Buttermilk would add too much moisture to a cookie dough and ruin the chewy texture. Since sour cream is also a cultured dairy product, it works the same in terms of flavor. You can also use plain full fat yogurt.
- Vinegar - it's another acid component that characterizes red velvet cake.
- Red food coloring - it is necessary to create the deeper red color. I do not like using a lot of food dye because it does in fact impart a taste. My recipe only requires ¼ teaspoon of gel coloring, which is a lot less than the 1-2 teaspoons required by other recipes.
- Salt - don't leave out the salt! It really elevates all the flavors! It also enhances the cocoa taste and balances the sweetness.
- All purpose flour - regular unbleached all-purpose flour makes the best chewy cookies in my opinion.
- Cocoa powder - I recommend getting your hands on some good quality cocoa powder! I use natural cocoa powder because that is what you use in traditional red velvet cake. It has a wonderful fruity flavor and lighter rusty reddish brown color. You can still use Dutch Process cocoa powder if that's all you have - it just means your cookies will be a bit darker in color. Make sure you use unsweetened cocoa powder and not cocoa mix.
- White chocolate - the quality of your white chocolate make a huge difference in how it melts and blends with the cream cheese. Seek out pure white chocolate (not compound chocolate) which has only cocoa butter as the fat. There should not be any other vegetable oils added in the ingredient list. This is the one I use here.
- Cream cheese - this is like the frosting on red velvet cake. I blend white chocolate with cream cheese to make a type of bark to chop up and fold into the dough. It is divine!
STEP-BY-STEP INSTRUCTIONS: HOW TO MAKE RED VELVET COOKIES
- STEP 1). Make the white chocolate cream cheese bark. Melt white chocolate VERY GENTLY in a heatproof bowl set over a saucepan with very hot, barely simmering water. Let it melt slowly with occasional stirring. Cut cream cheese into cubes and place it in a medium bowl. Make sure it is very soft. Add melted chocolate over it and use a sturdy whisk to mix it together until it looks smooth and glossy. You don't want to incorporate too much air, but you do need to whisk well so it comes into an emulsion. The mixture will thicken up. Scrape it onto a parchment-lined baking sheet and spread it out to about ⅛ or ¼ inch thickness. It's ok if it looks a bit chalky and maybe looks matte at this point.
- STEP 2). Chill the bark. Place it in the freezer for about 30 minutes until firm. Once firm, peel off the parchment and quickly slice the bark into about ¾ inch squares or pieces (the size or shape doesn't matter too much, but I like to keep them on the larger side since they are soft and will break up as you scoop the cookie dough). Place the pieces back in the freezer until you are ready to add them to the cookie dough.
- STEP 3). Blend dry ingredients. Combine flour, cocoa powder, baking soda and salt in a medium bowl and whisk to blend evenly. Sift the cocoa powder if it is lumpy.
- STEP 4). Blend wet ingredients. Combine soft butter, brown sugar and granulated sugar in a large bowl and cream together until smooth, slightly pale and fluffy with a wide rubber spatula. Add egg mix it in until well incorporated and smooth. Add sour cream, vanilla, vinegar and red food coloring mix to combine.
- STEP 5). Add dry ingredients and fold them in gently.
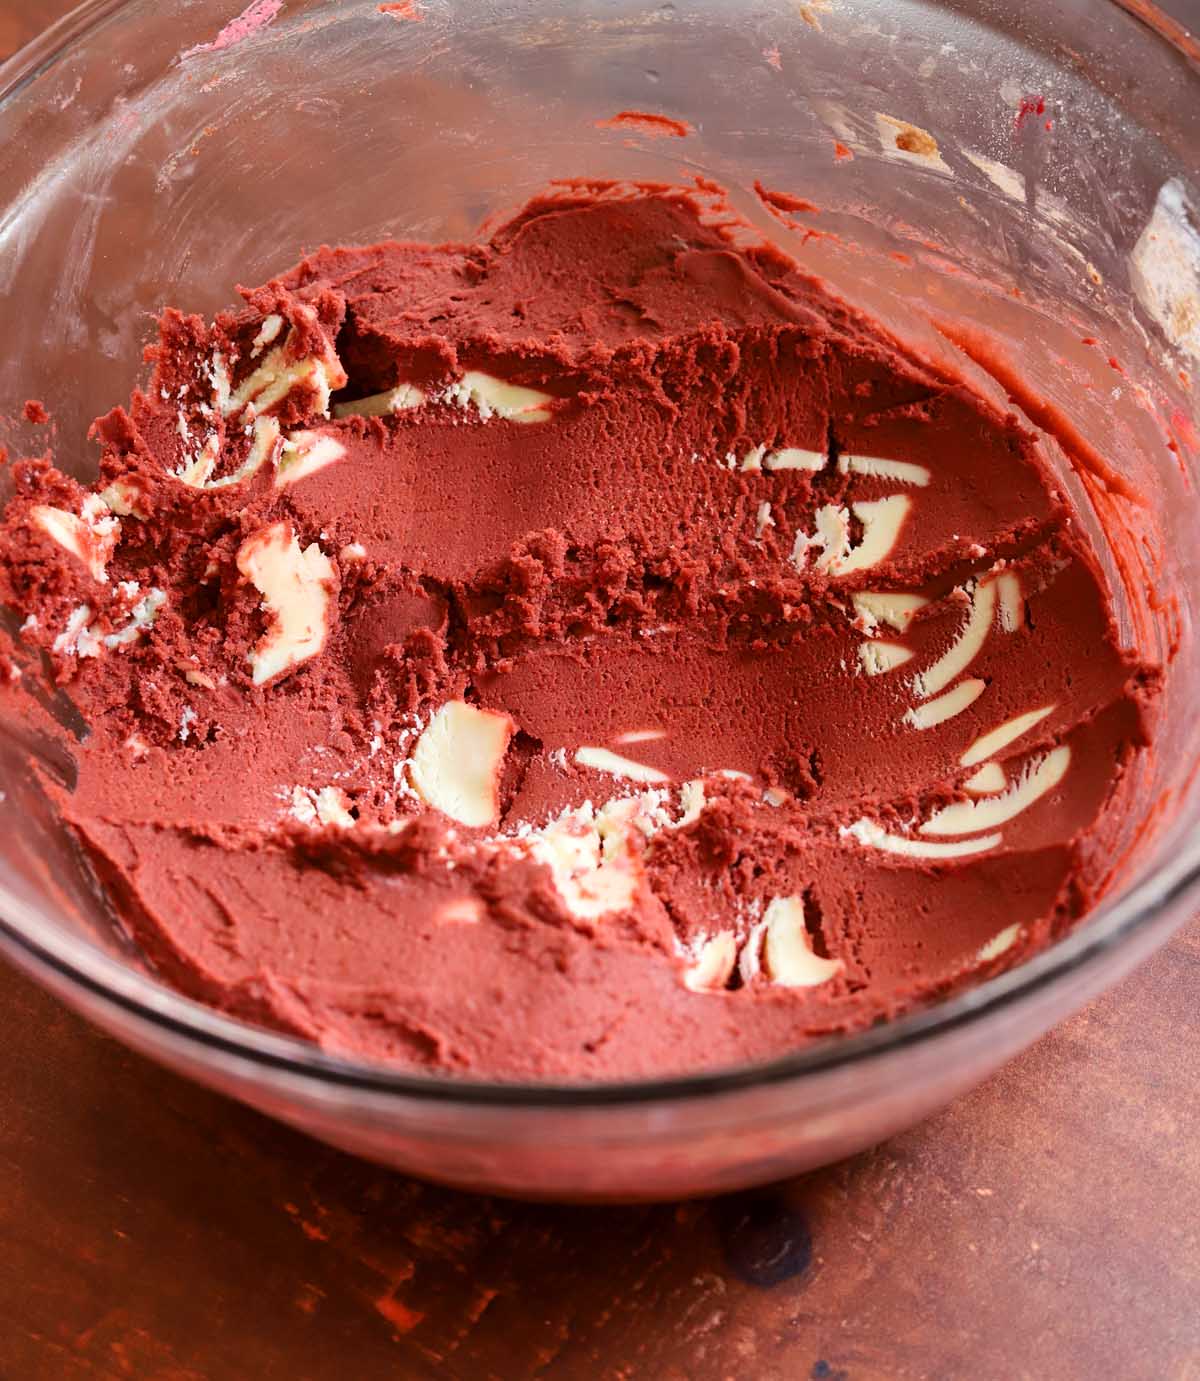
- STEP 6). Fold in white chocolate cream cheese bark. Right before all of the flour is incorporated, add the chilled white chocolate cream cheese wafers and fold them in.
- STEP 7). Chill the dough. Cover the bowl and refrigerate the dough for about 1 hour.
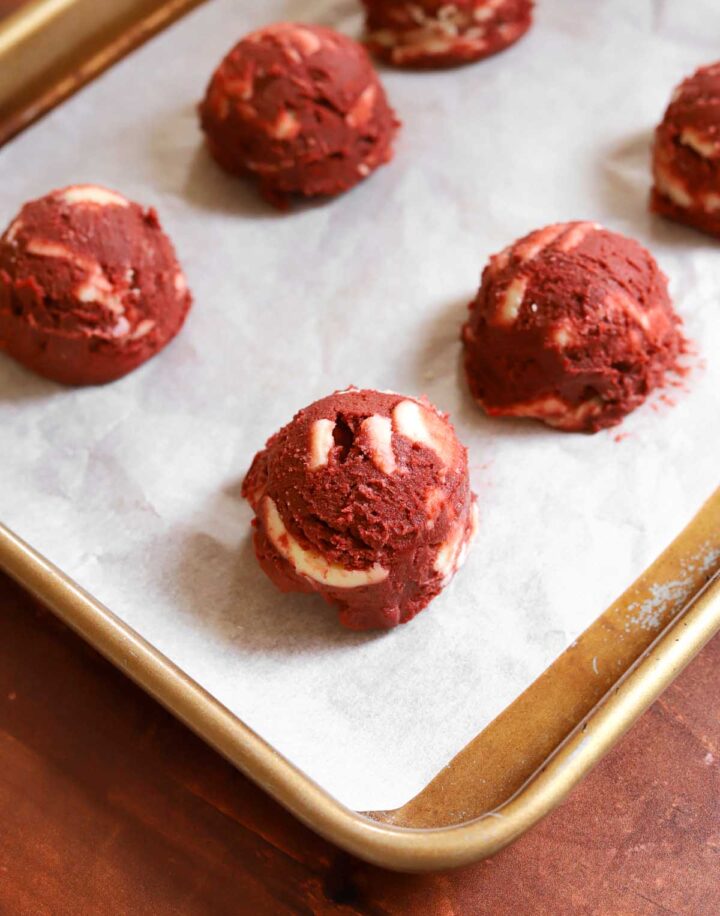
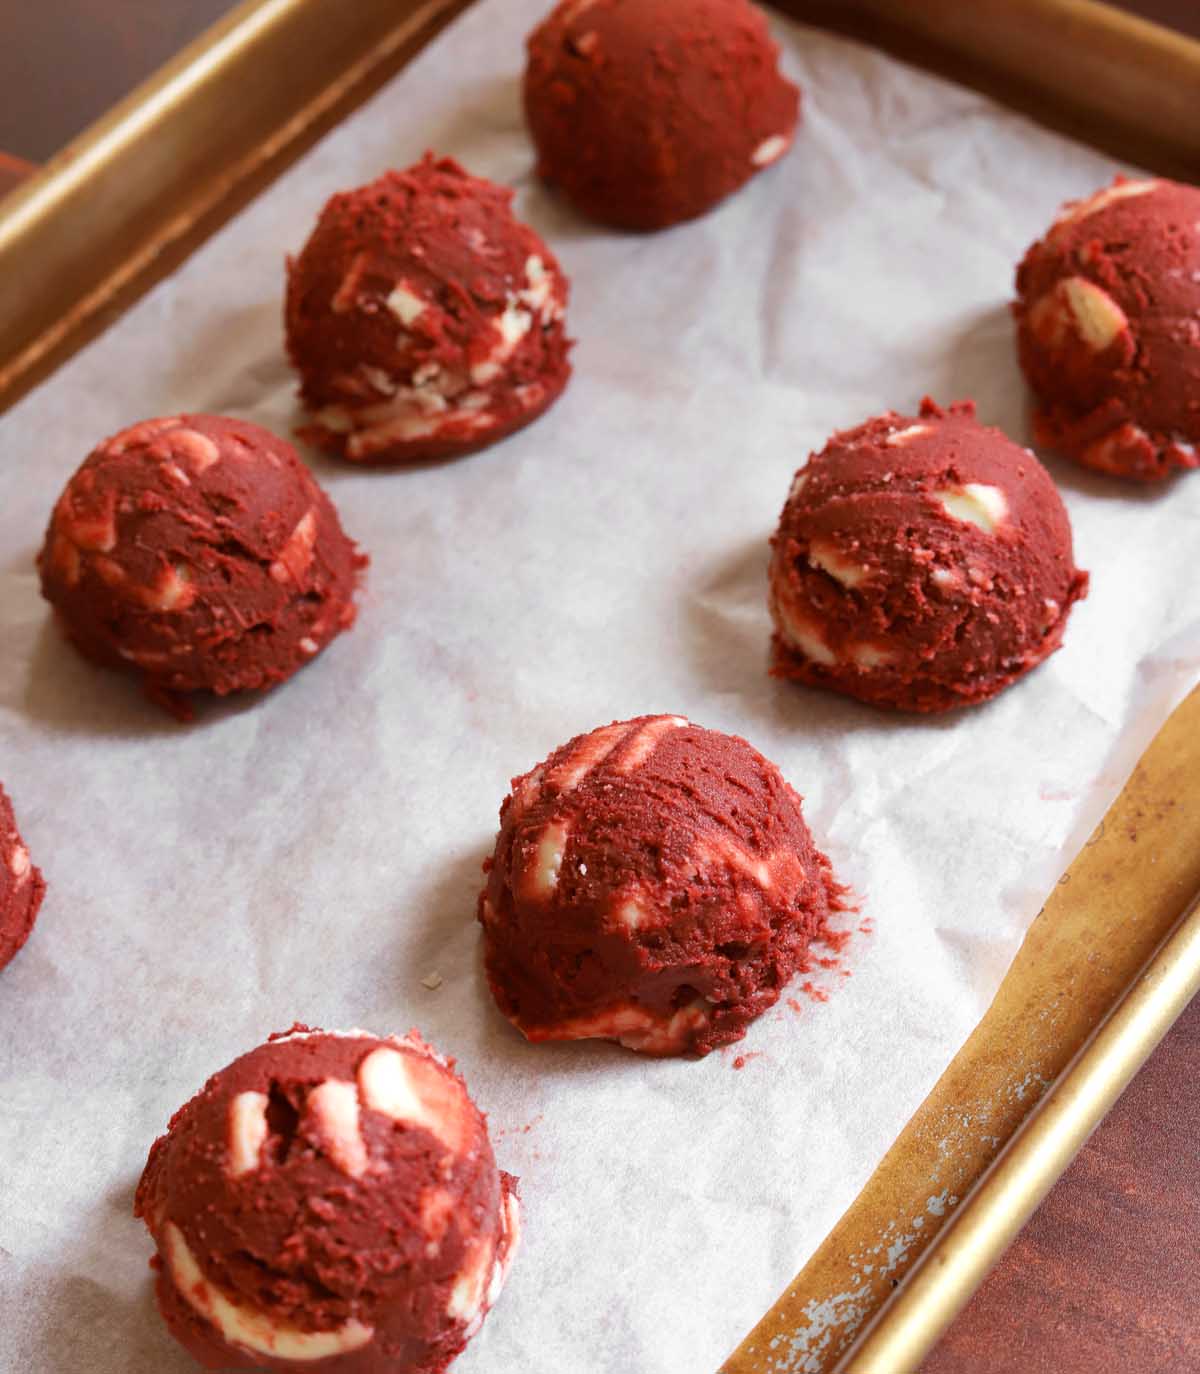
- STEP 8). When ready to bake, use a 1.35oz cookie scoop to portion dough and roll into smooth balls. Place onto prepared baking shets spacing them at least 2 inches apart and bake for 10-12 minutes until set around the edges and slightly soft in the middle. Transfer trays to a wire rack and let cookies set on the trays for 2 minutes before transferring individually to the rack to finish cooling.
EXPERT BAKING TIPS
- Do not over mix. Mix the cookie dough just until the flour is incorporated and the cream cheese bark is evenly distributed. Over-mixing will make the baked cookies less fudgy and it also smears and breaks up the bark which changes the texture of the final cookies.
- Measure the flour correctly. It is important that the flour quantity is correct. If you use too much flour, the cookies will be dry and crumbly, while if you use too little then the cookies spread too much.
- Make sure the cream cheese is completely softened. Very soft cream cheese will blend more easily and evenly with the white chocolate.
- Keep the cream cheese bark frozen right up until you need it. This bark will not harden at room temperature because of the moisture of the cream cheese. It will be easy to cut once frozen, but it will soften quickly as it warms up so I suggest to put it back in the freezer after you chop it up so that it is still firm when you fold it into the cookie dough. Otherwise, it will easily smear into the dough instead of remain as individual pieces.
RECIPE FAQ
This recipe works with both Dutch process and natural cocoa, however traditional red velvet recipes would use natural cocoa since it has a reddish hue.
Plain white distilled vinegar is all that you need for this recipe but I also like using apple cider vinegar.
Contrary to what you might read elsewhere, vinegar does not "tenderize" this cake. There is not enough acid to break down any gluten or anything like that in this batter. The original purpose for adding acidic ingredients was to lower the pH of the batter to maintain the reddish color of the cocoa. This was before red food coloring was invented. The color compounds in unalkalized cocoa stay red when the environment is acidic. Now, with the addition of food coloring, this is no longer the case. However it has become fundamental to the flavor of red velvet cake so it is a distinguishing taste factor.
If you prefer even thicker cookies, you can add another 2 tablespoons (18g) of flour.
Chilling this cookie dough is so important for the best results. Of course you can bake them right away, but they will not be as thick or as chewy and flavorful as they could be if you chill the dough. Ideally you would chill the dough for a minimum of 1 hour and up to 4 hours. It will lend the richest flavor and chewiest texture. Chilled cookie dough also makes cookies with a longer shelf life so they will stay chewy for longer and be slower to stale.
If your cookies didn't spread much then it could be that you've added too much flour or you've made the cookies too small. This recipe makes 14 cookies for the perfect texture and shape.
For the best results, use pure white chocolate with at least 30% cocoa solids, Do not use compound chocolate or melting wafers which contain other hydrogenated oils and not cocoa butter.
STORAGE AND FREEZING
These cookies keep well for up to 2 days in an airtight container at room temperature. To store longer, keep them refrigerated for up to a week since the moisture from the cream cheese white chocolate bark can make them a bit soft. I actually love eating these cold from the fridge!
Yes, you can freeze the cookie dough. I recommend wrapping the cookie dough in plastic wrap and then placing it in a zip top freezer bag for storage. If you would like to freeze individual dough balls then let the dough chill in the fridge for 1 hour, portion and roll into balls, then place dough balls in a zip top freezer bag for storage for up to 3 months.
If you are baking cookies from a block of frozen cookie dough, let the dough thaw completely and then portion, roll and bake as directed. If baking frozen balls of dough, you can bake them directly and add 1-2 minutes to the baking time.
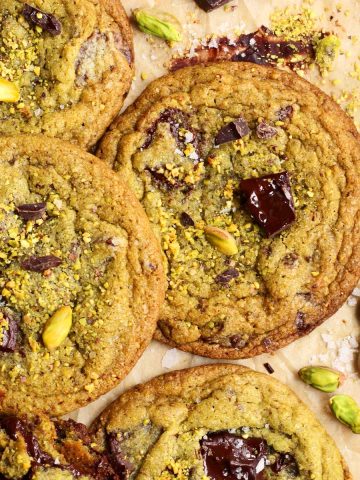
Craving more cookies?
If you love cookies as much as I do, check out the latest recipes:


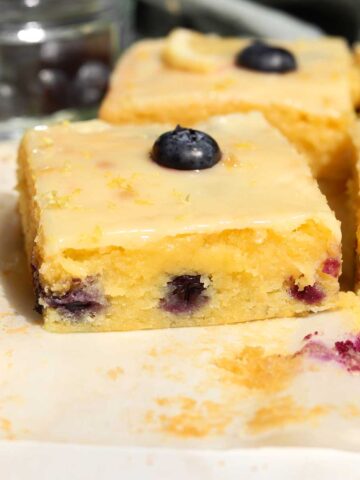
Baking with white chocolate
Here are some of my latest recipes with white chocolate:
Video
Red Velvet Cookies
Ingredients
White Chocolate Cream Cheese Bark:
- 6 oz (170g) white chocolate minimum 28% cocoa butter
- 3 tablespoon (45g) full fat cream cheese, softened
Red Velvet Cookie Dough:
- 1 ¼ cups (180g) all-purpose flour
- 3 tablespoon (18g) natural cocoa powder
- ½ teaspoon baking soda
- ¼ teaspoon salt
- ½ cup (113g) unsalted butter
- ½ cup (110g) packed light brown sugar
- ⅓ cup (65g) granulated sugar
- 1 large egg, at room temperature
- 1 tablespoon (15ml) full fat sour cream or plain yogurt
- 1 teaspoon (5ml) pure vanilla extract
- ¼ teaspoon white vinegar
- ¼ teaspoon red gel food coloring
Instructions
- Make the white chocolate cream cheese bark. Melt white chocolate VERY GENTLY in a heatproof bowl set over a saucepan with very hot, barely simmering water. Let it melt slowly with occasional stirring. Cut cream cheese into cubes and place it in a medium bowl. Make sure it is very soft. Add melted chocolate over it and use a sturdy whisk to mix it together until it looks smooth and glossy. You don't want to incorporate too much air, but you do need to whisk well so it comes into an emulsion. The mixture will thicken up. Scrape it onto a parchment-lined baking sheet and spread it out to about ⅛ or ¼ inch thickness. It's ok if it looks a bit chalky and maybe looks matte at this point. Place it in the freezer for about 30 minutes until firm. Once firm, peel off the parchment and quickly slice the bark into about ¾ inch squares or pieces (the size or shape doesn't matter too much, but I like to keep them on the larger side since they are soft and will break up as you scoop the cookie dough). Place the pieces back in the freezer until you are ready to add them to the cookie dough.
- Blend dry ingredients. Combine flour, cocoa powder, baking soda and salt in a medium bowl and whisk to blend evenly. Sift the cocoa powder if it is lumpy.
- Blend wet ingredients. Combine soft butter, brown sugar and granulated sugar in a large bowl and cream together until smooth, slightly pale and fluffy with a wide rubber spatula. Add egg mix it in until well incorporated and smooth. Add sour cream, vanilla, vinegar and red food coloring mix to combine. Add dry ingredients and fold them in gently. Right before all of the flour is incorporated, add the chilled white chocolate cream cheese wafers and fold them in. Cover the bowl and refrigerate the dough for about 1 hour.
- Preheat oven to 350°F. Line two large cookie sheets with parchment paper.
- When ready to bake, use a 1.35-oz cookie scoop to portion dough and roll into smooth balls. Place onto prepared baking sheets spacing them at least 2 inches apart and bake for 10-12 minutes until set around the edges and slightly soft in the middle. Transfer trays to a wire rack and let cookies set on the trays for 2 minutes before transferring individually to the rack to finish cooling.


the flavor was on point!!
I did have one issue with the softness, found that the dough was really sticky and when they were done baking it looked like the middle was still goeyie. after resting that helped a little (bottoms were also oily), maybe a little more flour/less butter or less mixing of the butter/sugar?
Hi Rowan! It could be too little flour. Did you weigh the dry ingredients?
oh wauw I found my mistake, so sorry! I read 118 instead of 180
thank you for quick response, now I have to try the recipe again cause even with my mistake the taste was delicious
Ok! Glad you figured it out! I hope you enjoye them next time 🙂
Lovely flavour! They were more brown than red, I used Menier cocoa powder. Still they went down a treat!
Thank you Mariana! I think Menier cocoa powder is dutch processed, which will make them more brown than natural cocoa. Glad you still enjoyed them 🙂
Everything was going well and the taste (while it's still raw) was perfect. However, after finishing baking, the cookie spread all over the place. We followed every step, and measured everything right. although the only thing I'm concerned about is that we didn't wait for it to chill in the fridge or freezer for more than 15 minutes.
Hi Khalil! Assuming all the ingredients and amounts were accurate, it is important to chill the dough sufficiently for the best results. Other possibilities could be a cold oven, or the cookies were too big, but likely it was due to lack of chilling.
I just baked them and they look nice but they did not turn out red. They are more brownish, even though I followed the recipe.. Any idea why?
Hi Ilaria! Did you use natural cocoa powder (not Dutch processed)?
Delish
Thanks Colin!
Very easy to make, and I love the way they turned out. I didn’t make the bark, I elected just to put white chocolate in, as I didn’t have any cream cheese on hand, and they are still delicious! A nice cookie for Valentine’s Day
Thank you Denise! Glad you enjoyed the cookies 🙂
This was a great recipe, but I too had issues with my bark separating. I used green and blacks white chocolate, so I think the quality was fine. I actually got frustrated, said " well, not all recipes can be winners" spread it out the best I could and popped it in the freezer. Then I was about to go for a shower and I reread the reviews and seen Annie's comment about putting it back on the stove. I was hesitant as now mine has been in the freezer but I thought what do I have to lose. I took it out of the freezer, back on the stove and voila, it worked. The cookies are perfect, fudgy, cookie, almost brownie like.
Thanks for the feedback Brandi! I'm so glad you were able to save the bark. It is very important, as per the instructions, that the cream cheese is very soft (not cold) for it to mix together properly.
The best! Tangy and sweet, perfect balance!
Thank you Mangiacakes!
Would you need to refrigerate these after baking because of the cream cheese?
Hi Jen! These cookies keep well for up to 2 days in an airtight container at room temperature. To store longer, keep them refrigerated for up to a week since the moisture from the cream cheese white chocolate bark can make them a bit soft.
Hi! Can these be made gluten free?
Hi Elon! This recipe has only been tested with AP flour, but many readers have reported success with King Arthurs and Bobs Read Mill gluten free flour.
Amazing recipie!!
I made a couple mistakes though which could've been avoided.
When I put the white chocolate and cream cheese together it curdled a lot is that meant to happen ? I popped it back on the stove and then it combined really nicely. I also didnt wait long enough for the chocolate and cream cheese bits to harden, so when I mixed them in they kind of just melted into my dough. Regardless, they turned out amazing, thank you for the recipie!!
Thank you Annie! Glad you enjoyed the recipe! It could be related to the quality of the white chocolate. Did you use pure white chocolate?
Every time I mix in the cream cheese, no matter what my white seizes. Room temperature cream cheese, slightly warmed cream cheese, pre-beaten cream cheese... still seizes. Any ideas?
Happened to me to, I popped it back onto the stove and mixed furiously until they combined
Thanks for sharing Annie!
Hi Alicia! What kind of white chocolate are you using?
Hi ,
Can i use beetroot instead the red gel coloring and how ?
Hi Esra! I have not tested that, but typically natural colors are not as stable and require a much higher dosage.
Hi, Cristina! Will this work with cream cheese on the center as a filling?
Hi Kim! I haven't tested it but you could try using the same method for my Stuffed Carrot Cake Cookies.