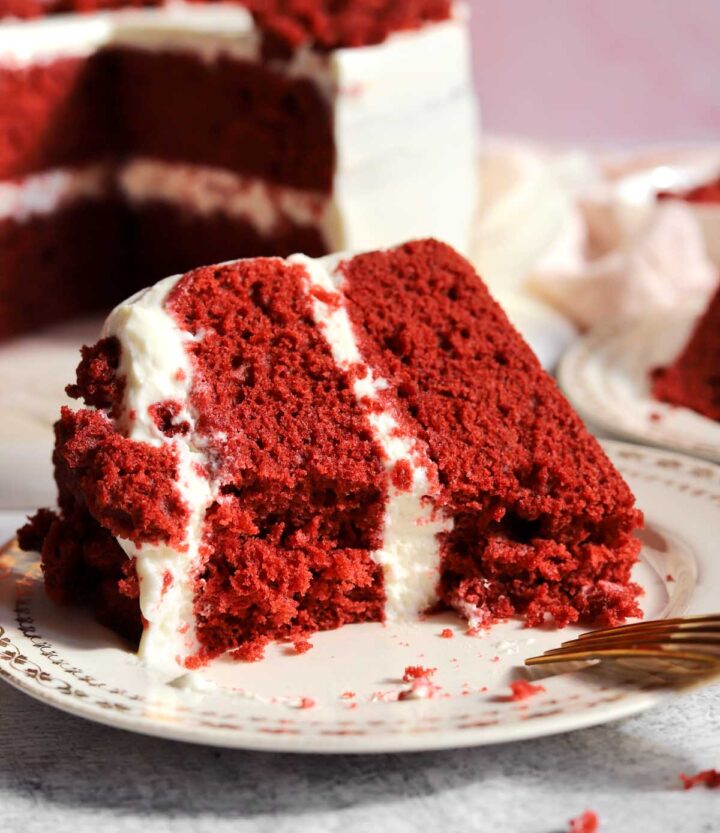
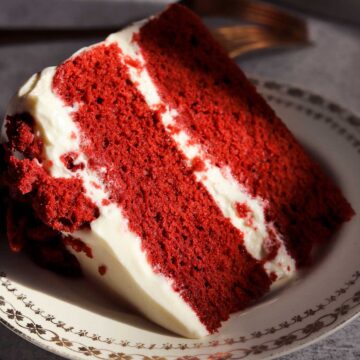
Red Velvet Cake
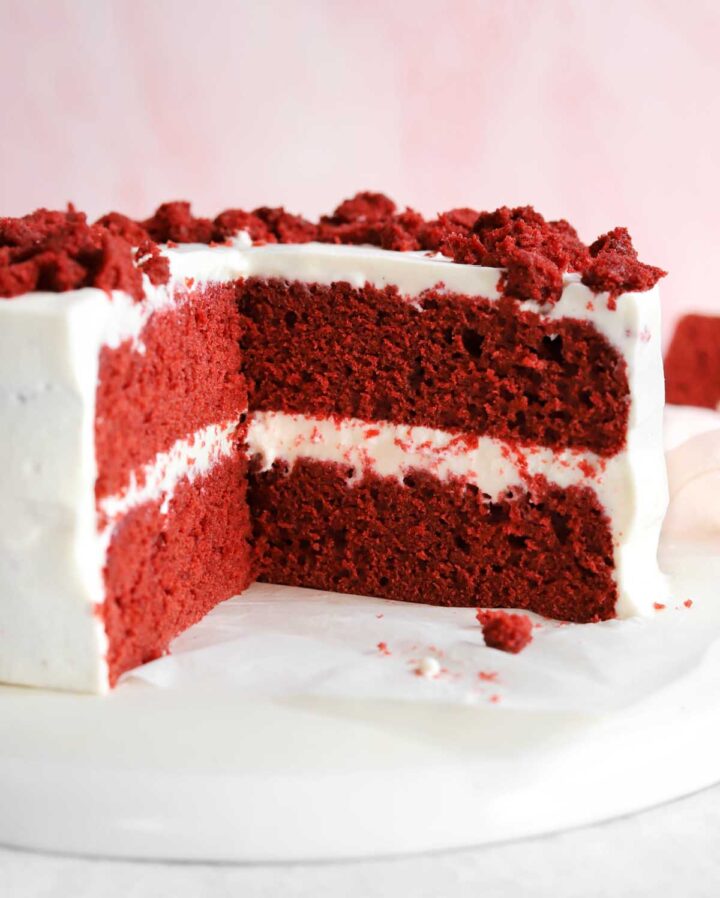
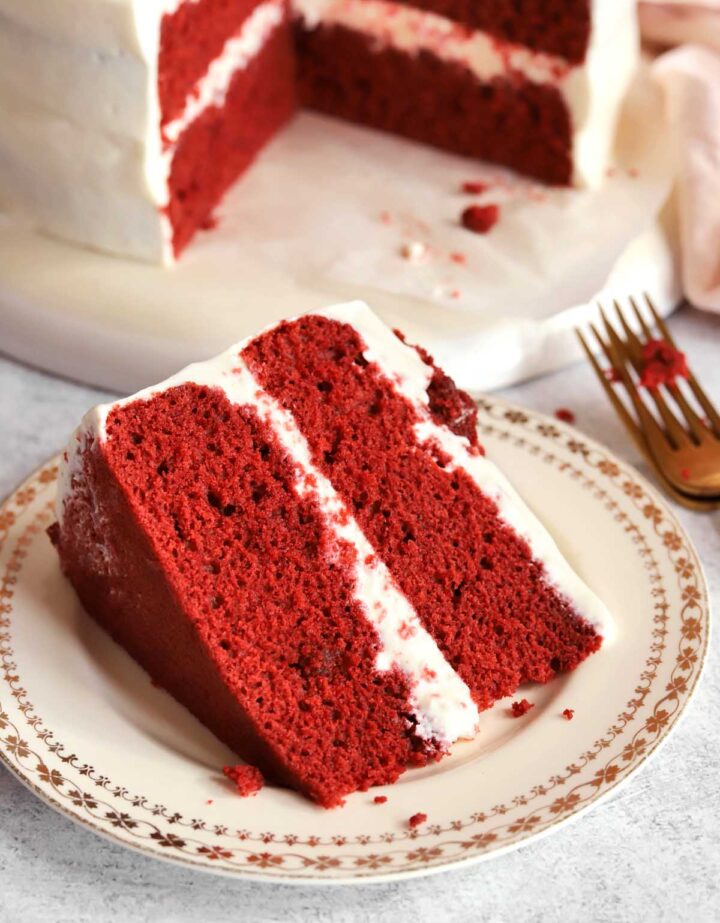
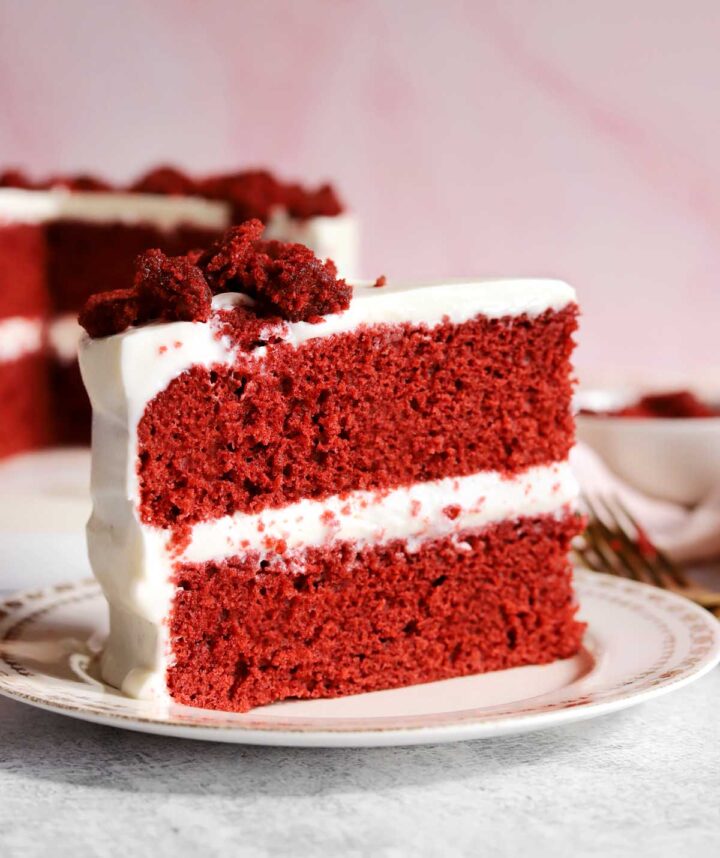
This classic Red Velvet Cake is so soft and moist with a tender crumb that melts in your mouth. It has a delectable tangy vanilla flavor with hints of cocoa and a light whipped cream cheese frosting, then topped with more cake crumbs. I love this recipe because it is very easy to prepare, and also because it isn't oily or mushy like I find a lot of commercial red velvet cakes can be. I use a blend of yogurt and milk instead of buttermilk since buttermilk is not an ingredient that many people have readily in their kitchens, and I also use a very little amount of food coloring paired with natural cocoa to impart the deep red color. If you love red velvet, check out my Red Velvet Cookies and Red Velvet Brownies.

WHY THIS RECIPE WORKS
- So easy to make - this red velvet cake recipe is so easy with a simple one bowl mixing method.
- Moist and not mushy - one of the reasons I don't like commercial red velvet cake is because it is overly moist to the point where it is oily and mushy. This one is soft and plush while also having some structure.
- Not oily - unlike most recipes that call for 1 cup of oil, my recipe uses just ⅓ cup of oil plus ⅓ cup of butter. That's because fat doesn't add moisture, it adds tenderness and shortness. More oil won't make this cake moist, it will just make it mushy.
- Soft and tender - the crumb is tender with a soft texture.
- Light and airy cream cheese frosting - this frosting is SO good! It doesn't have butter so it isn't heavy. It is more like whipped cream cheese, or a cross between whipped cream and cream cheese frosting. You will love it!
- No buttermilk required - I know that not everyone has access to buttermilk and also a lot of people don't want to purchase a whole liter of buttermilk for one single use, so my recipe uses a substitution that creates the same flavor and effect.
WHAT IS RED VELVET CAKE?
Red velvet cake is a tender and moist vanilla cake that has a tangy, slightly fruity flavor from cultured dairy as well as vinegar and a hint of cocoa powder. It has origins in southern USA and is mostly known for its soft, delicate and velvety texture as well as the inclusion of buttermilk. The red color was initially caused by natural (not alkalized) cocoa powder in an acidic batter which created a rusty reddish brown hue in the crumb, but nowadays most red velvet cake recipes include red food coloring for an intense color. A bit of cocoa powder is also what helps create a more delicate and soft texture compared to most standard vanilla cakes.
HOW DOES RED VELVET CAKE GET ITS RED COLOR?
Modern red velvet cake recipes get that signature red color from red food dye. In fact most recipes you will find on the internet ask for almost an entire bottle of red food coloring, and as a Food Scientist I can tell you that would be an ILLEGAL amount. It would never be permitted to be sold in stores, so I do not prepare it like that at home. It also imparts a bitter and metallic taste that I do not like. I'm happy to say that this recipe has just ½ teaspoon of food coloring, and that is plenty to give this cake a lovely red hue.
WHAT DOES RED VELVET CAKE TASTE LIKE?
Red velvet cake mostly tastes like a tangy vanilla cake with the tiniest hint of chocolate flavor. It's really not a chocolate cake at all and the original purpose of adding cocoa was to add natural coloring, hence the small amount used. Since it relies on natural unalkalized cocoa, the flavor is more fruity than roasted or caramel-like from the cocoa.
INGREDIENTS FOR RED VELVET CAKE
- Butter - you can use salted or unsalted butter, but if you choose salted then I recommend reducing the added salt by ⅛ tsp.
- Oil - I use a blend of butter and oil to add the flavor of butter while also contributing softness from oil. Oil is a liquid fat that is still liquid at room temperature and even while cold so that the refrigerated cake will still have a soft crumb.
- Granulated sugar - this recipe uses a simple white granulated sugar. I wouldn't recommend reducing the sugar because it will compromise the moist texture.
- Egg - you'll need 2 whole eggs for this recipe. Make sure they are large eggs which have an average weight of 57g.
- Pure vanilla extract - vanilla is essential to making red velvet desserts. I like this Madagascar Bourbon Vanilla extract.
- Yogurt - this is what gives the tanginess like traditional red velvet cake, which uses buttermilk. Buttermilk is an ingredient that I find most people do not carry at home, so I use a combination of plain low fat yogurt and milk to create the same flavor and effect.
- Vinegar - it's another acid component that characterizes red velvet cake.
- Red gel food coloring - it is necessary to create the deeper red color. I do not like using a lot of food dye because it does in fact impart a taste. I only use ½ teaspoon of gel coloring for this recipe, which is a lot less than the full bottle required by other recipes.
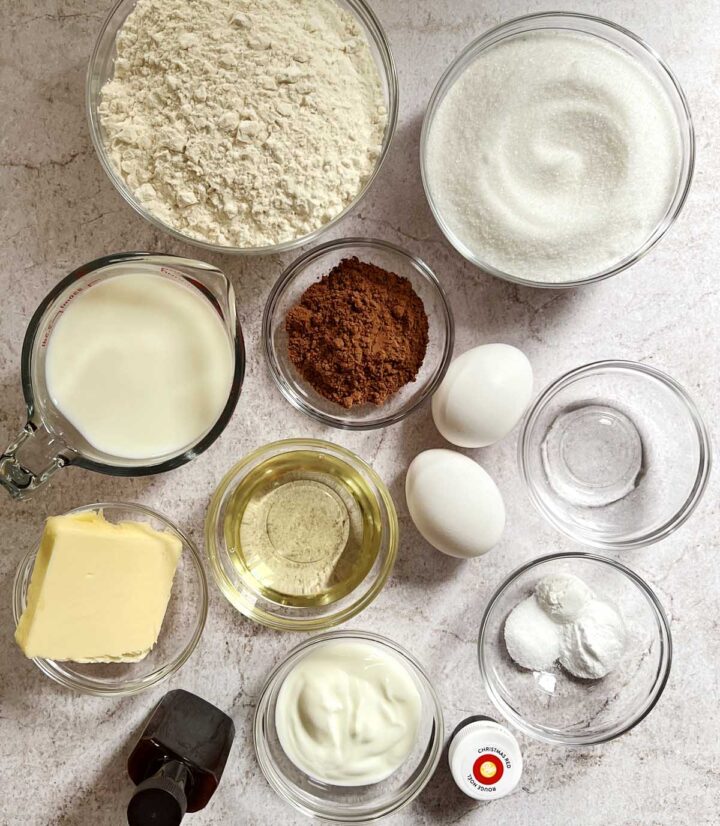
- Salt - don't leave out the salt! It really elevates all the flavors. It also enhances the cocoa taste and balances the sweetness.
- All purpose flour - regular unbleached all-purpose flour works great for this red velvet cake.
- Cocoa powder - I use natural cocoa powder because that is what you use in traditional red velvet cake. It has a wonderful fruity flavor and lighter rusty reddish brown color. You can still use Dutch Process cocoa powder if that's all you have - it just means your cake will be a bit darker in color. Make sure you use unsweetened cocoa powder and not cocoa mix.
- Milk - this is the main source of moisture in this recipe. I use whole milk.
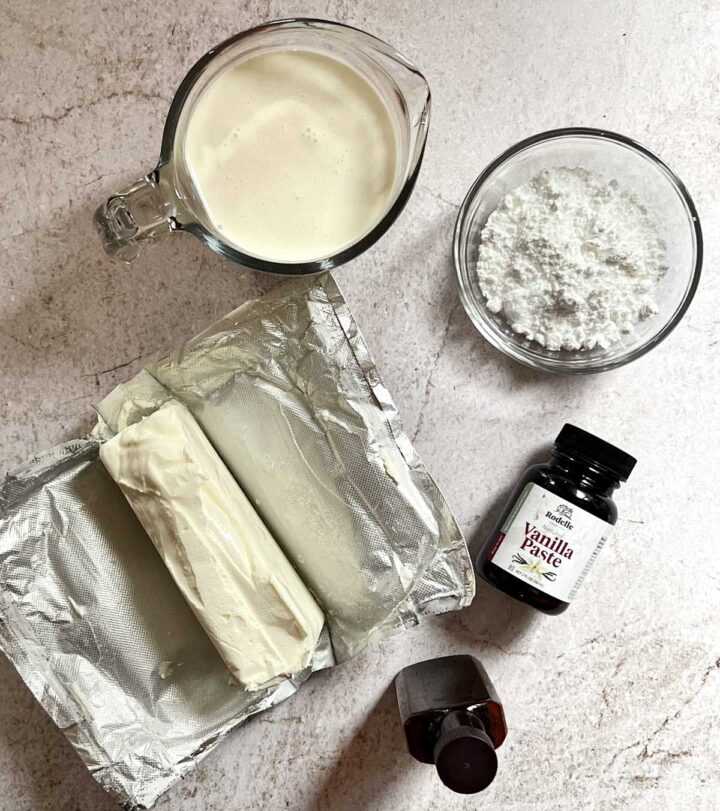
- Cream cheese - 1 block of cream cheese is enough for this frosting since it is a light and airy hybrid of cream cheese frosting and whipped cream.
- Whipping cream - you'll fold whipped cream into smooth cream cheese to create the lightest and airiest frosting.
STEP-BY-STEP INSTRUCTIONS: HOW TO MAKE RED VELVET CAKE
- STEP 1). Blend dry ingredients. Sift flour, cocoa powder, baking soda and baking powder into a large bowl. Add sugar and salt and whisk well to blend evenly.
- STEP 2). Blend wet ingredients. Combine yogurt, red food coloring and vinegar in a medium bowl and whisk to combine. Add melted butter, oil, eggs and vanilla and whisk to blend well until very smooth.
- STEP 3). Combine wet and dry ingredients. Make a well in the center of the dry ingredients in the other large bowl and pour in the wet mixture. Begin to mix on low speed with an electric hand mixer until most of the flour is absorbed - it will still look dry at this point. Begin pouring in the warm milk in 3 additions. Slowly pour in one third of the milk while mixing on low. Stop to scrape down the bowl. Continue to pour in the rest of the milk while mixing and stop to scrape down the bowl one more time. Once all of the milk is incorporated, stop mixing and just fold by hand to ensure there are no lumps, but do not over-mix this batter or it can cause tunnelling in the cake crumb.
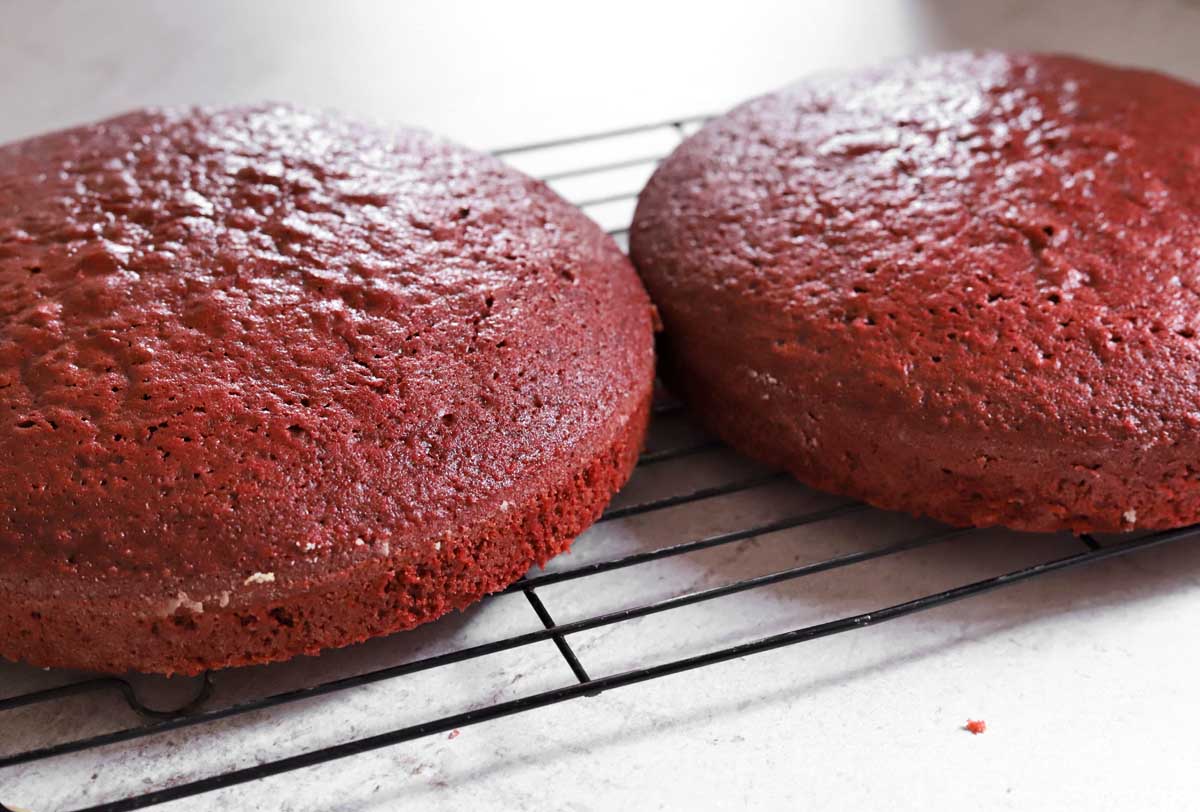
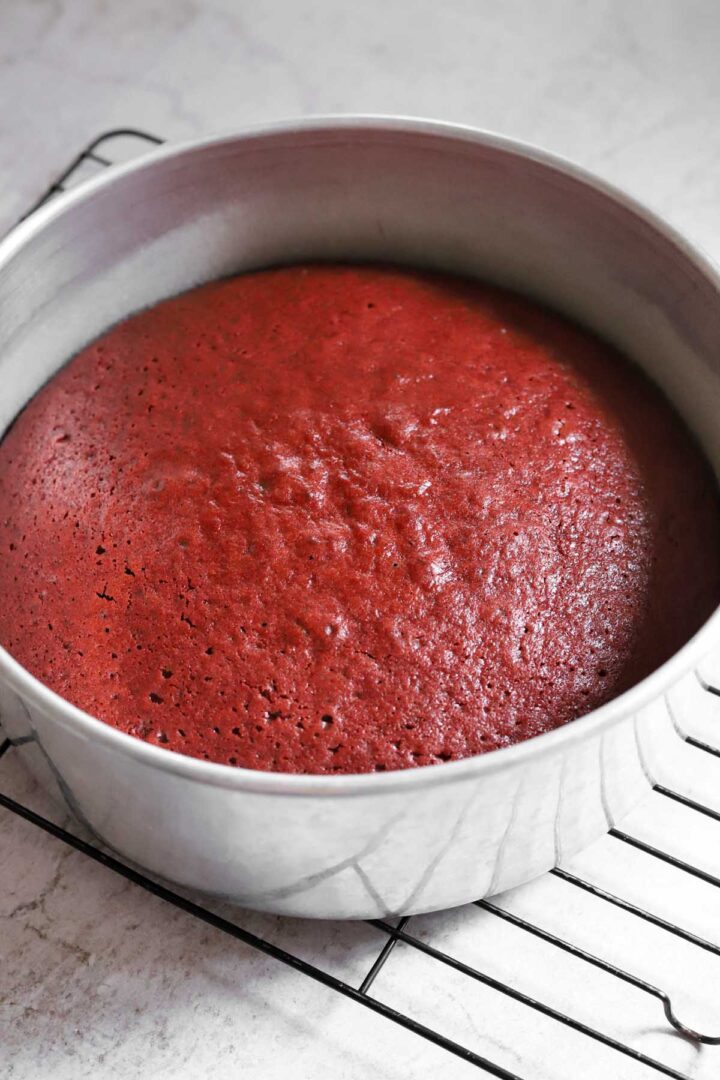
- STEP 4). Bake. Divide the batter evenly between the pans, tap the pan on the counter 3 times to burst any large air pockets and bake for 23-26 minutes until a toothpick inserted into the center of the cakes comes out clean.
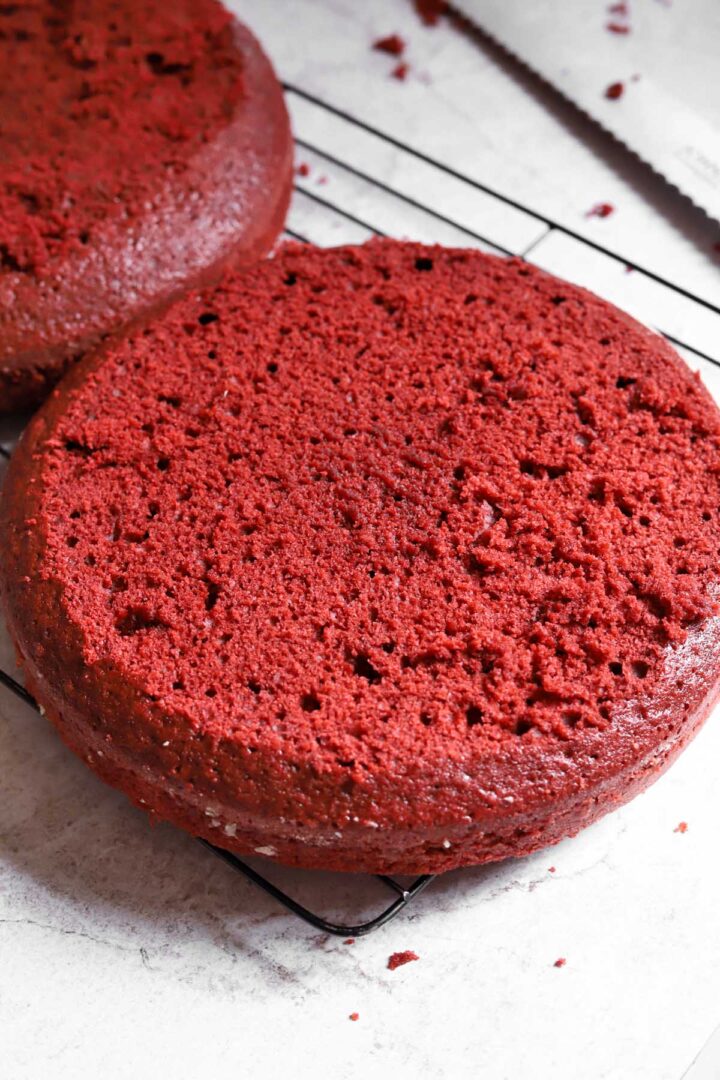
- STEP 5). Trim the tops. Once the cakes are cooled, level the top of the slightly domed cake layers with a serrated knife and reserve the crumbs for decorating later.
- STEP 6). Make the frosting. Combine soft cream cheese with 40g (about ⅓ cup) powdered sugar, vanilla extract and vanilla bean paste in a large bowl and mix with an electric hand mixer until very smooth and there are no lumps remaining. In a medium bowl, whip heavy cream until soft peaks. Add the remaining 2 tablespoons (20g) powdered sugar and whip on high until firm peaks form. Add one third of the whipped cream to the cream cheese mixture and mix on low speed until combined (you'll add the cream in 3 parts so the frosting is light and fluffy). Add half of the remaining whipped cream and fold it in evenly. Finally fold in the last of the whipped cream until well blended.
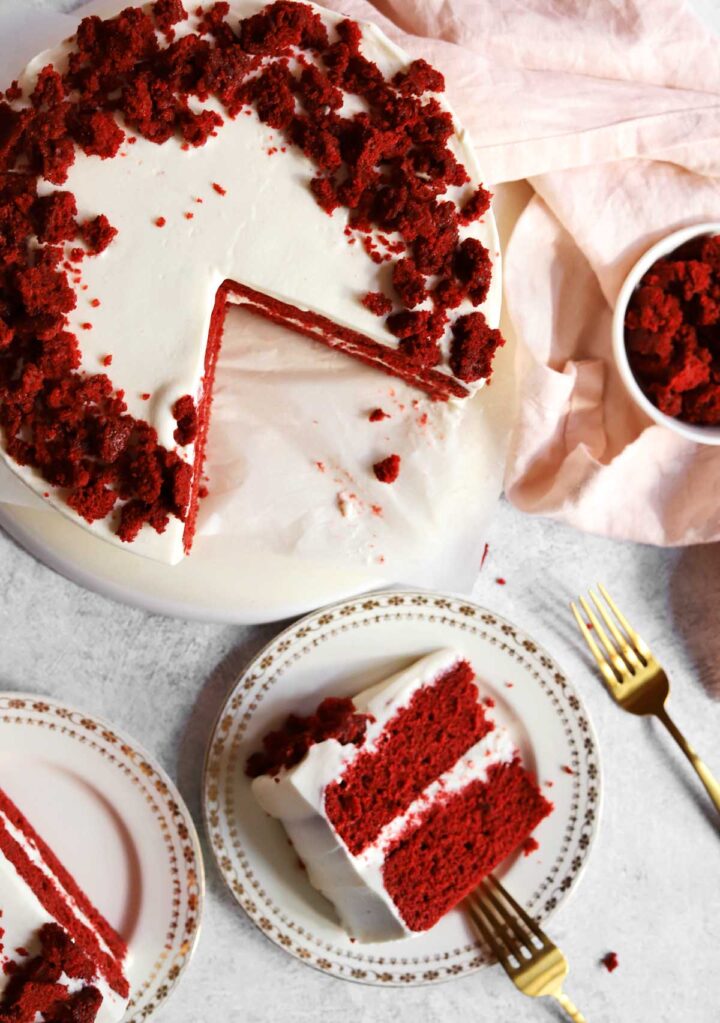
- STEP 7). Assemble the cake. Place one of the trimmed cake layers on a serving plate or a turn table and add about1 ½ cups of frosting, then spread it out to the edges leaving about ½ inch border. Place the other cake layer on top and cover the cake with the remaining frosting. Crumble the trimmings of the cake that you have reserved over the top of the cake to cover the circumference. Let the cake chill for 30 minutes before serving and enjoy!
HOW TO SUBSTITUTE BUTTERMILK
Instead of using buttermilk, I have developed this recipe to use yogurt which is more widely available to most people in most countries. In this recipe I use a blend of low fat yogurt and milk to make a substitute for buttermilk. Yogurt and milk are much more accessible and common ingredients in most home kitchens. This way you won't need to go out and buy buttermilk specifically for this recipe.
EXPERT BAKING TIPS
- Do not over mix - it is really important to mix the batter just until it is homogeneous. Over-mixing will cause it to be less tender and also may cause holes or tunnels in the baked cake.
- Measure the flour correctly - incorrect flour measurements are the most common mistakes in baking. If you use too much flour, the cake tends to be drier and more dense, while not enough flour means the cake lacks structure and can collapse.
- Make sure the cream cheese is completely softened - the only way the frosting will be smooth is if the cream cheese is completely soft. Cold cream cheese will not blend well with the whipped cream.
RECIPE FAQ
This recipe works with both Dutch process and natural cocoa, however the original recipe would use natural cocoa since it has a reddish hue.
Plain white distilled vinegar is all that you need for this recipe but I also like using apple cider vinegar.
Contrary to what you might read elsewhere, vinegar does not "tenderize" this cake. There is not enough acid to break down any gluten or anything like that in this batter. The original purpose for adding acidic ingredients was to lower the pH of the batter to maintain the reddish color of the cocoa. This was before red food coloring was invented. The color compounds in unalkalized cocoa stay red when the environment is acidic. Now, with the addition of food coloring, this is no longer the case. However it has become fundamental to the flavor of red velvet cake so it is a distinguishing taste factor.
STORAGE AND FREEZING
Since this cake has a cream cheese frosting, it needs to be stored in the fridge. Since it uses some oil in the recipe, it is still soft even when cold. But for the softest texture, let the cake sit at room temperature for 20 minutes before serving.
Yes, you can freeze the baked and cooled cake layers without the frosting. Wrap them well with plastic wrap, then wrap in foil and store them in a resealable bag in the freezer for up to 3 months.
If you love cake, check out these recipes!
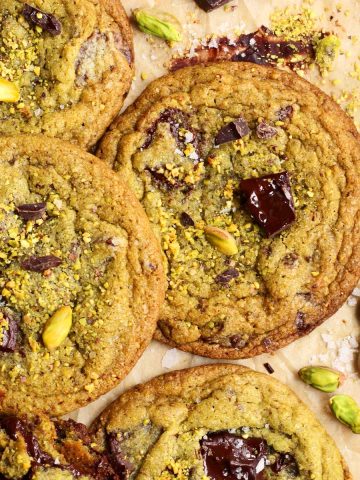
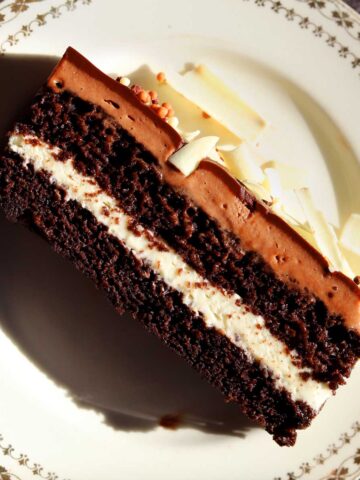
Ultimate Moist Chocolate Fudge Cake Lemon Pistachio Cake Sticky Toffee Date Cake Chocolate Mousse Cake One Bowl Vanilla Cake with Chocolate Frosting Best Vanilla Cupcake Recipe with Chocolate Fudge Frosting Chocolate Truffle Cake White Chocolate Raspberry Cake Dark Chocolate Raspberry CakeFor the love of chocolate
Looking for more recipes that use cocoa or chocolate? Try these:


Chocolate cake love
Here are more delicious chocolate cake recipes:
Video
Red Velvet Cake
Ingredients
Red Velvet Cake Batter
- 2 cups plus 2 tbsp (300g) all-purpose flour
- 3 tablespoon (18g) unsweetened natural cocoa powder
- 1 teaspoon baking soda
- ½ teaspoon baking powder
- 1 ½ cups (300g) granulated sugar
- ½ teaspoon table salt
- ¼ cup (60ml) plain yogurt
- ½ teaspoon red gel food coloring (or 2 teaspoon liquid food coloring)
- 1 teaspoon (5ml) white vinegar
- ⅓ cup (75g) unsalted butter, melted
- ⅓ cup (80ml) vegetable or canola oil
- 2 large eggs room temperature
- 2 teaspoon (10ml) pure vanilla extract or vanilla bean paste
- 1 cup (237ml) whole milk, warmed slightly
Cream Cheese Buttercream Frosting
- 8 oz (227g) brick cream cheese
- ½ cup (60g) powdered sugar, divided
- 1 teaspoon (5ml) pure vanilla extract
- ½ teaspoon vanilla bean paste (optional)
- 1 ¼ cups (300ml) heavy 35% whipping cream
Instructions
- Preheat your oven to 350°F. Lightly grease two 8-inch round cake pans, dust lightly with flour and line the base with rounds of parchment paper.
- Make the cake batter. Sift flour, cocoa powder, baking soda and baking powder into a large bowl. Add sugar and salt and whisk well to blend evenly.
- Combine yogurt, red food coloring and vinegar in a medium bowl and whisk to combine. Add melted butter, oil, eggs and vanilla and whisk to blend well until very smooth.
- Make a well in the center of the dry ingredients in the other large bowl and pour in the wet mixture. Begin to mix on low speed with an electric handheld mixer until most of the flour is absorbed - it will still look dry at this point. Begin pouring in the warm milk in 3 additions. Slowly pour in one third of the milk while mixing on low. Stop to scrape down the bowl. You can also mix it in the bowl of a stand mixer fitted with the whisk attachment on medium speed or mix by hand using a wire whisk starting in the center and slowly dragging the dry ingredients in from the sides to combine evenly with the wet ingredients.
- Continue to pour in the rest of the milk while mixing and stop to scrape down the bowl one more time. Once all of the milk is incorporated, stop mixing and just fold by hand to ensure there are no lumps, but do not over-mix this batter or it can cause tunnelling in the cake crumb.
- Divide the batter evenly between the pans, tap the pan on the counter 3 times to burst any large air pockets and bake for 23-26 minutes until a toothpick inserted into the center of the cakes comes out clean.
- Remove the pans from the oven and transfer to a wire rack to cool for 30 minutes. Run a small offset spatula around the edges of the pans, then carefully flip the cakes out and transfer them to a wire rack to cool completely.
- Once the cakes are cooled, level the top of the slightly domed cake layers with a serrated knife and reserve the crumbs for decorating later.
- Make the frosting. Combine soft cream cheese with 40g (about ⅓ cup) powdered sugar, vanilla extract and vanilla bean paste in a large bowl and mix with an electric hand mixer until very smooth and there are no lumps remaining. In a medium bowl, whip heavy cream until soft peaks. Add the remaining 2 tablespoons (20g) powdered sugar and whip on high until firm peaks form. Add one third of the whipped cream to the cream cheese mixture and mix on low speed until combined (you'll add the cream in 3 parts so the frosting is light and fluffy). Add half of the remaining whipped cream and fold it in evenly. Finally fold in the last of the whipped cream until well blended.
- Assemble the cake. Place one of the trimmed cake layers on a serving plate or a turn table and add about1 ½ cups of frosting, then spread it out to the edges leaving about ½ inch border using a large offset spatula. Place the other cake layer on top and cover the cake with the remaining frosting. Crumble the trimmings of the cake that you have reserved over the top of the cake to cover the circumference. Let the cake chill for 30 minutes before serving and enjoy!

Hi! Could this be made in a 9x13 pan? Thank you in advance!
Hi Laura! Yes it can.
Thank you! That worked out great!!
You are welcome Laura!
Hello! I only have 9in pan, would that work instead of 8 inch? Thank you! Looking forward to making red velvet cake!
Hi Laura! I would recommend increasing the recipe by 1/4 or the layers will be thin.
Love this recipe! Can this recipe be turned into cupcakes?
Thank you Gina! Yes, you will need to reduce baking time to around 18 min and it will yield around 15 cupcakes. Keep the same baking temp.
Hello! Are you using regular plain yogurt or greek yogurt for this recipe? Thank you!
Hi Becky! I am using regular plain yogurt for this recipe.
How do i substitute eggs in this cake?
Hi Jay! This recipe has only been tested with eggs, however a few readers have had success with egg replacer powders, like Bobs Red Mill Egg Replacer.
This cake is super easy to make, though for some reason it took nearly 10 min longer to bake than the top recommended time, which is unusual. In any case, it turned out great - not too sweet and easy to decorate. It was a hit at our family gathering!
Thanks for the feedback Denise 🙂
Doubled this recipe to make a 13” cake. Absolutely loved it. Turned out perfectly. I used Dutch processed cocoa which resulted in a darker red cake. Next time I’ll try making it with normal cocoa powder.
Thank you Laura! Glad you enjoyed the cake 🙂
No words.
As soon as I saw you'd posted a red velvet recipe, I knew I had to try it.
I'm from Barcelona, and I don't usually like "American" cakes because I find them too sweet or too buttery.
This one is delicious!
Just like the carrot cake, the chocolate cake, the chai caramel cake, and so many others... All your recipes are well-balanced, easy to follow, and guarantee a fantastic result.
Thank you for sharing all your knowledge.
You are welcome Cristina! Thanks for the feedback! I'm so glad you enjoyed the recipe 🙂
This is it! The perfect red velvet cake recipe. The cake is light and plush as promised. The whipped cream on the icing balanced out the tang of the cream cheese.
Thank you so much Min! 🙂
I'm excited to try this tonight, but of course I happen to have buttermilk at home but not yogurt haha. Is there I way I could replace the yogurt/milk mixture with buttermilk?
Hi Anna! I haven't tested that but it would probably work.
10/10
It is such a light and soft sponge and the cream cheese frosting is divine. Christina is so talented, and her instructions are so clear. Thank you
You are welcome Andrea! Thanks for the kind feedback 🙂
Oh, this looks so good. Can I use a Bundt cake pan with this recipe? How long would I bake it for?
Hi Sam! I haven't tested that but I think it can work. Baking time will probably be around 45-55 min, however you will need to check with a skewer.
Plush is the perfect way to describe this cake. Not oily and interestingly tasted better the next day even with refrigeration. As for the whipped cream cheese icing, I almost prefer it to traditional cream cheese buttercream. I live in a country that does not sell block cream cheese so I used around 4-5g of modified cornstarch to make up for the lack of thickeners in my tub cream cheese. Icing was very stable after chilling the cake for 3hrs and did not budge even after cutting a slice. Thank you for another fire recipe Christina!
You are welcome Mariam! Thank you so much for the feedback! Good to know it can work with tub cream cheese with some modifications.
Nice cake. Husband liked that it was soft without a ton of oil. The husband and kids would have preferred the frosting be more cheesy and dense. The frosting was light and fluffy for me....Maybe I erred on the whipping of the cream for them. ( Though, I loved the frosting!) My cake was more maroon than red. I used hershey regular powder (natural). I noticed the color in the tin was not very dark (I had a tin of hershey special dark, but that was dutched, so i did not use it). Thank you for sharing this recipe.
You are welcome Dawn! Glad everyone enjoyed the cake 🙂
Hi,
Can I bake these on a baking sheet and then cut out the shapes for a tea cake? How long would I have to bake them for?
Hi Katie! Yes you can. I would try 18-23min or until a toothpick inserted into the center of the cakes comes out clean.
Haven’t tried it yet, I’m waiting for Valentine’s Day but had a question. In one place it says prepare two cake pans, elsewhere in the instructions it says three pans. The picture looks like two but I just want to confirm this is meant to make two 8 inch cakes. Correct?
Hi Charity! Yes, this recipe if for two 8" cake pans.
I need to bake these as cupcakes for my daughter's birthday. Do I bake them at the same time and temp as the cake recipe calls for?
Hi Kelly! You will need to reduce baking time to around 18 min and it will yield around 15 cupcakes. Keep the same baking temp.