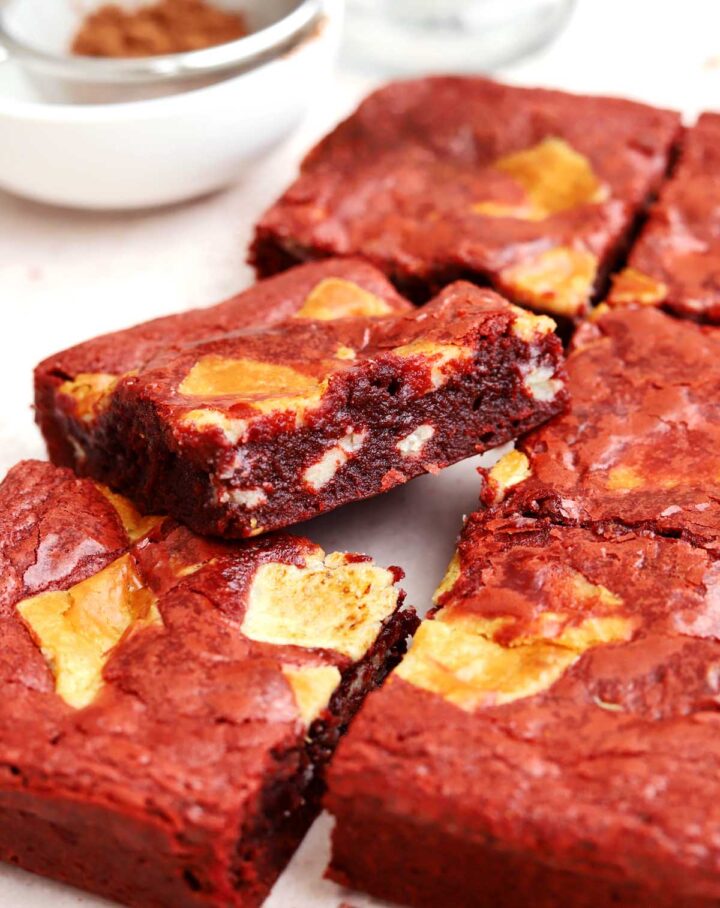
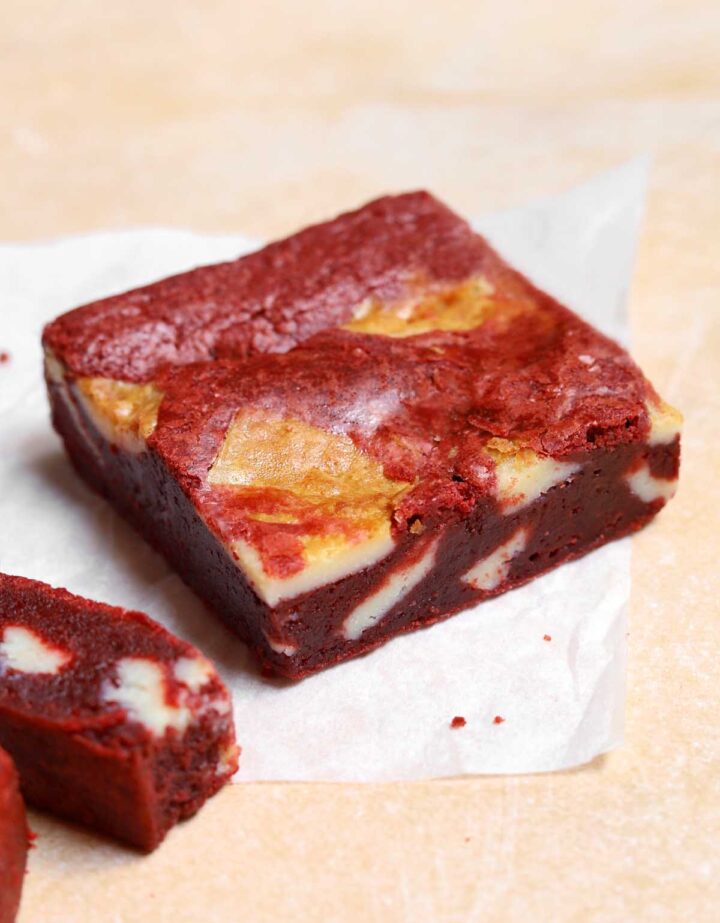
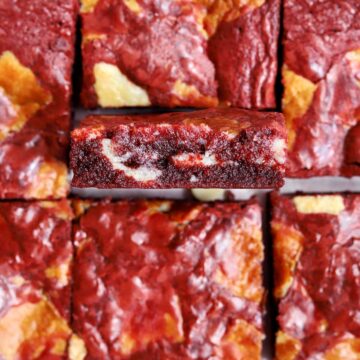
Red Velvet Brownies
If you love red velvet cake, then wait until you try these Red Velvet Brownies that have the same delightful tangy vanilla flavor combined with the rich fudgy, melt-in-your-mouth texture of brownies and white chocolate cream cheese bark. To stay in line with the red velvet flavor profile, these brownies use natural cocoa powder and some melted dark chocolate, yet they have a less intense chocolate flavor compared to my Best Homemade Brownies and Shiny Crust Brownies. It's not just a regular brownie recipe with added food coloring. In fact, this recipe does not have a ton of food coloring. I use just enough to turn it a lovely pinky/rusty red color. If you love making red velvet desserts, try my Red Velvet Cookies and Red Velvet Cake too!
WHY THIS RECIPE WORKS
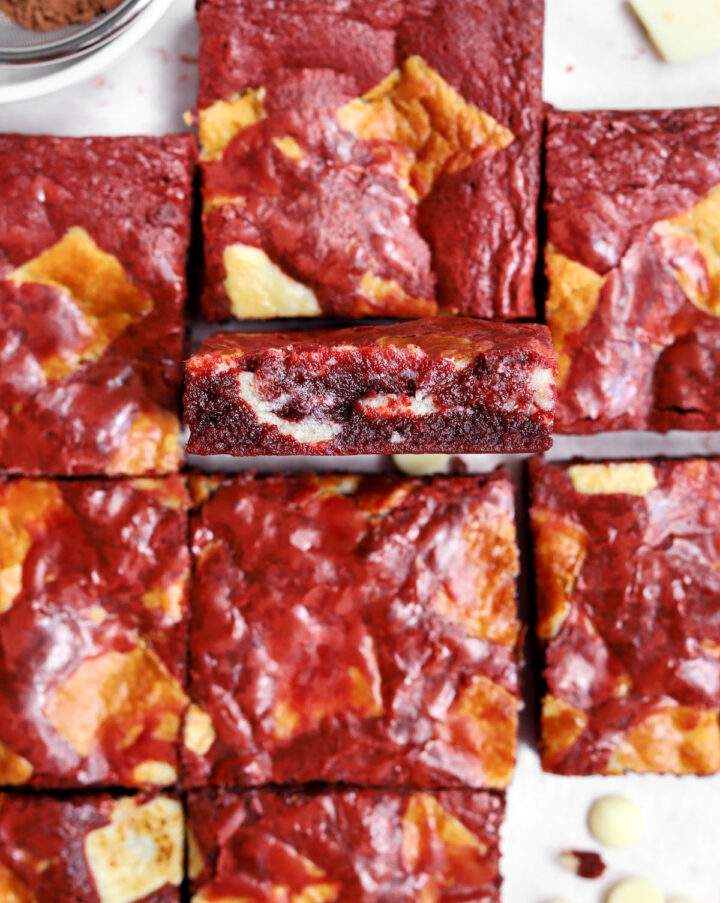
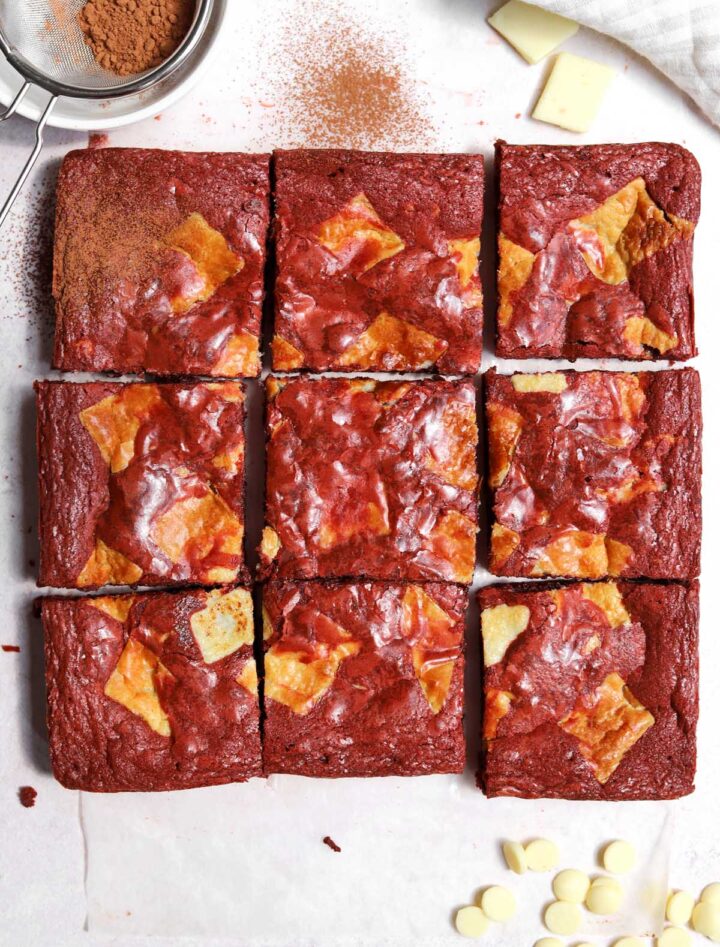
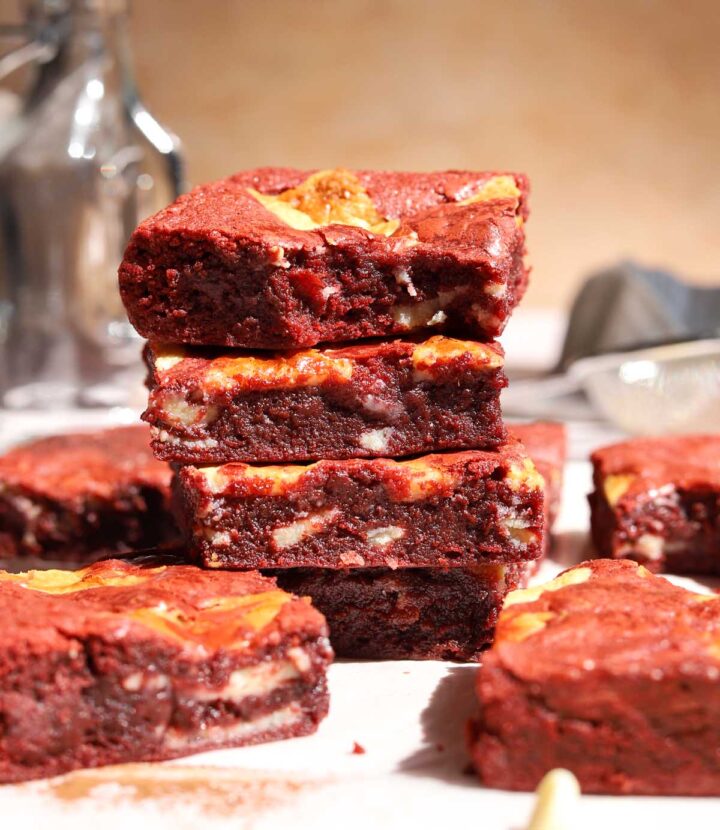
- Soft fudgy texture - you won't believe how soft and fudgy these brownies are with a texture that just melts in your mouth just like a plush red velvet cake, except more dense and chocolaty.
- Classic red velvet flavor - the combination of natural cocoa, sour cream or yogurt, vinegar and vanilla creates the classic red velvet flavor profile that typically comes from buttermilk.
- Shiny crust brownies - the beautiful crimson red glossy top is so attractive.
- White chocolate cream cheese bark - I make a delicious creamy white chocolate bark with cream cheese to mix into the batter, just like for my Red Velvet Cookies, and it really completes the theme like cream cheese frosting over red velvet cake. It is absolutely divine and adds another element of creamy texture.
WHAT IS RED VELVET CAKE?
Red velvet cake is a tender and moist vanilla cake that has a tangy, slightly fruity flavor from cultured dairy as well as vinegar and a hint of cocoa powder. It has origins in southern USA and is mostly known for its soft, delicate and velvety texture as well as the inclusion of buttermilk. The red color was initially caused by natural (not alkalized) cocoa powder in an acidic batter which created a rusty reddish brown hue in the crumb, but nowadays most red velvet cake recipes include red food coloring for an intense color. A bit of cocoa powder is also what helps create a more delicate and soft texture compared to most standard vanilla cakes.
WHAT DOES RED VELVET CAKE TASTE LIKE?
Red velvet cake mostly tastes like a tangy vanilla cake with the tiniest hint of chocolate flavor. It's really not a chocolate cake at all and the original purpose of adding cocoa was to add natural coloring, hence the small amount used. Since it relies on natural unalkalized cocoa, the flavor is more fruity than roasted or caramel-like from the cocoa.
INGREDIENTS FOR RED VELVET BROWNIES
- Butter - you can use salted or unsalted butter, but if you choose salted then I recommend reducing the added salt to ¼ teaspoon.
- Dark chocolate - pure dark chocolate keeps this recipe in line with "brownies", but I do use less than traditional brownies to make sure the tangy vanilla flavor comes forward.
- Granulated sugar - this recipe uses a simple white granulated sugar. I wouldn't recommend reducing the sugar because it will compromise the fudgy texture.
- Egg - you'll need one whole egg plus one yolk for this recipe. Two whole eggs would make the brownies cakey since we are also using sour cream which adds moisture. Using just the yolk helps maintain the texture by eliminating the added moisture from egg white.
- Pure vanilla extract - vanilla is essential to making red velvet desserts. I like this Madagascar Bourbon Vanilla extract.
- Sour cream - this is what gives the tanginess like traditional red velvet cake, which uses buttermilk. Buttermilk would add too much moisture to a brownie recipe and ruin the fudgy texture. Since sour cream is also a cultured dairy product, it works the same in terms of flavor. You can also use plain full fat yogurt.
- Vinegar - it's another acid component that characterizes red velvet cake.
- Red gel food coloring - it is necessary to create the deeper red color. I do not like using a lot of food dye because it does in fact impart a taste. I only use ½ teaspoon of gel coloring for this recipe, which is a lot less than the 1-2 teaspoons required by other recipes.
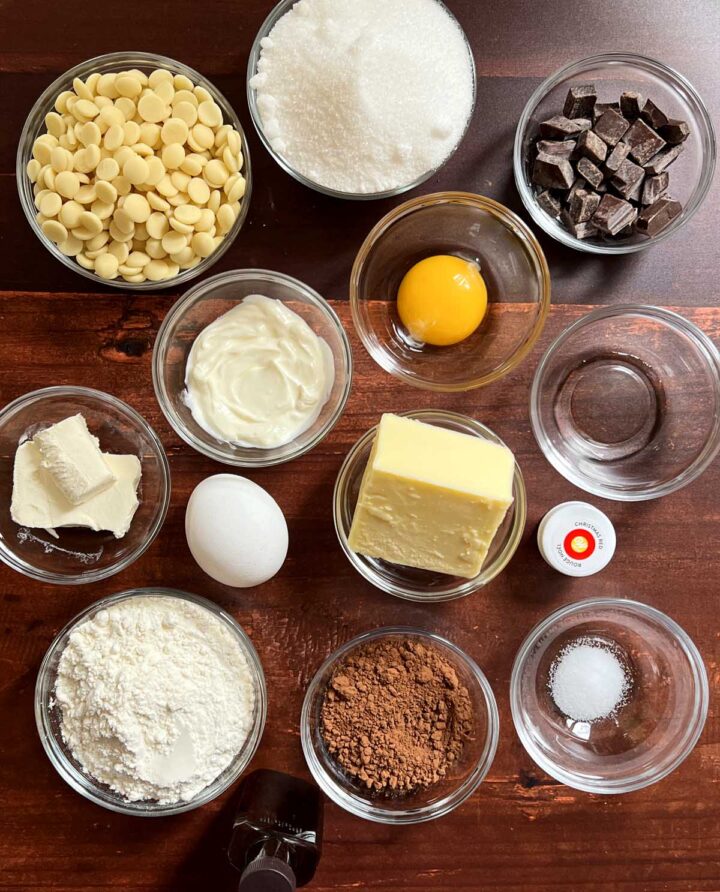
- Salt - don't leave out the salt! It really elevates all the flavors. It also enhances the cocoa taste and balances the sweetness.
- All purpose flour - regular unbleached all-purpose flour makes the best fudgy brownies.
- Cocoa powder - I recommend getting your hands on some good quality cocoa powder since it is the main flavor in these brownies. I use natural cocoa powder because that is what you use in traditional red velvet cake. It has a wonderful fruity flavor and lighter rusty reddish brown color. You can still use Dutch Process cocoa powder if that's all you have - it just means your brownies will be a bit darker in color. Make sure you use unsweetened cocoa powder and not cocoa mix.
- White chocolate - the quality of your white chocolate make a huge difference in how it melts and blends with the cream cheese. Seek out pure white chocolate (not compound chocolate) which has only cocoa butter as the fat. There should not be any other vegetable oils added in the ingredient list. This is the one I use here.
- Cream cheese - this is like the frosting on red velvet cake. I blend white chocolate with cream cheese to make a type of bark to chop up and fold into the batter. It is divine!
STEP-BY-STEP INSTRUCTIONS: HOW TO MAKE RED VELVET BROWNIES
- STEP 1). Make the white chocolate cream cheese bark. Melt white chocolate VERY GENTLY in a heatproof bowl set over a saucepan with very hot, barely simmering water. Let it melt slowly with occasional stirring. Cut cream cheese into cubes and place it in a medium bowl. Make sure it is very soft. Add melted chocolate over it and use a sturdy whisk to mix it together until it looks smooth and glossy. You don't want to incorporate too much air, but you do need to whisk well so it comes into an emulsion. The mixture will thicken up. Scrape it onto a parchment-lined baking sheet and spread it out to about ⅛ or ¼ inch thickness. It's ok if it looks a bit chalky and maybe looks matte at this point.
- STEP 2). Chill. Place it in the freezer for about 30 minutes until firm. Once firm, peel off the parchment and quickly slice the bark into about ¾ inch squares or pieces (the size or shape doesn't matter too much, but I like to keep them on the larger side since they are soft and will break up as you scoop the cookie dough). Place the pieces back in the freezer until you are ready to add them to the cookie dough.
- STEP 3). Melt chocolate. Combine butter and chocolate in a heatproof bowl and melt in the microwave, then stir until smooth and glossy. You can also melt it gently in a saucepan over the stove. Add cocoa powder, vinegar and salt and whisk to combine.
- STEP 4). Mix eggs and sugar. Combine egg, yolk, and sugar in a large bowl and whisk vigorously by hand until pale and creamy-looking. You can also use a hand mixer or a stand mixer fitted with the whisk attachment. Mix in sour cream, vanilla and red food coloring. Add the warm chocolate mixture and whisk to blend well.
- STEP 5). Add flour. Sift in the flour and fold it in gently. Add the chilled white chocolate cream cheese wafers and fold them in. Reserve a few extra for topping if you'd like.
- STEP 6). Bake. Spread the batter into the prepared pan and place reserved wafers on top. Use a small offset spatula to spread some of the batter over the wafers to nestle them in. Bake for 25-28 minutes until the top is glossy and the edges feel set and skewer inserted into the center comes out with a few sticky moist crumbs attached. Do not over-bake these or they will be dry. Transfer pan to a wire rack and let brownies cool completely in the pan. Refrigerate for at least 1 hour before lifting out and cutting into squares.
EXPERT BAKING TIPS
- Do not over mix - fold gently and minimally after you add the white chocolate cream cheese bark. Over-mixing can create brownies that are more doughy than soft and fudgy.
- Measure the flour correctly - since this is a small amount of batter, it is important that the flour quantity is correct. If you use too much flour, the brownies will be more dry.
- Make sure the cream cheese is completely softened - this is important to ensure that the cream cheese blends smoothly with the white chocolate to make the bark so that it sets up firm enough to slice.
- Keep the white chocolate cream cheese bark chilled - the cream cheese softens the texture of the white chocolate, so it is important to keep it cold if your house is warm so that it is easier and less messy when you fold it into the batter.
RECIPE FAQ
This recipe works with both Dutch process and natural cocoa, however traditional red velvet recipes would use natural cocoa since it has a reddish hue.
Plain white distilled vinegar is all that you need for this recipe but I also like using apple cider vinegar.
Contrary to what you might read elsewhere, vinegar does not "tenderize" this cake. There is not enough acid to break down any gluten or anything like that in this batter. The original purpose for adding acidic ingredients was to lower the pH of the batter to maintain the reddish color of the cocoa. This was before red food coloring was invented. The color compounds in unalkalized cocoa stay red when the environment is acidic. Now, with the addition of food coloring, this is no longer the case. However it has become fundamental to the flavor of red velvet cake so it is a distinguishing taste factor.
For the best results, use pure white chocolate with at least 30% cocoa solids, Do not use compound chocolate or melting wafers which contain other hydrogenated oils and not cocoa butter.
STORAGE AND FREEZING
These brownies keep well for up to 2 days in an airtight container at room temperature. To store longer, keep them refrigerated for up to a week. I actually love eating these cold from the fridge!
Yes, you can freeze these brownies. I recommend wrapping the squares in plastic wrap and then placing them in a zip top freezer bag for storage for up to 3 months.
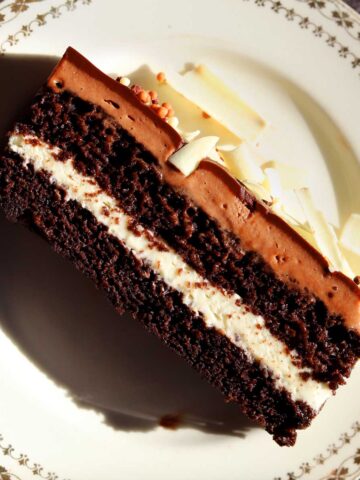
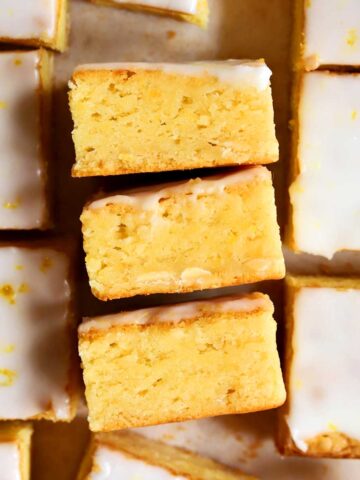
Craving more cookies?
If you love cookies as much as I do, check out the latest recipes:


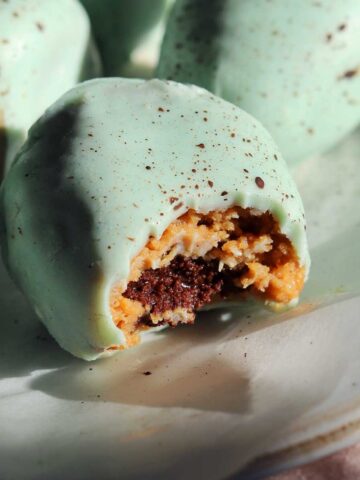
Baking with white chocolate
Here are some of my latest recipes with white chocolate:
Video
Red Velvet Brownies
Ingredients
White Chocolate Cream Cheese Bark:
- 6 oz (170g) white chocolate minimum 28% cocoa butter
- 3 tablespoon (45g) full fat cream cheese, softened
Red Velvet Brownie Batter:
- 1 large egg at room temperature
- 1 large egg yolk
- 1 cup (200g) granulated sugar
- 2 tablespoon (30ml) sour cream or full fat plain yogurt
- 1 teaspoon (5ml) pure vanilla extract
- ½ to 1 teaspoon red gel food coloring
- ½ cup (113g) unsalted butter
- 2 oz (56g) semisweet dark chocolate
- 3 tablespoon (18g) natural cocoa powder
- ½ teaspoon white vinegar
- ½ teaspoon salt
- ⅔ cup (95g) all-purpose flour
Instructions
- Make the white chocolate cream cheese bark. Melt white chocolate VERY GENTLY in a heatproof bowl set over a saucepan with very hot, barely simmering water. Let it melt slowly with occasional stirring. Cut cream cheese into cubes and place it in a medium bowl. Make sure it is very soft. Add melted chocolate over it and use a sturdy whisk to mix it together until it looks smooth and glossy. You don't want to incorporate too much air, but you do need to whisk well so it comes into an emulsion. The mixture will thicken up. Scrape it onto a parchment-lined baking sheet and spread it out to about ⅛ or ¼ inch thickness. It's ok if it looks a bit chalky and maybe looks matte at this point.
- Place it in the freezer for about 30 minutes until firm. Once firm, peel off the parchment and quickly slice the bark into about ¾ inch squares or pieces (the size or shape doesn't matter too much, but I like to keep them on the larger side since they are soft and will break up as you scoop the cookie dough). Place the pieces back in the freezer until you are ready to add them to the cookie dough.
- Preheat the oven to 350°F. Line an 8x8-inch metal baking pan with parchment paper, leaving a 2-inch overhang at each side.
- Melt chocolate. Combine butter and chocolate in a heatproof bowl and melt in the microwave, then stir until smooth and glossy. You can also melt it gently in a saucepan over the stove. Add cocoa powder, vinegar and salt and whisk to combine.
- Combine egg, yolk, and sugar in a large bowl and whisk vigorously by hand until pale and creamy-looking. You can also use a hand mixer or a stand mixer fitted with the whisk attachment. Mix in sour cream, vanilla and red food coloring. Add the warm chocolate mixture and whisk to blend well.
- Sift in the flour and fold it in gently. Add the chilled white chocolate cream cheese wafers and fold them in. Reserve a few extra for topping if you'd like. Spread the batter into the prepared pan and place reserved wafers on top. Use a small offset spatula to spread some of the batter over the wafers to nestle them in.
- Bake for 25-28 minutes until the top is glossy and the edges feel set and skewer inserted into the center comes out with a few sticky moist crumbs attached. Do not over-bake these or they will be dry.
- Transfer pan to a wire rack and let brownies cool completely in the pan. Refrigerate for at least 1 hour before lifting out and cutting into squares.
Tried these and they genuinely melt in your mouth - absolutely brilliant
Thank you so much Mimi! Glad you enjoyed them 🙂
I loved how this was SUPER easy to make and was an ABSOLUTE winner! I brought some to the office and they were gone in an instant.
I also loved how it was not too sweet but I personally wasn't sure how they actually differ in taste from normal brownies. Overall, a wonderful recipe!
Thank you Issa! I'm so glad everyone enjoyed the brownies 🙂
This recipe is amazing, the white chocolate bark really makes the brownie yummy 😋 and its a brownie well worth making again and again.