How To Make Pie Crust
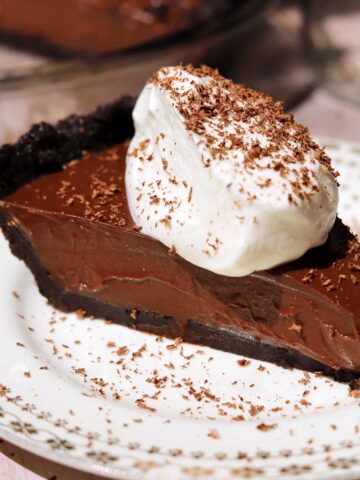
This article will teach you all about how to make the best pie crust from scratch that is tender and flaky. This all-purpose pie crust recipe is perfect for pies of all kinds from those with a no-bake filling like French Silk Pie to fruit pies like Classic Apple Pie. If you can make a good pie, then you will make friends, and making friends (even if they only like you for your pie) is a good skill to have! In this post I will cover all of the techniques and tips for making the ultimate pastry for your pies and tarts, and if you make more friends because of this, then... well, you're welcome.

WHY THIS RECIPE WORKS
- Easy recipe - you don't need a mixer to make perfect pie crust. In fact, I prefer to use my hands so I can control the extent of mixing so I don't over-work the dough.
- Tender pie crust - the two-step method I use to incorporate the butter means this pie crust will be tender AND flaky.
- Flaky pie crust - my technique of slicing cold butter into thin sheets helps promote lamination without having to fold and actually laminate the dough as you would when making puff pastry. The result is delicate, flaky pastry that still has integrity.
- Rich buttery taste - this is an all-butter pie crust recipe which means it is very flavorful. Although non-dairy fats like shortening and lard can product wonderful flaky results, they do not lend much taste. This recipe guarantees flakiness AND flavor!
IS BUTTER OR SHORTENING BETTER FOR PIE CRUST?
Both butter and shortening work great to make flaky pie dough, but there is one thing shortening lacks - flavor. Shortening is hydrogenated oil which means it has been processed to transform liquid non-animal fats into a solid form. The benefits of shortening are that it is pure fat and it has a high melting point so it can potentially create a flakier crust and is a bit less temperamental since it doesn't melt as easily during mixing. I prefer butter, however, for its superior flavor. It does have a lower melting point than shortening so be sure to follow my tips to ensure you get superior flakiness as well as superior flavor.

WHAT IS THE DIFFERENCE BETWEEN BUTTER AND LARD AND SHORTENING?
Fat tenderizes pastry because it is insoluble in water, so it coats flour particles and helps to prevent the proteins in the flour from coming together and forming an elastic material called gluten, which can make pastry tough. Fat is described as having a "shortening" effect, as it essentially shortens these gluten-forming protein strands by preventing them from linking together and elongating.
Butter has incredible flavor and contains small amounts of sugar and protein which promote browning during baking. It is absolutely superior for making cookies, brownies and cakes. For pastries, a combination of butter and lard or shortening works
well for flakiness. Lard has a higher melting temperature than butter, which prevents it from becoming oily when making the dough by hand. It also gives time for the flour portions in the dough to set before the fat melts to create striations, which translates to flakiness in the final crust.
- Butter - Butter has a lot to offer pastry due to its incredibly rich flavor. It is made up of a variety of fatty acids which makes it soft at room temperature and melt over a wide temperature range. Butter contains only about 82% fat and the rest consists of mostly water, some proteins and trace amounts of milk sugars (lactose). These sugars and proteins interact in browning reactions when the crust is baked, adding both flavor and color. Although butter has a lower melting temperature than lard and shortening, it has the benefit of being chilled to a rock hard consistency so large pieces of solid butter worked into the flour will create long striated pieces of fat when rolled out in the final dough.
- Lard - Of the main fats used to make pastry, lard has the highest melting temperature due to its crystalline structure. That means it will withstand the temperature of your fingers and resist melting more so than butter. This provides more insurance that your fat will remain solid in the dough, and solid fat is required for flakiness. Lard is 100% rendered pig fat and is softer than butter when cold, making it a bit trickier to work with when making pie dough. Nonetheless, this softness makes it easy to finely integrate with flour and create a tender crust. Keeping larger flakes of lard in pie dough will make a flaky crust because it keeps the layers of flour separate due to its higher melting temperature. These layers of flour will set before the lard melts, creating individual laminated sheets of dough. Fat also acts as a water barrier. So, as the crust bakes, the little water that is in the dough turns to steam and further separates the layers of flour and fat.
- Shortening - Vegetable shortening is made from vegetable oils, and like lard, it is 100% fat. It is made through a high pressure process called hydrogenation which converts unsaturated fatty acids in liquid oils to saturated fatty acids. This creates a solid fat that is softer than butter when cold. Pure fat tenderizes more effectively because it is insoluble in water, so it coats flour particles and prevents wheat proteins from hydrating and cross-linking to form a strong gluten network. Commercial shortening has a higher melting point than butter which means that it will withstand the warmer temperature of your hands and resist melting or "oiling out". This provides more insurance that your fat will remain solid in the dough for flakiness.

TOP TIPS TO MAKE FLAKY PIE CRUST
Number ONE rule for making flaky pastry is: make it COLD & bake it HOT
1) Use cold fat
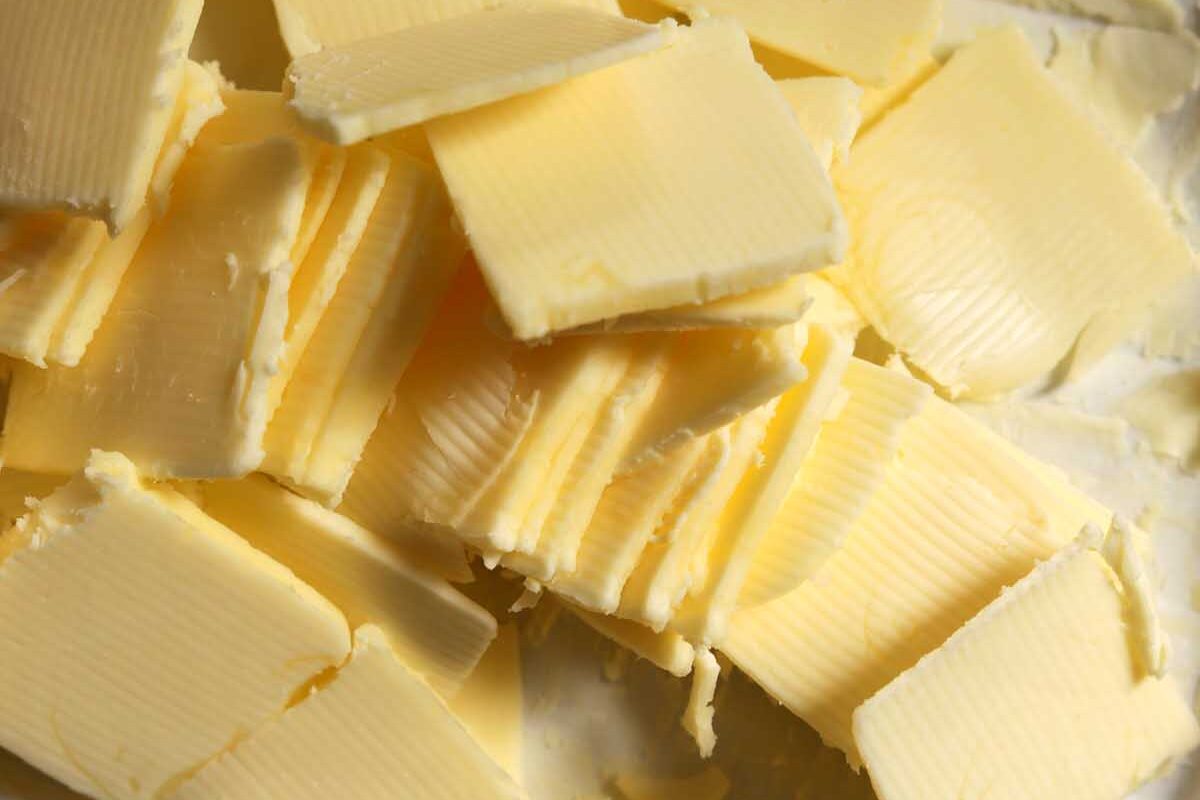
2) Slice a block of cold butter into thin sheets
3) Keep your hands cold
4) Make the bowl cold by placing it in the freezer for 5-10 minutes
5) Keep the liquid ice cold
6) But, have your oven hot. Start at 425 degrees F
7) Add the water gradually and stop once the mixture holds together in clumps when squeezed. Do not add TOO much liquid as it will encourage gluten formation and make a dense, pasty, doughy crust.

INGREDIENTS FOR PIE CRUST RECIPE
- All-purpose flour - You can use specialty pastry flour, however I almost always use unbleached all-purpose flour to make pie crust. With the right amount of fat and the correct technique, you can make great pastry and there's no need for special flour. Pastry flour has a lower protein content and creates a more "short" texture to make pastries even more tender, but I like the strength that comes with AP flour so that I get nice flaky layers.
- Sugar - Not all pie dough recipes contain sugar, such as the French "pate brisée" which is often used for savory tarts too. I always use a bit of sugar (1-2 tablespoons per batch) in my sweet pie doughs because it achieves a few great things. For one, sugar enhances the flavor of the pastry; two, it makes the crust more tender as it interferes with gluten development; three, it promotes browning for both color and flavor; and four, it helps the dough roll out smoother.
- Salt - This is important! Without a good amount of salt, pastry is bland. I prefer to use unsalted butter so I can control how much salt to add, however salted butter still makes great pastry.
- Butter - Butter adds unmatchable flavor to pastry. Bottom line - butter is better, so never replace all of the butter with alternative fat in a recipe because shortening is essentially flavorless and butter is sensational. It also promotes browning of the crust thanks to the milk proteins and milk sugars that come together in a golden delicious reaction called Maillard Browning. The tricky thing about butter is that its unique fat composition makes it hard and solid when cold but soft and spreadable at room temperature. It melts between 32-35 degrees C so it is best to work quickly and coldly.
- Water - Ice cold water is ideal for pastry since it is more difficult for gluten to form in cold conditions and it keeps the fat cold in the pastry. Just do not let ice get in because as the ice melts, it will leave pockets of water that will make the dough soggy.


STEP BY STEP INSTRUCTIONS: How to Make Pie Crust
- Step 1). Flash freeze the butter. First place the butter in the freezer for 10 minutes.
- Step 2). Combine dry ingredients. Combine flour, sugar and salt in a large bowl. Whisk to blend evenly.
- Step 3). Cut cold butter into small cubes if using a pastry cutter. Or, for best results, slice cold butter into thin sheets. This is my favorite technique for pie crust. I take a block of butter straight from the freezer and use a small sharp, thin-bladed serrated knife to slice it thinly. If you are using sticks of butter, imagine thin little squares. This creates cold sheets of fat that you can easily and quickly work into the flour so that it doesn't get too warm from your hands. The thin pieces also help create a laminated effect for extra flakiness.
- Step 4). Finely blend in some butter. Add 2 tablespoons (28g) of cold butter (keep the rest of the butter in the fridge) and rub it into the flour mixture using your fingertips until it is evenly dispersed and the mixture resembles fine bread crumbs (you can also blend on medium-low speed in a stand mixer for 2 minutes or pulse in a food processor).
- Step 5). Press in remaining butter. Toss the remaining cold sliced butter into the flour mixture, then use your fingers to incorporate it, smearing it between your thumbs and fingertips to rub the flour into the butter. The thin slices will help create an instant laminated effect (watch the video at the top of the recipe card for a demonstration). Continue to rub in the fat until the mixture looks very shaggy and all of the fat is coated with flour without any large pieces, but also it shouldn't be blended in too finely as in Step 4. There should be some larger almond flake-sized pieces remaining and no dusty flour left in the bowl.
- Alternatively, instead of slicing the butter (if you find it too finicky) add the remaining cold butter in small cubes and rub it in, pressing and smearing it between your thumbs and fingertips to flatten pieces of butter. You can also use a pastry cutter (this is my all-time favorite one - it is strong and fits comfortably in the hand) to mince the butter into smaller pieces first. If you use my method of slicing the butter into thin sheets, then you can work it in with your hands and it will take much less effort than trying to press out cold cubes of fat. Continue to rub in the fat until it resembles coarse crumbs with some larger almond flake-sized pieces remaining. There should be no dusty flour in the bowl.
- Step 6). Add water. Gradually sprinkle in cold water, one tablespoon at a time, while gently tossing with a fork until the dough is moistened and it clings together in clumps. The dough will hold together when squeezed or pressed when it is ready and it will hold the impressions of your fingers, but it should not form a ball. You can add another tablespoon of water as needed if it is too dry. Do this part by hand and don't use the mixer once you add the water since it tends to over-mix in parts. Turn the shaggy mixture out onto a clean surface and bring it together with cupped hands, pressing in loose bits until it is cohesive. Do not knead.
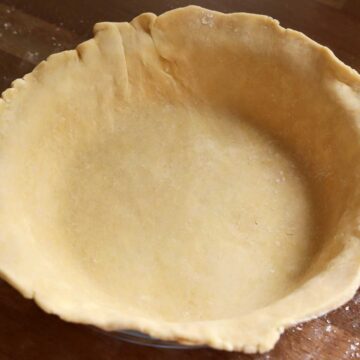
- Step 7). Shape the dough. Lay a large piece of plastic on the counter and place the dough on top. If some shaggy bits fall off, place them on top and pile them onto the dough. Bring the sides of the plastic up and over the dough and use it to squeeze the dough together again.
- Step 8). Chill the dough. Wrap it firmly and refrigerate for at least 2 hours or over night. You can also divide the shaggy dough in half and wrap each portion into two discs so you can keep one chilled while you roll the other one when making a double crust pie.


HOW TO MAKE TENDER PIE CRUST
The aim of Step 4 is tenderness - finely dispersing some of the fat evenly into the flour so that it is well distributed will coat and separate small particles of flour from each other (like a moisture barrier) to achieve a tender texture. This serves to protect wheat proteins from linking up to form gluten which would make the pastry too strong and chewy like bread dough. Instead it will be crumbly and tender. It will also prevent it from absorbing too much liquid which can lead to a soggy crust.

HOW TO MAKE FLAKY PIE CRUST
We don't just want tender, we want flaky too. The purpose of Step 5 is to incorporate cold butter into the flour so that it ends up looking like rubble. Larger bits of fat will flatten out as you roll the pastry and create layers that separate stronger dough - that leads to flakes. On the other hand, if the fat bits are too large then they will just melt and leave gaping holes in the pastry - not a good scene. Aim to have most of the cold fat incorporated rather well and evenly dispersed with a few larger bits no bigger than the size of hazelnuts. It also helps to put the bowl with the cut-up fat and flour into the freezer for 5 minutes before adding any liquid.
Since flaky pastry requires pliable solid fats, the trick is to avoid melting. Melted fat becomes oily, leaks water and tends to stick to the dough. If you have very warm hands, it is best to use a pastry cutter or two knives. My mother's genetics have proven handy in making pastry as our poor circulation leads to cold hands all year round!

HOW MUCH WATER TO ADD TO PIE DOUGH?
In Step 6 you dribble cold liquid into the dough until it comes together to form a mass but does not form a smooth ball. Use only enough liquid as it takes to make a shaggy but cohesive dough. Too much water will promote gluten formation and elasticity. Pie dough knows no smoothness because that means it is over-worked, tired and not-so-flaky. Wrap it up in plastic wrap and let it chill in the fridge for at least 2 hours to firm up the fat and hydrate the flour.
If you are using part lard or shortening, then there is more room for error since these fats contain no moisture (remember butter is only 82% fat and melts at a lower temperature than lard or shortening).
DOES VODKA MAKE GOOD PIE DOUGH?
Some pie dough recipes may call for vodka and it works! Spirits are around 40% ethanol and 60% water which means that although it is 100% effective at moistening the dough ingredients, only 60% of it can contribute to gluten development so that you can actually use a bit more liquid to help with smoothing and rolling out the dough without having a negative effect on texture. On the other hand, if you don't mind working with a drier dough like me, then it just means that there is less moisture in your dough if you replace some water with the same amount of vodka, and when the alcohol evaporates during baking you are left with a really dry and flaky crust. You know what else this means? Less chance of that soggy bottom! This is completely optional and you can instead replace it with cold water).

EXPERT BAKING TIPS FOR FLAKY PIE CRUST
- Use cold butter and cold water to make the pastry. Cold ingredients will help with flakiness and also reduce the chances of gluten formation when water comes into contact with flour. This will ensure a tender crust.
- Keep the rolled out pie dough cold. Make sure your pie filling is ready to go as soon as you roll out the crust so that it doesn't have a chance to warm up, or roll the dough, line the pie dish with pastry and keep it in the fridge until you are ready to fill it.
- Blend a fraction of butter into the flour so it is well incorporated. This creates tenderness as the fat coats the flour particles to prevent excessive moisture absorption which limits gluten formation. The result is a "short" texture which is a baking term for tenderness as it relates to a "short bite", meaning that you don't need to pull much to break off a piece.
- Blend the remaining fat into larger, flattened pieces. This creates flakiness as the flattened pieces of fat will become laminated into the dough to create layers of dough with fat in between that will separate them and create flakes.
- Slice cold butter into thin sheets. This is my favorite technique for pie crust. I take a block of butter straight from the fridge and use a small sharp serrated knife to slice it thinly. This creates cold sheets of fat that you can easily and quickly work into the flour so that it doesn't get too warm from your hands. The thin pieces also help create a laminated effect for extra flakiness.
- Work quickly and be aware of the temperature of your butter when making pastry - if you feel that your dough mixture becomes oily, place it in the freezer for a few minutes until the fat firms up.
- Avoid any ice in the dough. Ice cold water is important for making pastry, but if you get any actual ice in the dough it will cause issues. The ice will melt into water and leave a soggy hole in the pastry. Be sure to strain the ice and only use the cold water.
- Do not over-mix the pie dough. Over-working the dough will activate gluten which will make the dough more stretchy and tough. You only need to fold the dough over itself once or twice and then press and compress it together. Do not knead.
- Use a glass pie dish. I prefer to bake pies in glass as opposed to metal or ceramic because it conducts heat evenly and will retain heat to help cook the filling. Ceramic takes too long to heat through which means the crust is more likely to be soggy, while metal conducts heat very quickly but will not retain enough heat so the crust may burn before the filling starts to cook. In addition to this, glass allows you to see through to the bottom so you know when the crust is evenly browned.
- Cut slits in the top crust for venting. It's important to allow steam to escape since there is so much moisture in the berries which will accumulate under the crust. Vents will allow the crust to bake down against the berries to prevent that gap and also help with keeping it crisp.
- Bake very hot for the first few minutes. This will help to set the crust especially on the bottom to minimize chances of sogginess. High temperatures will help with flakiness as well.
- Tent the pie with foil if browning too quickly. If the top crust is already very brown and the filling still hasn't started bubbling, place a large piece of aluminum foil over the pie to protect it from direct heat as the pie continues to bake.
- Do not under-bake. Bake 5-10 minutes longer than you think. A pie is truly ready when the crust is nicely golden and even singed around the edges with a browned bottom and bubbling juices.
- Use pie weights if you are making a single crust pie with a pre-cooked filling that requires a pre-cooked crust. This will help the crust bake evenly and prevent shrinking.
- Use a pie crust shield. This will help protect the edge crust from burning before the filling is fully cooked through. It is important to bake pies at a high temperature to make a flaky crust and also to cook the dense filling, but since pies need a long baking time, it does mean the crust is prone to browning very quickly. I often fold up some aluminum foil and curve it around to loosely cover the crust for a homemade shield (see the video below for an example).
- See my Ginger Apple Pie recipe video to learn how to make a lattice pie crust.
- See my Best Blueberry Pie recipe video to learn how to crimp and flute pie crust.

RECIPE FAQ
The answer is definitely YES. It is absolutely crucial to rest the dough in the fridge for at least 2 hours. This serves a few purposes:
1) It makes the dough easier to handle and roll out smoothly. Resting the dough in the refrigerator allows the water to become absorbed and more evenly distributed which makes it easier to work with. Chilling pie dough allows flour to hydrate evenly so that even though initially the mixture will look a bit dry, it will come together during this resting time.
2) It firms up the fat so that when you roll it it, you will press solid pieces of butter into flattened sheets which separates flattened layers of dough for flakiness. The end result is a laminating effect with layers of flour aggregates that are mostly untouched by the fat alternating with layers of fat particles embedded with flour. Some gluten develops in the layers of flour and the fat layers melt upon baking to leave spaces between sheets of dough.
I use all butter in this recipe because I like the flavor of butter, but you can absolutely replace half of the butter with shortening. This will give you a flakier texture since shortening has a higher melting temperature and will resist melting.
You can replace half of the butter with lard in the pie crust. This will give you a flakier texture since lard has a higher melting temperature than butter and will resist melting. It also adds rich flavor.
The amount of water you need to make pie dough can vary depending on the brand or quality of flour and the humidity of your environment or season. In the winter you may need more water when the air is dry. You will need to adjust accordingly, so I suggest watching the video below above the recipe card so you can see the consistency you need to achieve.
The key to tender AND flaky pie crust is to cut the butter into the flour in two stages. The first stage is incorporating a little bit of the butter into the flour evenly so it is broken down and well incorporated to coat the flour for tenderness. The mixture will look like fine bread crumbs. The second stage is incorporating the butter in larger pieces and flattening them between your fingers to give flakiness.
This doesn't normally seem important, but it will affect your baking time. I always recommend baking pies in glass pie dishes or aluminum pans. You may have lovely decorative ceramic pie plates that will present beautifully to the table, and by all means use them! Just note that it may take 10-20 minutes longer for your pie to bake and you will definitely want to use very high heat at the beginning to seal in that crust (especially the bottom crust). If you have a bottom heating element in your oven, place the pie on the lower-third rack. Ceramic is a great insulator so it will keep your pie warm for longer, but this also means it takes longer to heat through.
Initially it is important to bake the pie at a very high temperature (400-425 degrees F) to both set the dough layers before the fat melts completely and to set the crust before the fruit filling makes it soggy. This rapid heating also causes the ~16% water in the butter to evaporate quickly so that the steam separates dough layers.
Whatever you do, don't go to the effort of making a lovely pie and then not brush the crust with egg. What a shame that would be! An egg wash is the ultimate signature of home-baked pie. A whole egg will do, but for that ultimate golden shiny crust, combine one yolk with 2 teaspoons of water or milk and brush it lightly all over the surface just before baking.

BEST TOOLS FOR MAKING PIE
- Pastry cutter - if you prefer to not use your hands, I highly recommend a pastry cutter which will help keep the ingredients cold and prevent over-working.
- Rolling pin - you can use anything long that rolls to roll out pie dough, including a wine bottle. My favorite rolling pin is a French tapered rolling pin. I've had this one for almost 2 decades. It is lightweight, easy to store and clean, and it will last me for life!
- Pizza cutter - this is handy to cut strips of pastry to make a lattice top, although I also often use a sharp long knife and a straight edge (like a ruler).
- Glass pie dish - I've had this 8-inch pie dish also for 20 years and it is my go-to!
- Pastry brush - a pie without an egg wash is just not worth it! The egg wash adds so much appeal, adding a rich golden, crisp and glossy top. Lightly brush the pie dough with beaten egg and the fine bristles help it disperse evenly. I always use one to brush biscotti before baking as well. Without and egg wash, pie can turn out dull and lacking color.
- Pie weights - these ceramic beads are so handy for weighing down pie dough when blind baking crust for open pies with pre-cooked or wet fillings such as custard pies.
- Pie crust shield - it's very helpful to cover the edges of a pie with a pie crust shield about halfway through baking in order to prevent the crust from burning before the filling is fully cooked. I often make my own from folding up several layers of aluminum foil and shaping it around the pie.
Recipes you might want to try to practice your awesome new pastry skills:
The Best Blueberry Pie Classic Apple Pie Gooey Little Pecan Tarts All Butter Raspberry Peach PieVideo
How to make Flaky Pie Crust
Ingredients
- 1 cup (227g) very cold unsalted butter
- ½ cup (120ml) ice cold water
- 2 ⅔ cups (380g) all-purpose flour
- 3 tablespoon (40g) granulated sugar
- 1 teaspoon fine table salt
Instructions
- Flash freeze the butter. First place the butter in the freezer for 10 minutes.
- Prepare ice water. Fill a cup with water and add some ice.
- Combine dry ingredients. Combine flour, sugar and salt in a large bowl. Whisk to blend evenly.
- Cut cold butter into small cubes if using a pastry cutter. Or, for best results, slice cold butter into thin sheets. This is my favorite technique for pie crust. I take a block of butter straight from the freezer and use a small sharp, thin-bladed serrated knife to slice it thinly. If you are using sticks of butter, imagine thin little squares. This creates cold sheets of fat that you can easily and quickly work into the flour so that it doesn't get too warm from your hands. The thin pieces also help create a laminated effect for extra flakiness.
- Finely blend in some butter. Add 2 tablespoons (28g) of cold butter (keep the rest of the butter in the fridge) and rub it into the flour mixture using your fingertips until it is evenly dispersed and the mixture resembles fine bread crumbs (you can also blend on medium-low speed in a stand mixer for 2 minutes or pulse in a food processor).
- Press in remaining butter. Toss the remaining cold sliced butter into the flour mixture, then use your fingers to incorporate it, smearing it between your thumbs and fingertips to rub the flour into the butter. The thin slices will help create an instant laminated effect (watch the video at the top of the recipe card for a demonstration). Continue to rub in the fat until the mixture looks very shaggy and all of the fat is coated with flour without any large pieces, but also it shouldn't be blended in too finely as in Step 4. There should be some larger almond flake-sized pieces remaining and no dusty flour left in the bowl.
- Alternatively, instead of slicing the butter (if you find it too finicky) add the remaining cold butter in small cubes and rub it in, pressing and smearing it between your thumbs and fingertips to flatten pieces of butter. You can also use a pastry cutter (this is my all-time favorite one - it is strong and fits comfortably in the hand) to mince the butter into smaller pieces first. If you use my method of slicing the butter into thin sheets, then you can work it in with your hands and it will take much less effort than trying to press out cold cubes of fat. Continue to rub in the fat until it resembles coarse crumbs with some larger almond flake-sized pieces remaining. There should be no dusty flour in the bowl.
- Add water. Strain out the ice from your water and measure out ½ cup. Gradually sprinkle the cold water over the flour/butter mixture, one tablespoon at a time, while gently tossing with a fork until the dough is moistened and it clings together in clumps. The dough will hold together when squeezed or pressed when it is ready and it will hold the impressions of your fingers, but it should not form a ball. You can add another tablespoon of water as needed if it is too dry. Do this part by hand and don't use the mixer once you add the water since it tends to over-mix in parts. Turn the shaggy mixture out onto a clean surface and bring it together with cupped hands, pressing in loose bits until it is cohesive. Do not knead.
- Shape the dough. Lay a large piece of plastic on the counter and place the dough on top. If some shaggy bits fall off, place them on top and pile them onto the dough. Bring the sides of the plastic up and over the dough and use it to squeeze the dough together again.
- Chill the dough. Wrap it firmly and refrigerate for at least 2 hours or over night. You can also divide the shaggy dough in half and wrap each portion into two discs so you can keep one chilled while you roll the other one when making a double crust pie.


Hi! I just made this pie dough for a pie I'm making tomorrow. Can I leave it in the fridge overnight (for 24+ hours)? Thanks!
Hi Kenzie! Yes that should be OK.
I’ve always been too intimidated by pastry to attempt making pie dough, but this recipe explained every step so thoroughly that I felt comfortable taking the plunge. The result was a flaky and flavorful crust for my first from-scratch apple pie (also by Scientifically Sweet). It was fantastic. Thanks for the great instructions!
You are welcome Dana! Thanks for the kind feedback 🙂
Great recipe and directions Christina and loved learning the new butter technique! Taking out bits of butter at a time while the rest stayed frozen worked well in my hot Singapore kitchen.
Thank you Monika! Glad it worked out! I could use some of your Singapore weather right now 🙂
Hi! Could this recipe be used for savory (quiche-type) pies if omitting the sugar in the dough?
Thanks!
Hi Sarah! Yes you can omit without issues.
I love this pie crust! I ve used it for apple pie, cherry pie, lemon pie, always comes out delicious! Just a question. Can i use this for tartlets? If yes ,how long time and what temperature should be cooked?
Thank you Georgia! Yes you can, bake at 375F. Baking time depends on the size of the tartlets.
Can we freeze the dough
Hi Silvia! Yes you can. Wrap it well and place in airtight container or bag.
Thank you for this recipe. It is well described in detail how to make the dough. I love those important tips you have given clear and precise. It's the way to succeed. All your advices are highly appreciated.
You are welcome Brenda! Glad you enjoyed the recipe.
I saw your IG post this morning showing how you cut butter when making your pastry. Thanks for that. I’m definitely going to try it next time.
Question: I like to make pie crust ahead of time and freeze it. Years ago my mother would give me ready made pie shells in pie plates that I could freeze making it really simple to make pies last minute. Is it possible to do this with your recipe?
This is my new favourite pie dough recipe! It was so flaky! I'll definitely be making it again.
Hi Ryan, I'm so glad this recipe worked well for you.