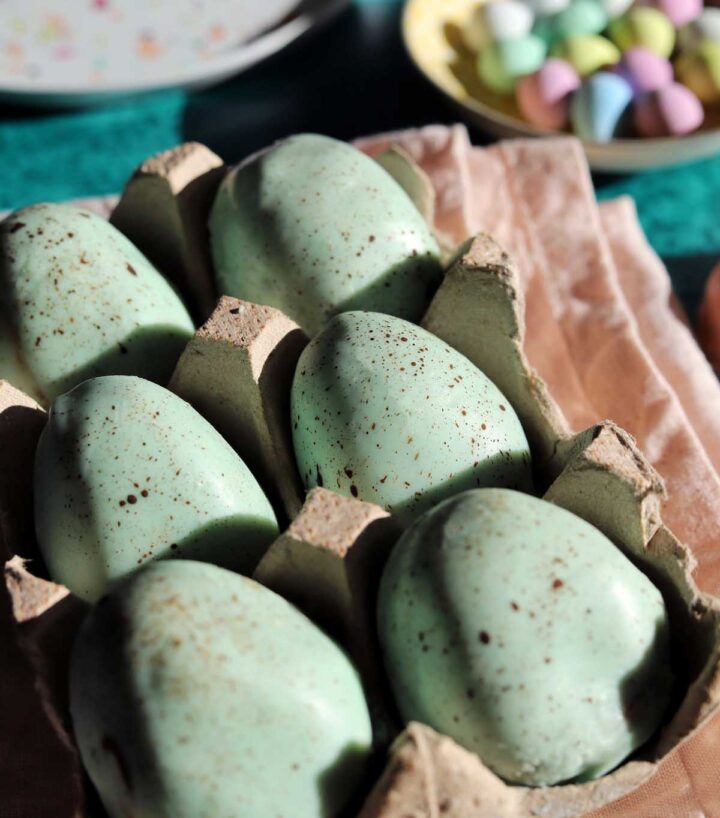
Healthier Peanut Butter Easter Eggs
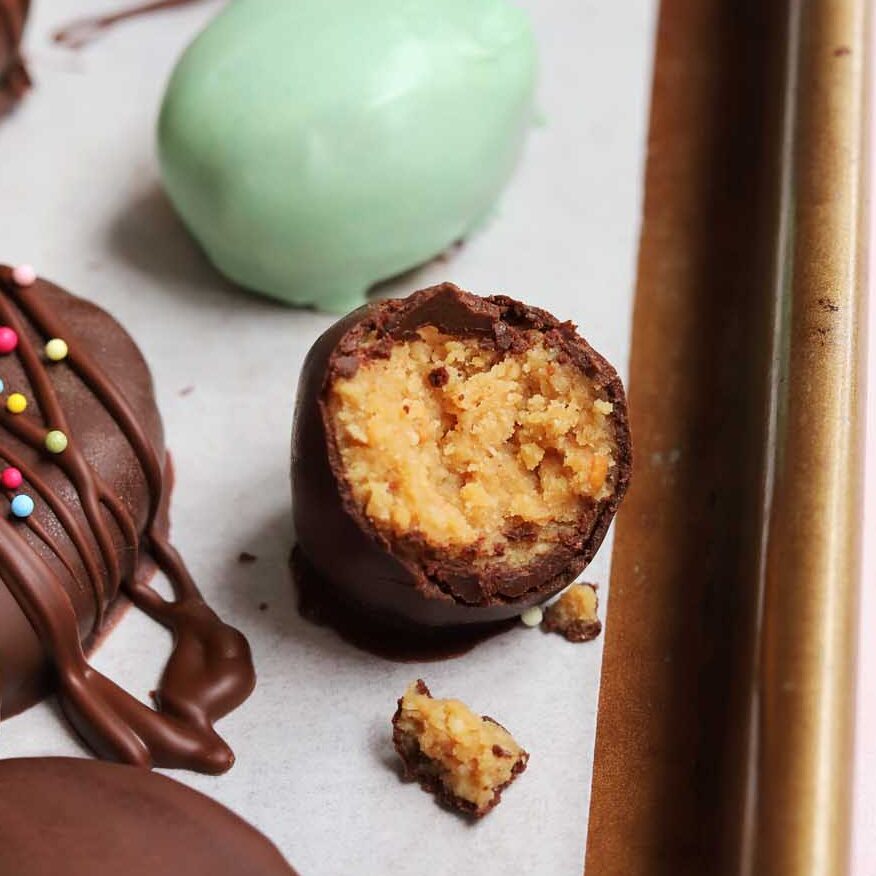
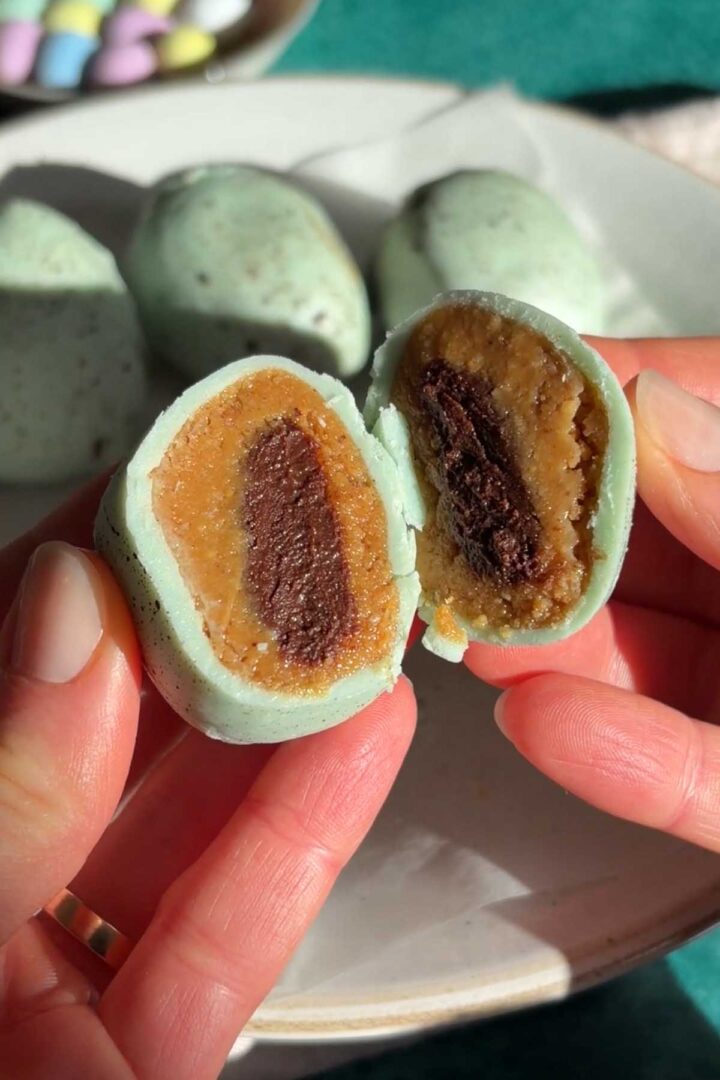
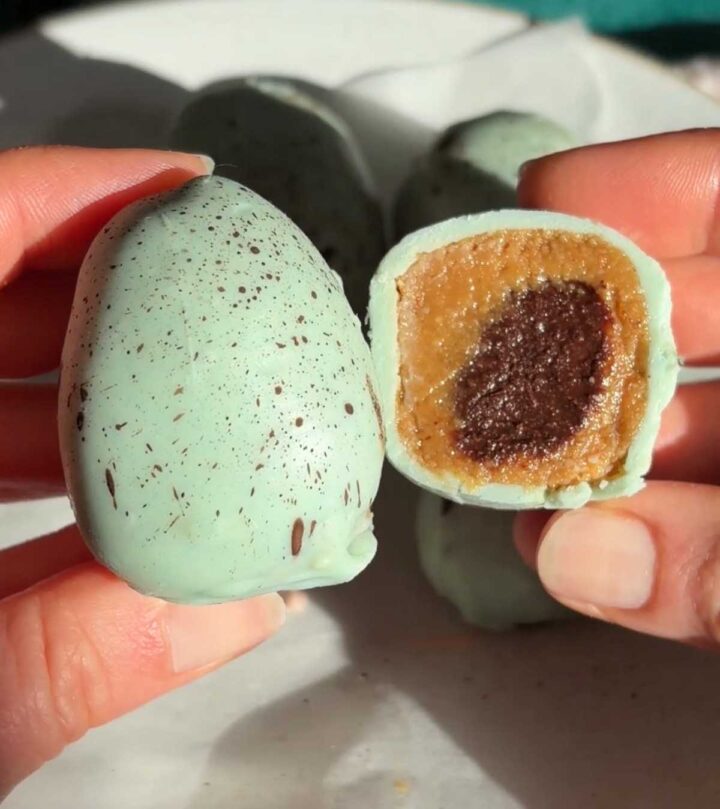
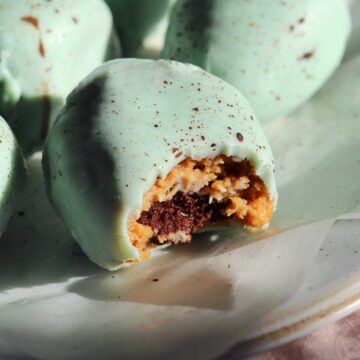
You can make your own homemade version of the popular Reese's candy peanut butter eggs with just 6 simple ingredients and a few easy steps. These no-bake Peanut Butter Easter Eggs are so easy to make in one bowl and taste way better than store-bought with wholesome ingredients, way less sugar and rich peanut butter flavor. Plus they have a surprise chocolate yolk! They are naturally gluten free, dairy free and vegan as well! This is a perfect treat to make with the kids to celebrate the holiday. To make them extra festive, I like to coat half of them in dark chocolate and the other half in pastel-dyed white chocolate to resemble a robin's egg. They're so fun! You can also use a similar recipe to make Homemade Chocolate Peanut Butter Cups.
WHY THIS RECIPE WORKS
- Fast & easy to make - this simple treat comes together in just one bowl with only 6 ingredients. It's a great treat to make with kids.
- No-Bake dessert - there's no baking involved to make peanut butter eggs. You simply mix some ingredients together, shape it and dip it into melted chocolate.
- Rich peanut butter flavor - if you love peanut butter, then you will certainly love these because they are so much more flavorful than store-bought Reese's peanut butter eggs.
- Dark chocolate coating - I love the contrast of semi-sweet chocolate with the slightly sweet and salty peanut butter filling.
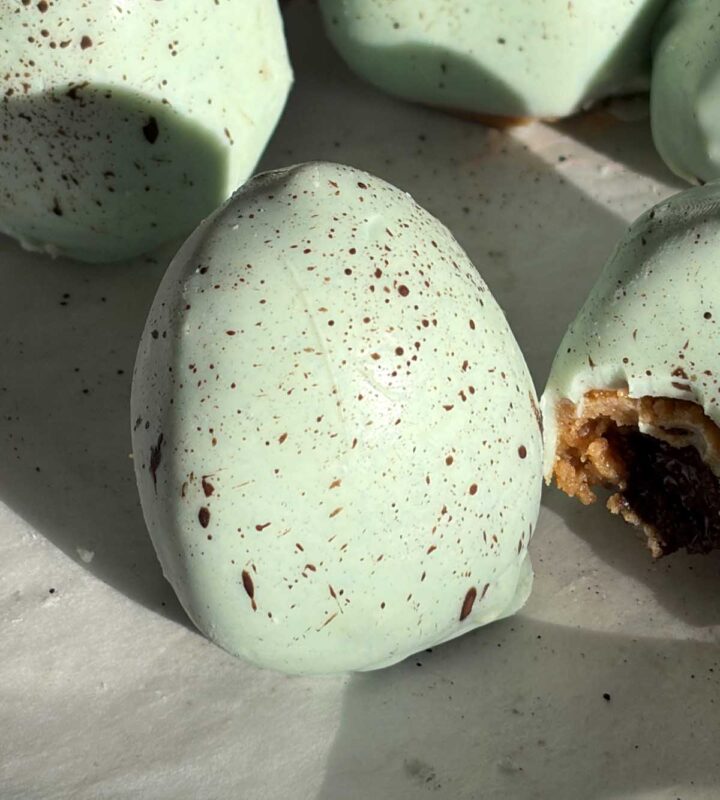
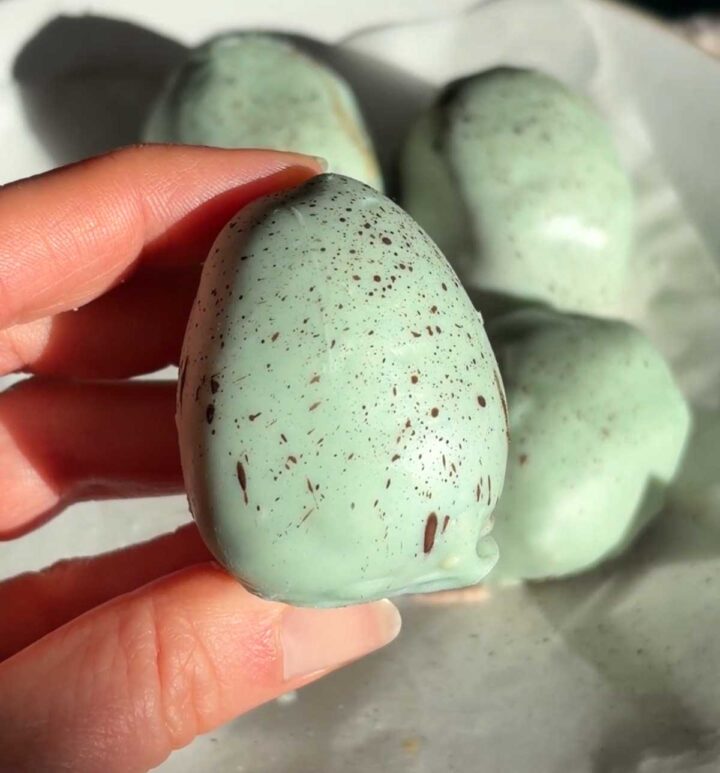
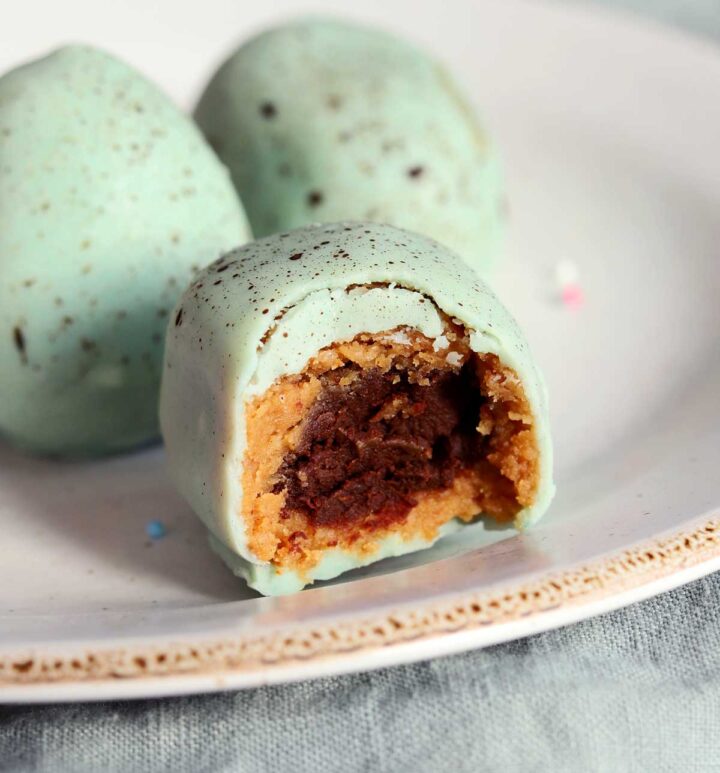
- Pastel white chocolate coating - another fun variation is colored white chocolate to make these look like robin's eggs. The sweet creamy white chocolate pairs well because the filling isn't too sweet.

INGREDIENTS FOR PEANUT BUTTER EGGS
- Peanut butter - I use smooth creamy unsalted natural peanut butter for this recipe (the drippy kind that you need to stir) to get a nice strong peanut butter taste.
- Maple syrup - peanut butter and maple is a lovely flavor combination and it adds the perfect amount of sweetness.
- Almond flour - fine ground blanched almonds helps to stiffen the filling so you can shape it. You may need more or less depending on the brand of peanut butter that you choose.
- White chocolate - the quality of your white chocolate make a huge difference in this recipe since it is one of the main ingredients if you opt for it. Seek out pure white chocolate (not compound chocolate) which has only cocoa butter as the fat. There should not be any other vegetable oils added in the ingredient list. This is the one I use here.
- Dark chocolate - semi-sweet dark chocolate is perfect since it is just the right amount of sweetness to enhance the filling which isn't too sweet. You can also use bittersweet chocolate if you really love dark chocolate.
- Coconut oil - this gives the melted chocolate coating more fluidity so that it is easier to dip the peanut butter eggs in. It also prevents the need for tempering chocolate if you don't have time. However, if you are interested in learning how to temper chocolate, I have a full tutorial here.
- Food coloring - I use these gel food colors to dye the white chocolate a shade of blue similar to a robin's egg. I mix blue with a tiny bit of green to get this nice color. You can also use spirulina powder and matcha powder for a natural option.
- Salt - natural peanut butter is usually unsalted, and so we need to add some salt or else the flavor will be bland. It really makes a big difference.

STEP-BY-STEP INSTRUCTIONS
- STEP 1). Make the peanut butter filling. Combine peanut butter, maple syrup, almond flour, powdered sugar (if you use it) and salt in a medium bowl and mix well until combined.
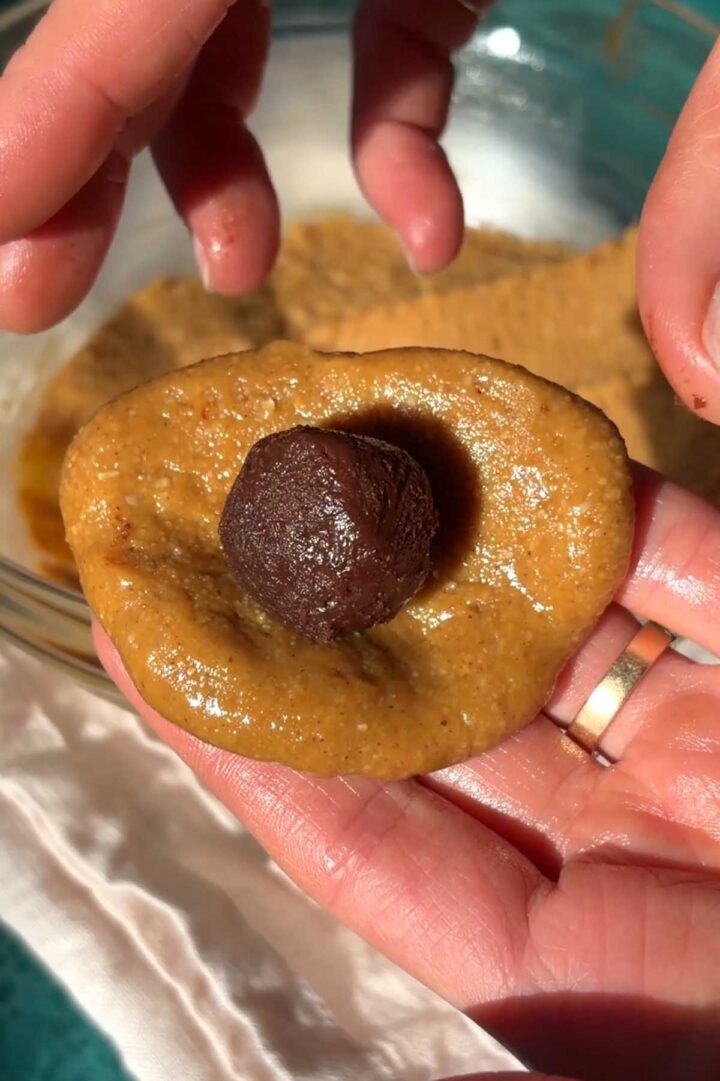
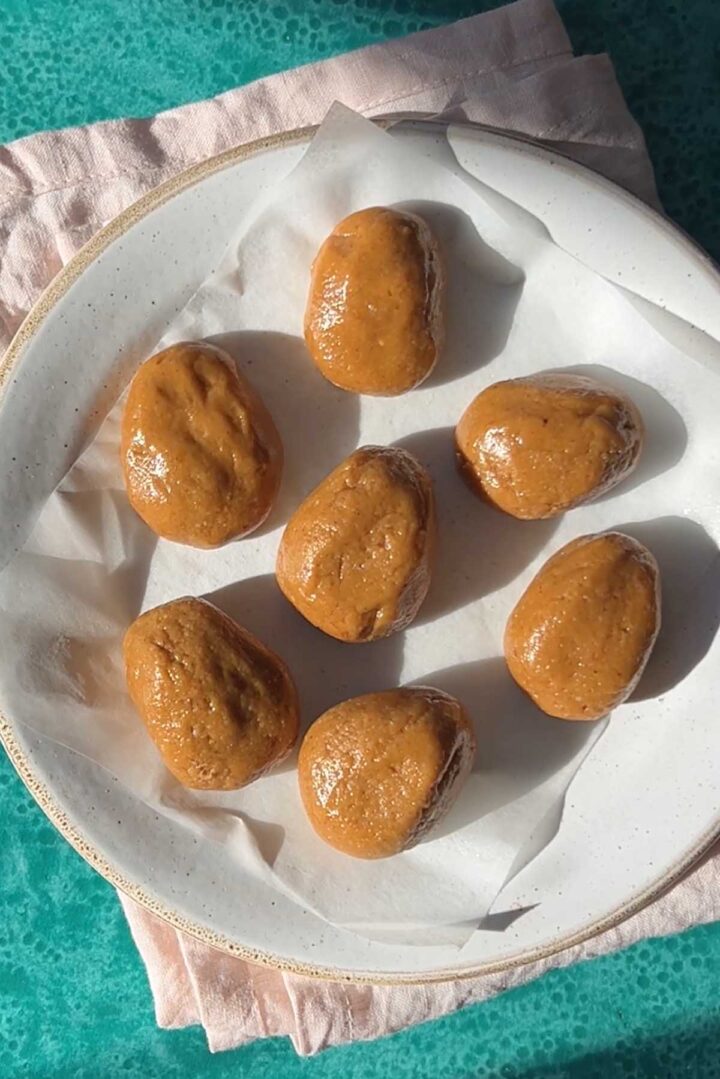
- STEP 2). Shape the filling. Scoop up tablespoon portions of the filling and roll each one into a smooth ball using your hands. Then, use your hands to flatten the ball and shape it into an oval to resemble and egg. You can also shape the ball to form a 4D egg shape.
- STEP 3). Chill. Place the 'eggs' on a parchment paper-lined baking sheet and put the tray in the freezer while you prepare the coating.
- STEP 4). Prepare the coating. For the dark chocolate coating, add the white chocolate and coconut oil to a microwave-safe bowl. Microwave in 15-20 second intervals until fully melted, stirring well between each interval. For the white chocolate coating, add the white chocolate and coconut oil to a microwave-safe bowl. Microwave in 15-20 second intervals until fully melted, stirring well between each interval. Stir in the matcha powder and blue food coloring and adjust colors as desired.
- STEP 5). Dip the eggs. Coating the eggs works best when they are chilled so that the chocolate firms up quickly and doesn't pool when you set it down on the baking sheet. Place a peanut butter egg into the bowl with the chocolate coating and use a fork to flip it so it is evenly coated on all sides. Lift it out of the chocolate and let the excess chocolate drip off, scraping off excess against the edge of the bowl. Return it to the parchment paper. Let stand until chocolate is set.
- STEP 6). Decorate. Drizzle more chocolate over the coated eggs and add pastel-colored sprinkles before the drizzle sets.
WHAT TYPE OF CHOCOLATE TO USE FOR HOMEMADE PEANUT BUTTER EASTER EGGS?
Once you have all of your filling disks ready, it's time to melt the chocolate for the coating. I strongly recommend dark chocolate for these homemade chocolate peanut butter cups. Chocolate with greater than 60% cocoa solids is best because it will have a higher cocoa butter content which means it will flow more easily, and also taste great! The chocolate is melted down with a bit of coconut oil which helps to make it more fluid chocolate for easy coating, and it also softens the texture of the coating so it has a soft bite at room temperature.
EXPERT TIPS
- Use smooth natural peanut butter. I prefer the "just peanuts" type of peanut butter for the most intense peanut butter taste.
- Use a good quality chocolate with a high cocoa butter content. This is called "couverture" chocolate because it is used for making confectionery in applications for coating, dipping and drizzling.
- Melt the chocolate gently but thoroughly. If you're following the recipe with coconut oil the it is important to heat the chocolate enough to completely melt the coconut oil so that it blends evenly with the chocolate to set up firm with a sheen. If you use pure chocolate, then I recommend using the double boiler method to ensure that you do not over-heat the chocolate. Milk chocolate is more prone to burning due to its high milk solids content and it is very easy to over-heat milk chocolate in the microwave. If it is over-heated, it will seize up, clump and be impossible to melt smoothly.
- Don't skip the salt! It really makes a difference in the flavor since the ingredients are very pure and simple.
RECIPE FAQ
You can dip these in any type of chocolate - white, milk or dark. I recommend choosing couverture chocolate which has a high cocoa butter content designed to be more fluid for dipping and enrobing.
Once the chocolate is set firm, you can store them at room temperature in an airtight container.
These delicious little treats will keep at room temperature for up to 2 weeks, and up to a month in the fridge. If you like them soft, keep them at room temperature, but if you like the texture of a crackly chocolate shell, then eat them straight from the fridge. I like them both ways!
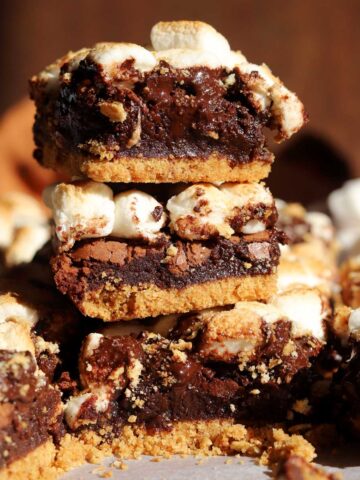
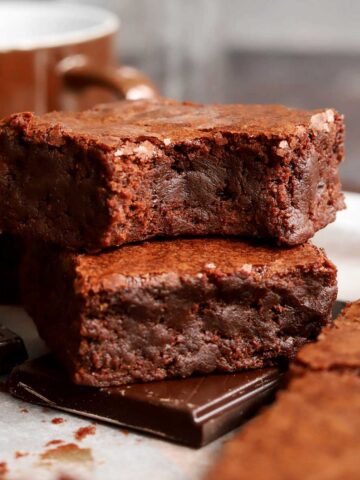
If you love chocolate, check out these recipes!
Triple Chocolate Brownies Fudgy Grain Free Brownies Olive Oil Brownies with Date Fudge Frosting Fudgy Buckeye Brownies Outrageous Fudgy Chocolate Chip Cheesecake Brownies The BEST Small Batch Fudge Brownies Homemade Cosmic Brownies Recipe!More chocolate recipes please!
Looking for more things to bake with chocolate? Try these:
Video
Peanut Butter Easter Eggs
Ingredients
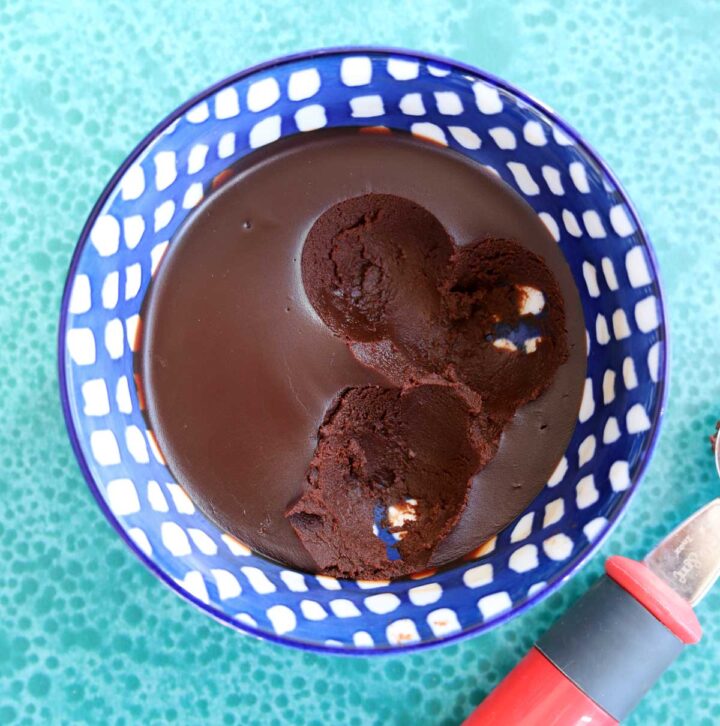
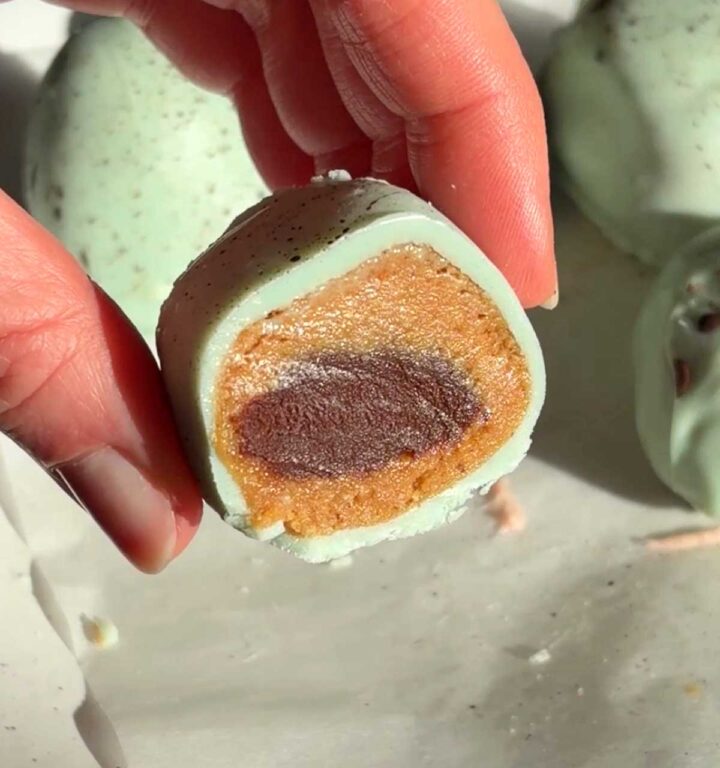
Chocolate Yolk Filling:
- 2 ½ oz (70g) high quality semisweet chocolate (minimum 55% cocoa and up to 65%)
- 2 tbsp (30ml) hot water
Peanut Butter Egg Filling:
- ½ cup (130g) natural drippy smooth peanut butter (no sugar added)
- 2 tablespoon (30ml) maple syrup
- ½ cup (50g) fine almond flour
- 1 tablespoon powdered sugar (optional)
- ⅛ teaspoon salt
White Chocolate Coating:
- 6 oz (170g) pure white chocolate
- 1 teaspoon (5g) coconut oil
- ¼ teaspoon matcha powder
- blue gel food coloring
Cocoa Speckles:
- 1 teaspoon (2g) cocoa powder
- 2 teaspoon (10ml) hot water
Instructions
- Read this post here for more details on how to make water ganache for water chocolate truffles.
- Make the chocolate yolk filling. Chop up the chocolate very finely so it melts quickly and evenly. Place the chocolate in a heatproof bowl. Bring a cup of water to a full boil. Measure out 2 tablespoons (30 ml) and pour it over the chopped chocolate. Cover and let stand for 1 minute, then whisk gently until completely smooth and glossy. If the chocolate is not completely melted because it is cold in your kitchen, heat it again GENTLY by placing the bowl in the microwave for just 10-20 seconds at medium power until smooth, thick and glossy, or set it over a pot with simmering water (a double boiler if you are using a metal bowl). It is very easy to over-heat warm ganache, so be cautious. You will know it is emulsified when it looks tight, smooth, thick and glossy with not signs of separation.
- Let the ganache cool uncovered at room temperature for 30 minutes until it is no longer warm, then cover the bowl tightly with plastic wrap and leave it at room temperature for at least 2 hours to fully set. Do not refrigerate.
- Once set, use a teaspoon or a melon baller to scoop up small teaspoons of ganache, use your fingers to mold and shape it so it is pliable, then roll into smooth balls. Place them back on the parchment and into the freezer to harden for at least 15 minutes.
- Make the peanut butter filling. Combine peanut butter, maple syrup, almond flour, powdered sugar (if you prefer it a bit sweeter) and salt in a medium bowl and mix well until combined. Place the bowl in the freezer to chill for 15 minutes so it is easier to work with.
- Scoop up heaped tablespoons of the filling and roll each one into a smooth ball using your hands. Then, use your hands to flatten the ball and place a frozen truffle in the middle. Wrap the peanut butter around it and then shape it into an oval with a tapered end to resemble and egg.
- Place the eggs on a parchment paper-lined baking sheet and put the tray in the freezer while you prepare the coating. It is important that the eggs are very firm or it will be a challenge to dip and coat them.
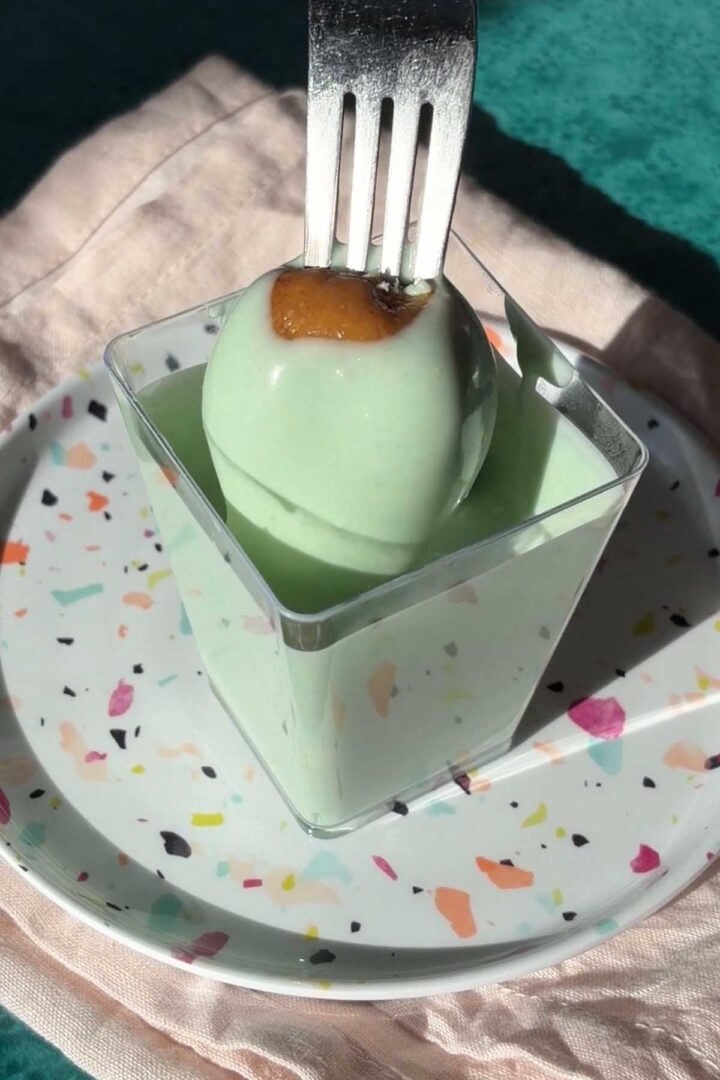
- Dip the eggs. Add the chopped white chocolate and coconut oil to a heat-safe metal bowl. Set it over a pot with simmering water (a double boiler) and stir constantly until completely melted and smooth. Stir in the food coloring and adjust colors as desired. Pour it out into a drinking glass or jar with a wide mouth so that the chocolate is deep and it is easier to submerge the egg.
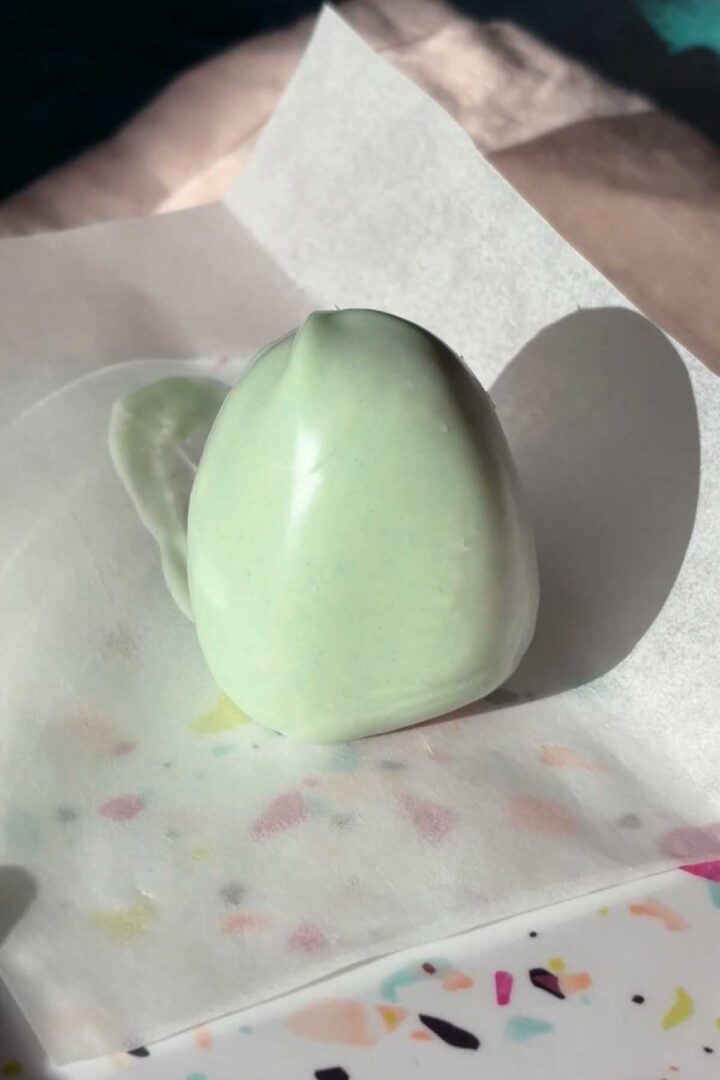
- Coating the eggs works best when they are chilled so that the chocolate firms up quickly and doesn't pool when you set it down on the baking sheet. Use a thin dessert fork to skewer the bottom of an egg and then dip it into the melted chocolate. Tap the fork on the edge of the cup to let any excess chocolate drip off and then transfer the egg to a piece of parchment to set. I like to use another fork or a skewer to help release and push the egg off of the fork that's holding it, then I gently lift it up so it is sitting upright. Set aside until the chocolate sets up firm.
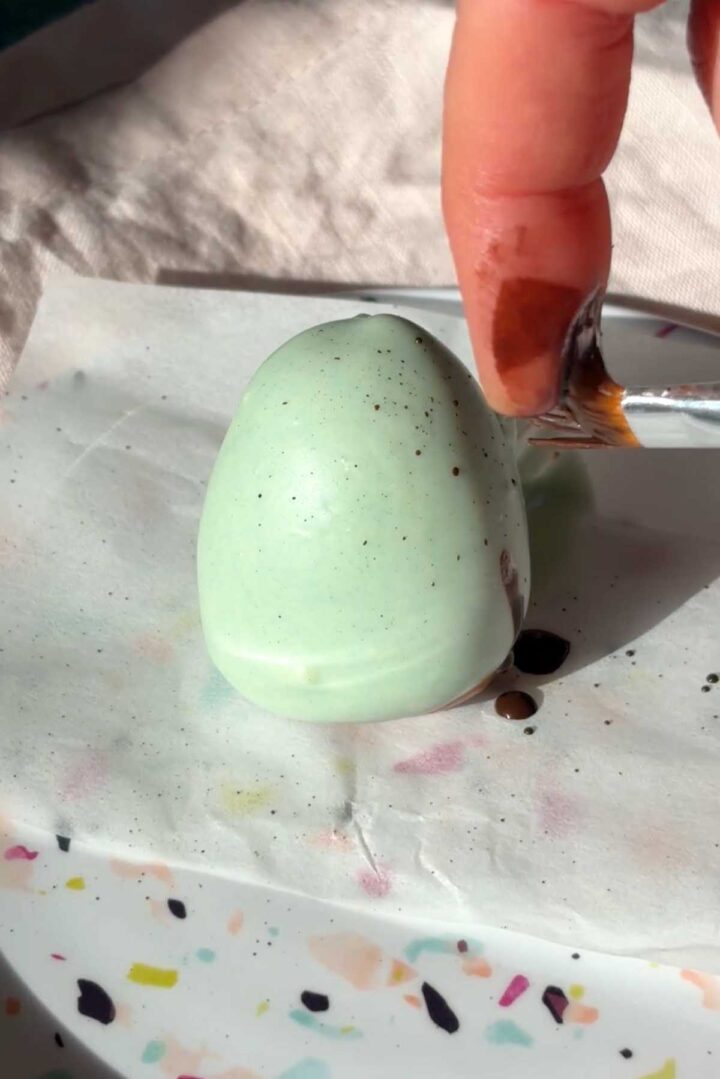
- Decorate with speckles. Combine cocoa powder and hot water in a small bowl. Whisk until combined. Dip the tip of a dry pastry brush or new (clean) paint brush into the cocoa mixture and shake off any excess. Hold the brush about 3 inches away from the eggs, then use your pointer finger to pull the bristles back and slowly release to "flick" the cocoa over them. Repeat as many times as you'd like to create the pattern. Note: this can be slightly messy, so do it over a large work surface and wear an apron. The eggs are ready to enjoy!

Haven't made these yet....hmmmm...you mentioned powdered sugar - do you use it in your recipe? I was surprised to see it in the ingredient list even though it wasn't mentioned anywhere else. Is it more for someone who wants them a bit more sweet? Or is it help to add to obtain a bit dryer texture? Looking forward to making them - first time on your site and happy to have found you!
Hi Elle! It's optional if you want it a bit sweeter. It works great without it and I often omit it.
Can I use avocado oil in place of the coconut oil? Thank you.
Hi Roz, coconut oil has a higher melting profile so the chocolate will set firmer. If you use avocado oil, the chocolate will be a bit softer.
That sounds like an absolute treat! Homemade peanut butter Easter eggs are such a great idea, especially with the benefit of fewer ingredients and less sugar. Plus, the rich peanut butter flavor must be so satisfying! It’s always fun to put a personal twist on classic candy, and making them in one bowl is a huge bonus for convenience. I bet these are perfect for Easter baskets or just an indulgent snack anytime. What kind of chocolate do you use to coat them—dark, milk, or something else?